View and Manage Conversation Participants in Moments™
During live calls and meetings, you can view and manage information about conversation participants directly in the Moments™ App. This helps you access contact details, link Salesforce records, and view related information without leaving your conversation.
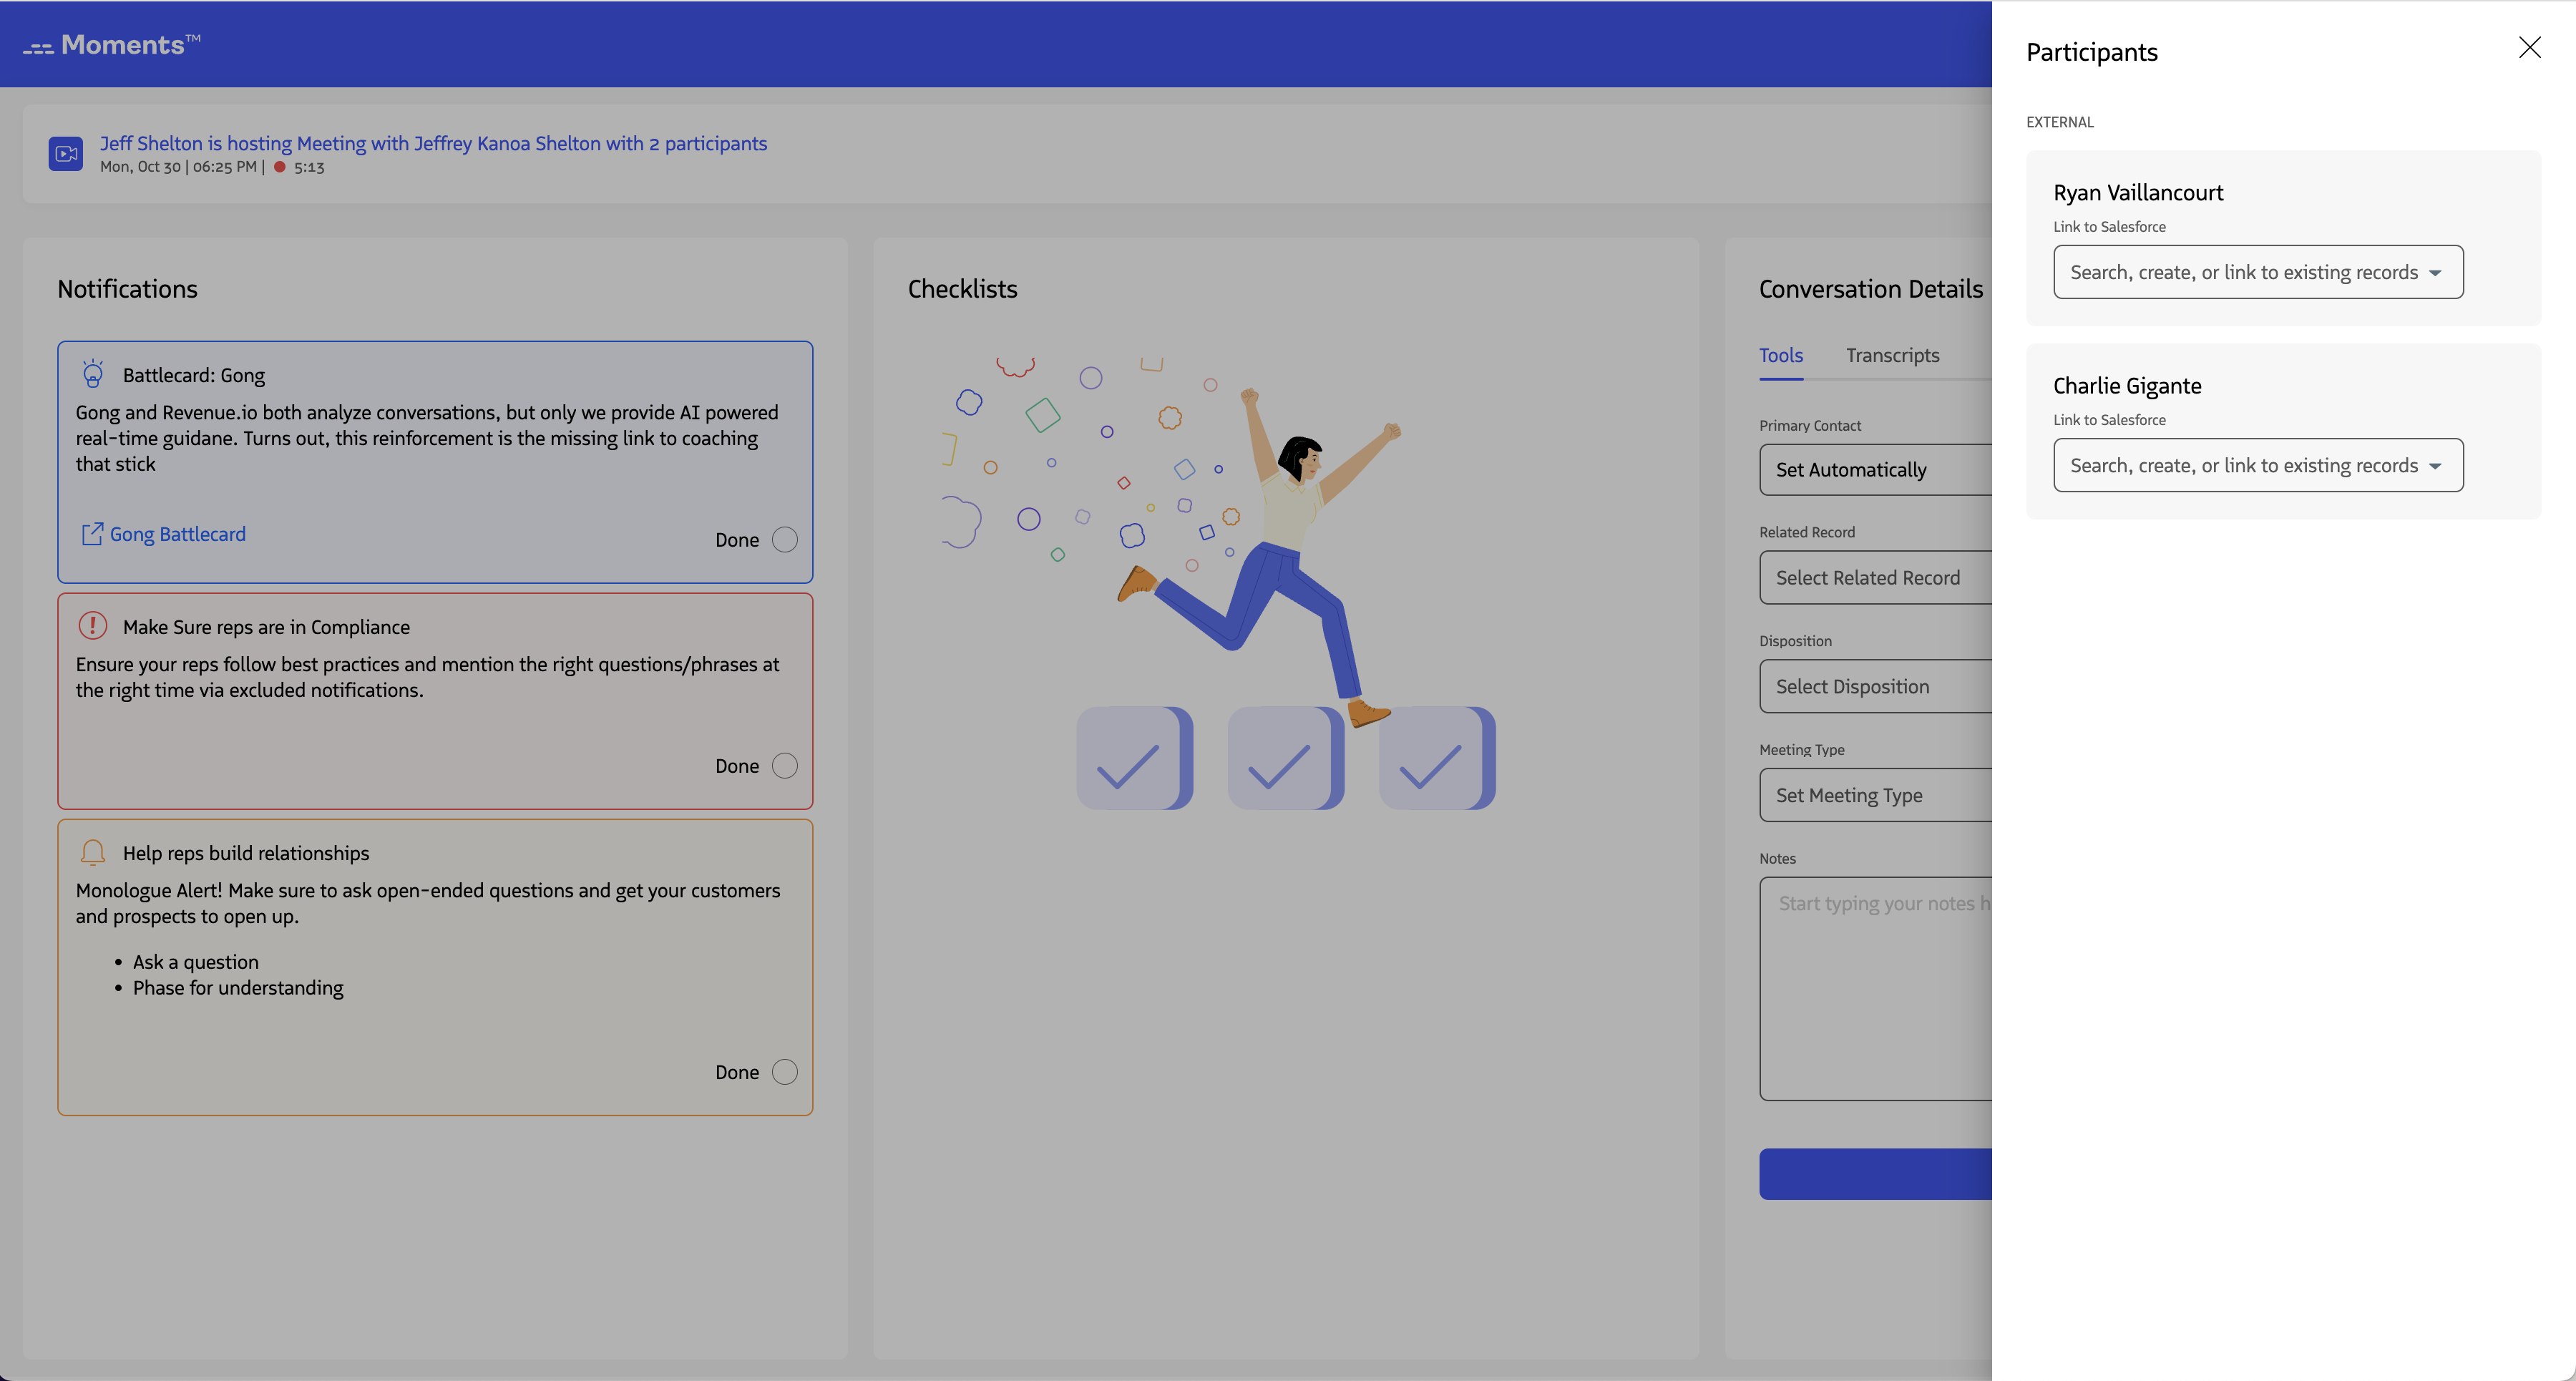
View Participants Associated with a Conversation
The header of the Moments™ App displays an info bar with details about your conversation. On the left, you’ll see the meeting title, date, timestamp, and elapsed time. On the right, you’ll see participant avatars with initials and a View Participants link.

Click View Participants to open a panel showing information about each person in the meeting. Each participant displays a linked Salesforce lead or contact record if one is available.
Salesforce records are automatically linked when there’s a single match:
- For audio calls: based on phone number match
- For Microsoft Teams meetings: based on name match
If there’s no single match or no record is found, you can manually link a Salesforce record to the participant.
Link Participants to a Salesforce Lead or Contact
You can link a Salesforce lead or contact to a participant in three ways: search, use suggested results, or create a new record.
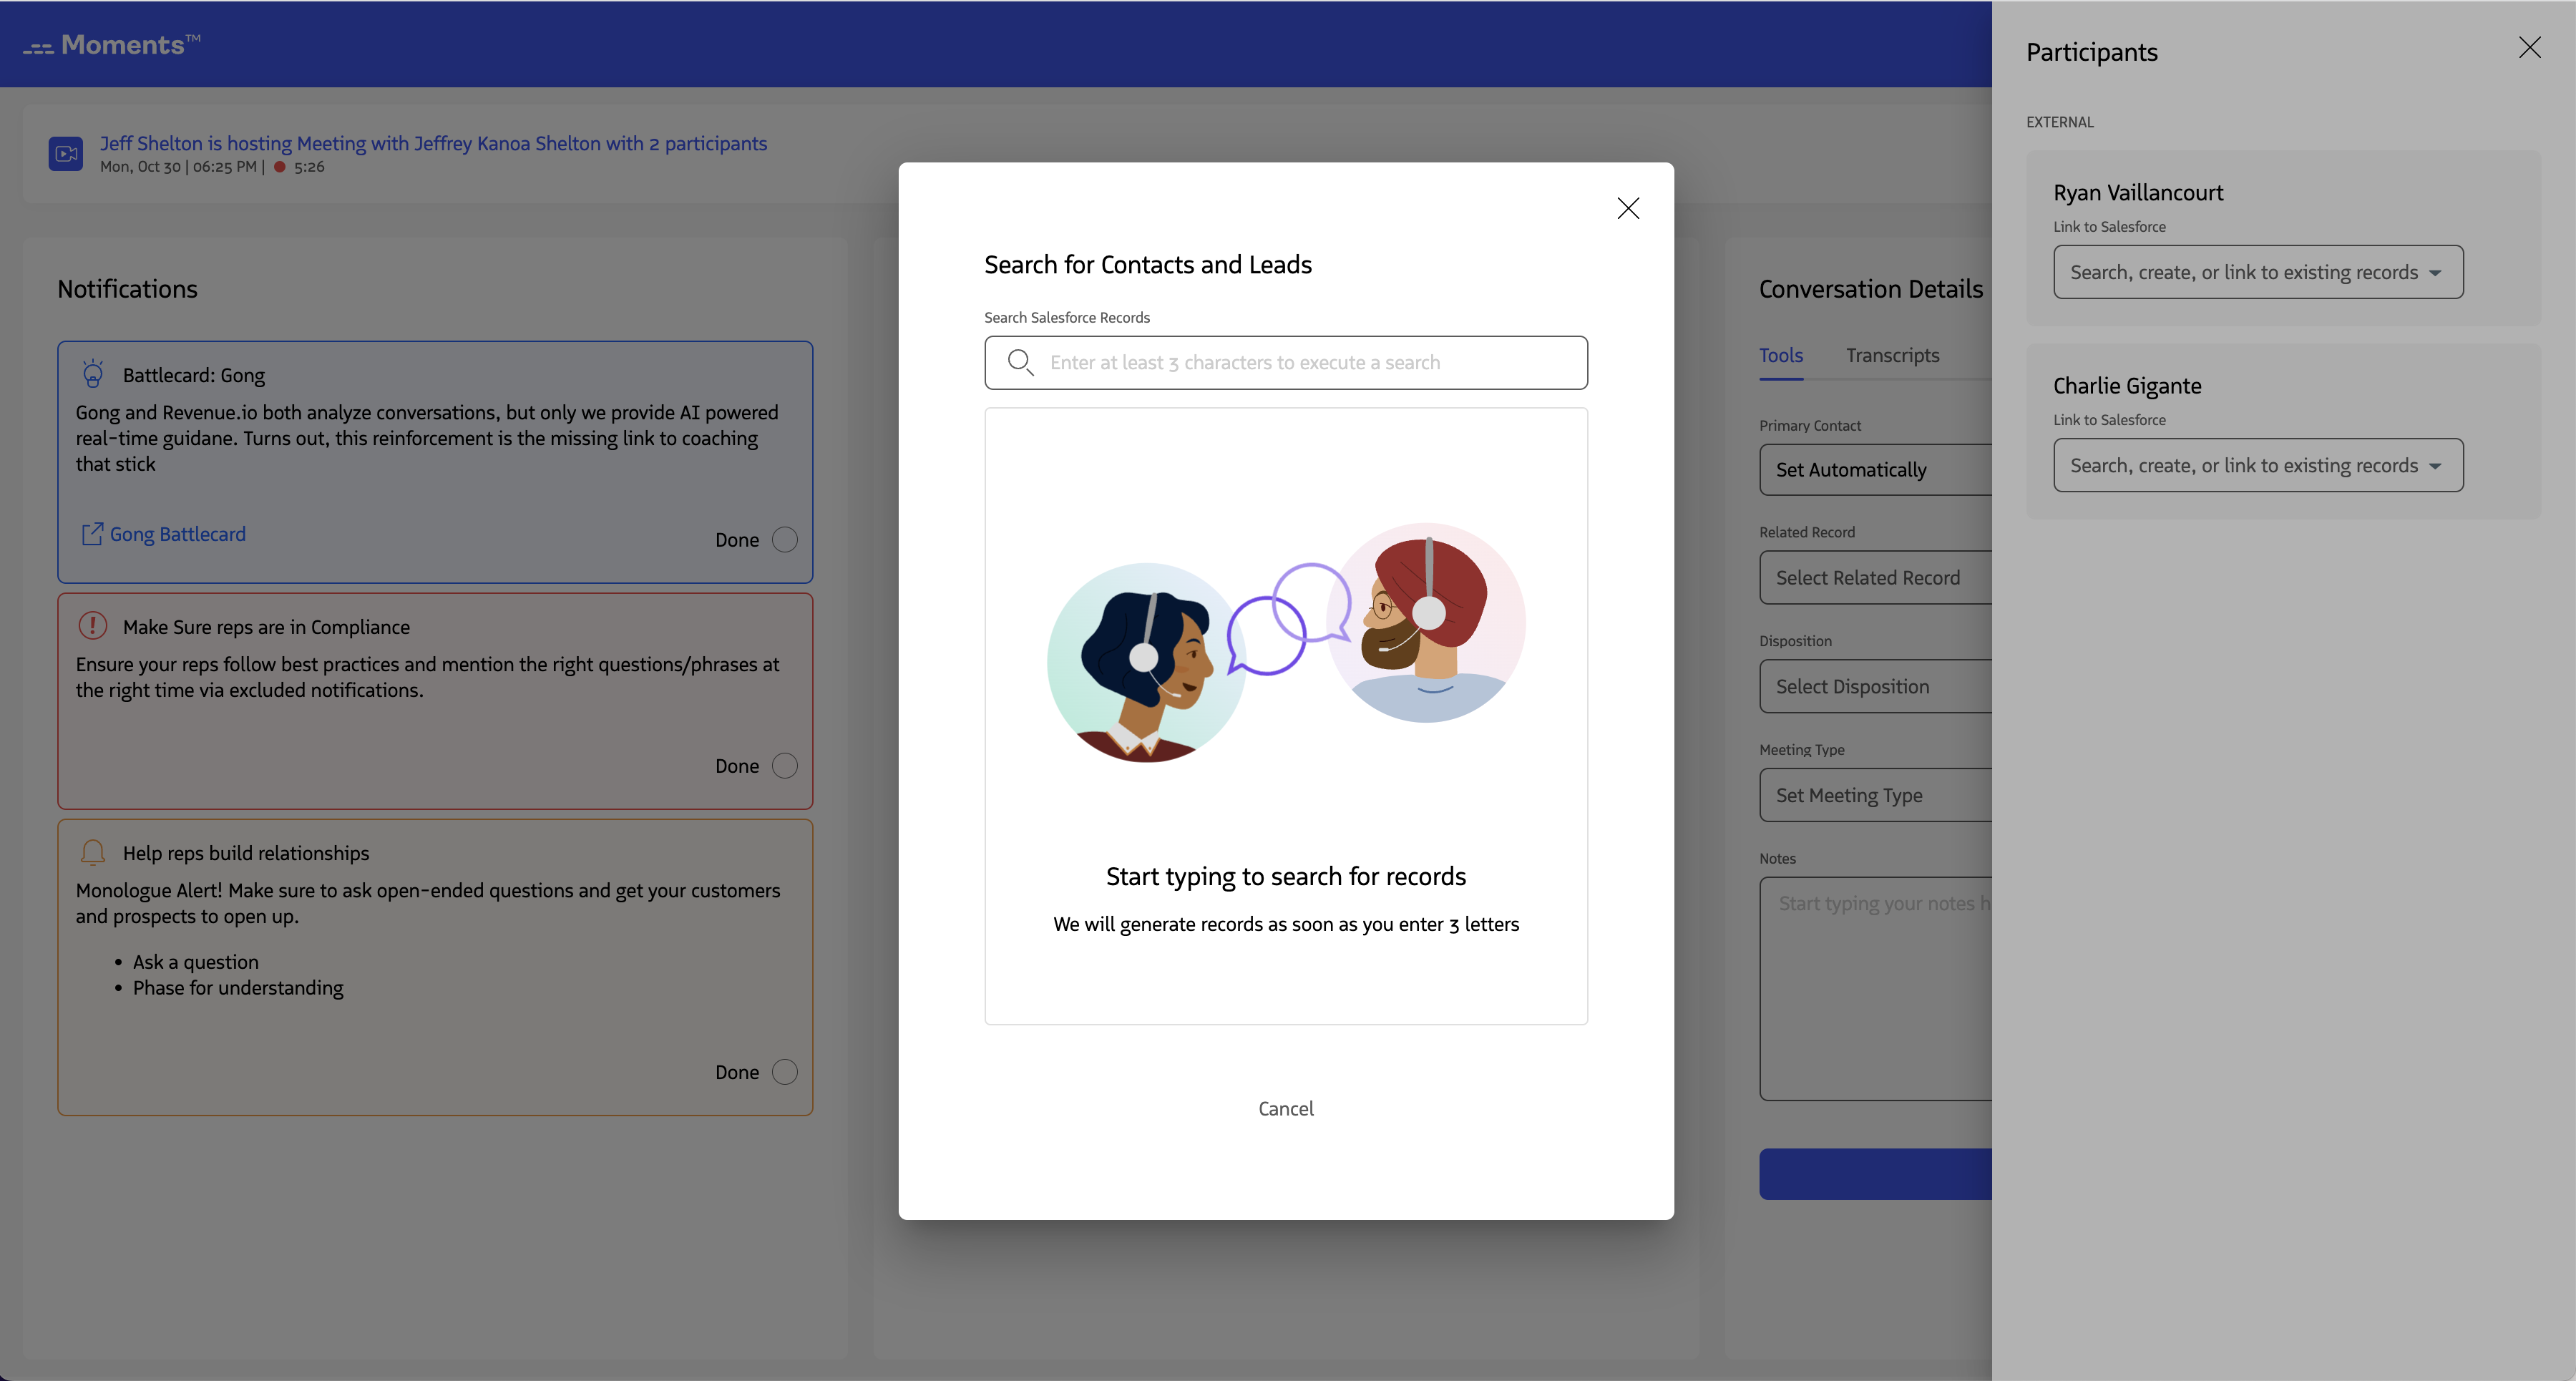
Search for Contacts and Leads
Search Salesforce when you need to find records that don’t have phone numbers, or when there are duplicates or slight name differences.
Steps to search:
- Click Search for Contacts and Leads to open the search modal
- Enter at least 3 characters in the search bar to query leads and contacts
- Review the search results
- Select a record to link it to the participant


The Moments™ App remembers your selection, so you won’t need to search for the same person in future meetings. This applies to both audio call participants and Microsoft Teams meeting participants who are logged into the Teams client.
Link an Existing Record via Suggested Results
When Revenue detects potential matches, you’ll see a list of suggested Salesforce records based on name matching. This lets you quickly link a record without searching. Suggested results show the account or company associated with each record, plus a customizable field (configured by your Revenue admin) to help differentiate records when multiple matches exist.
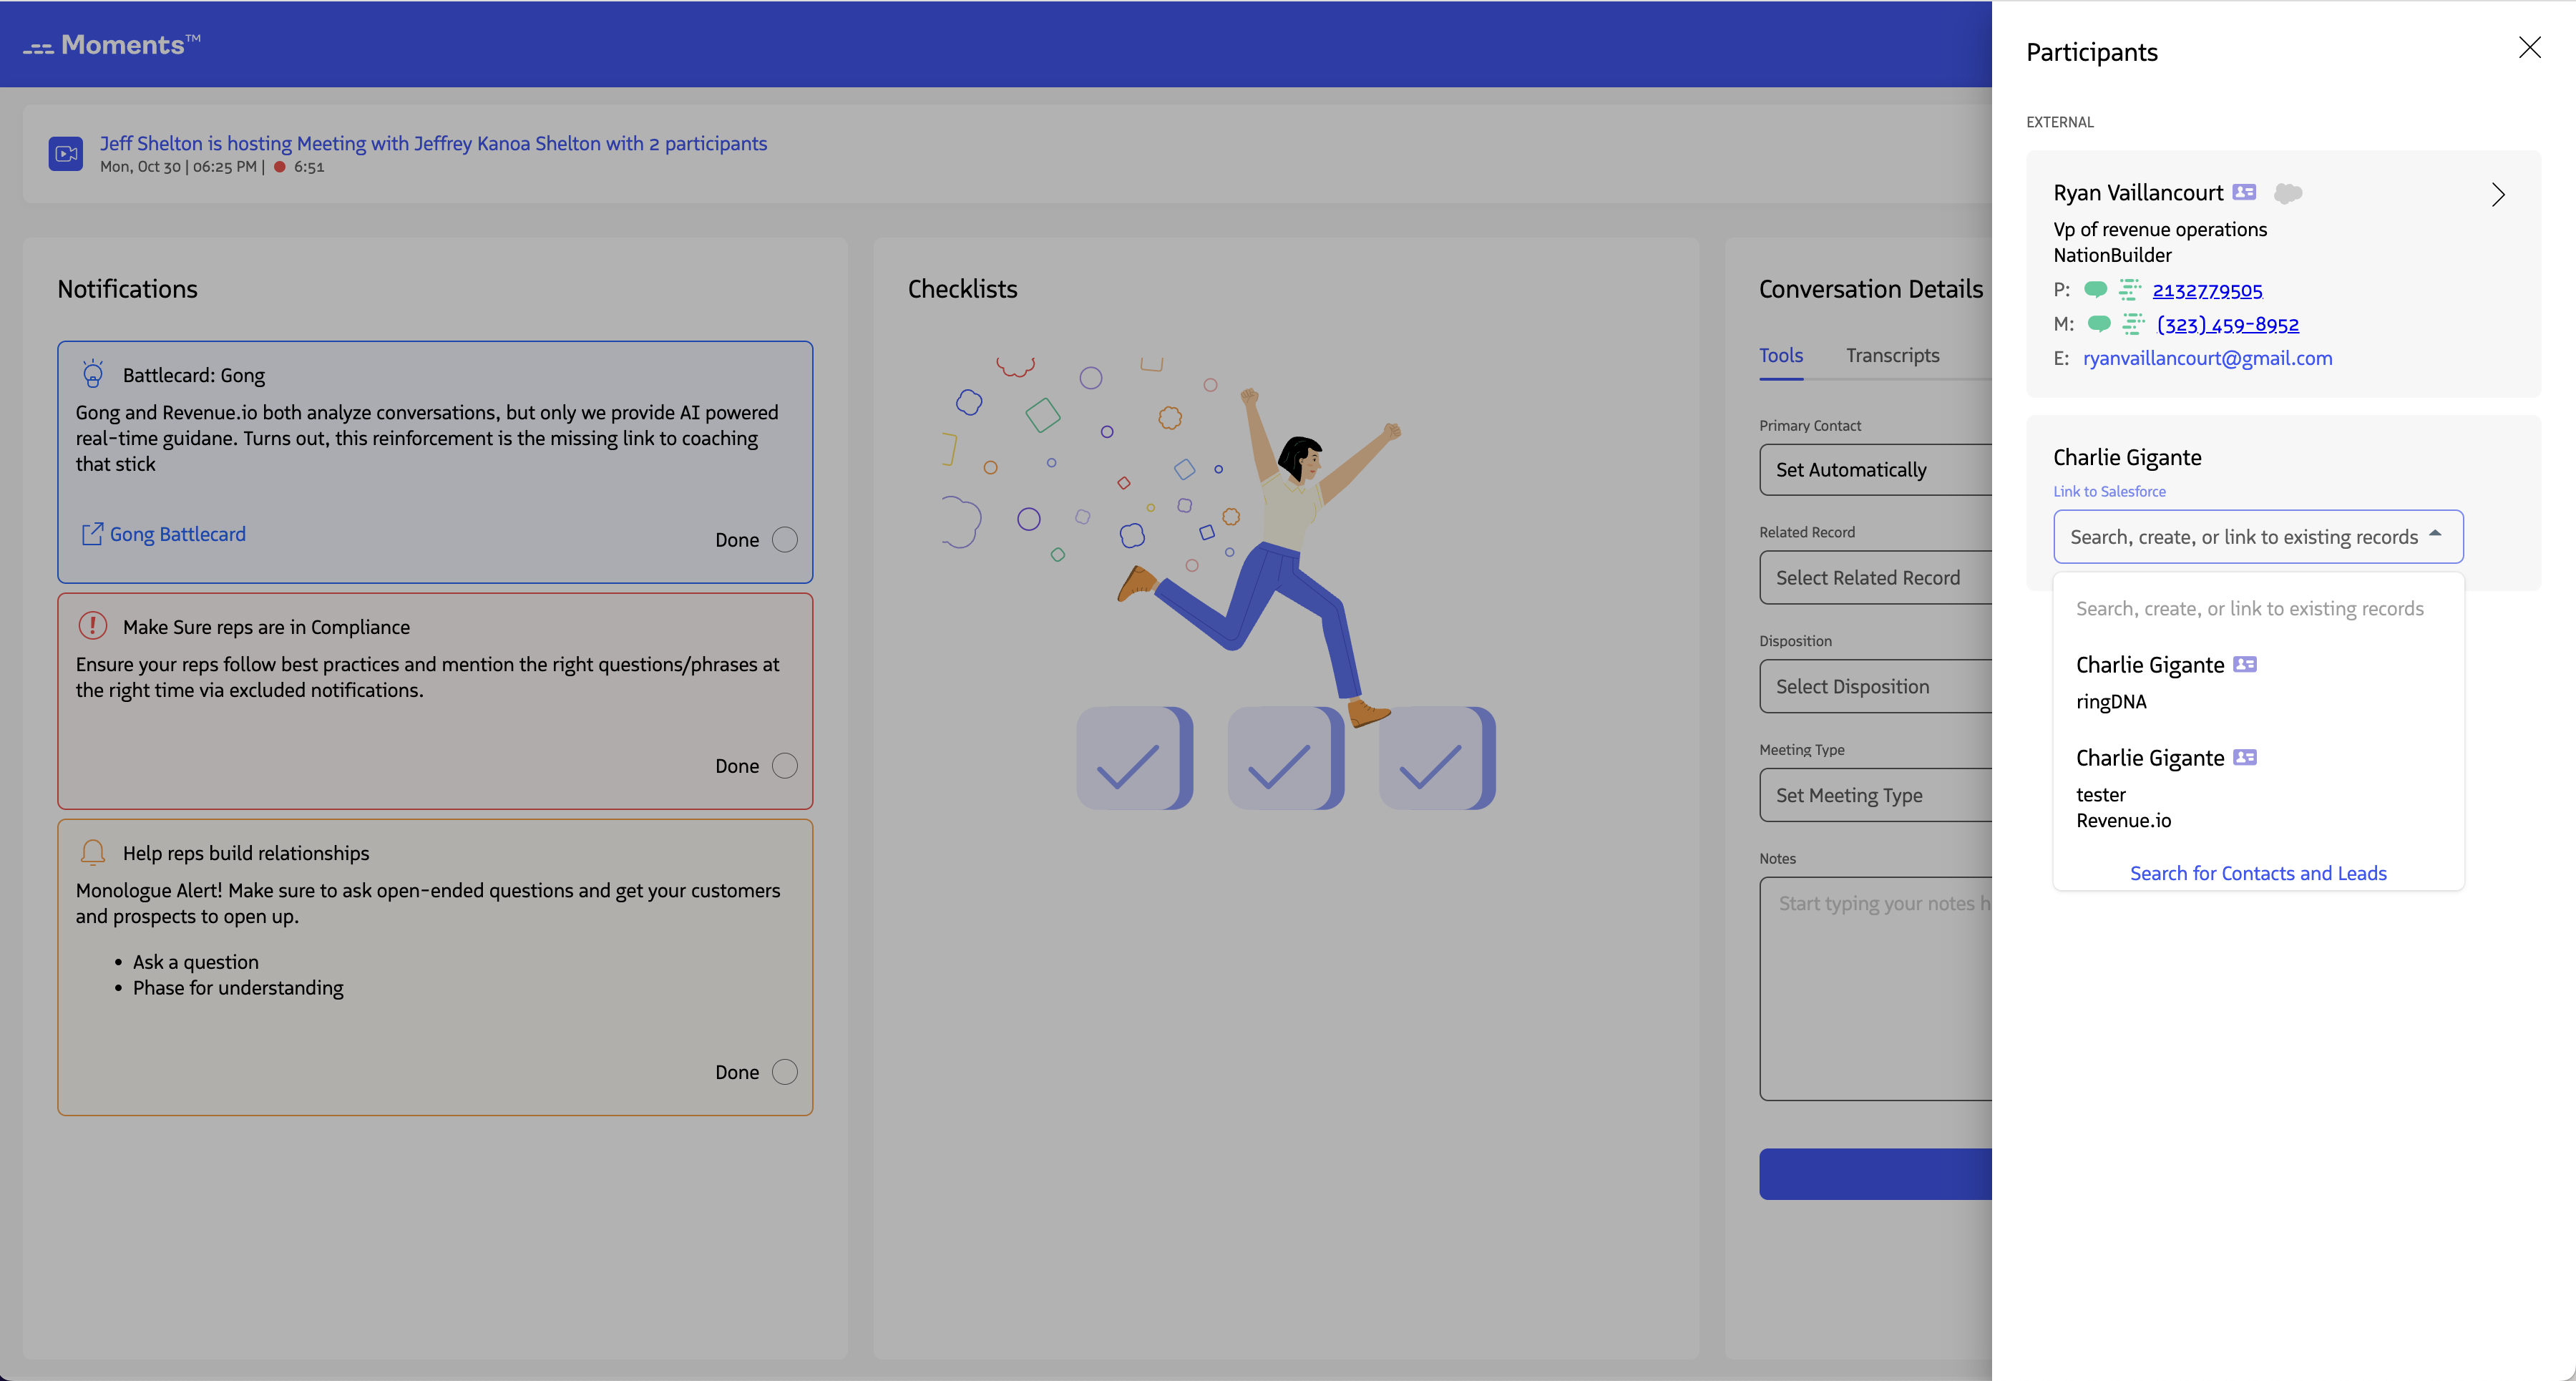
Select a suggested result to link it to the participant.
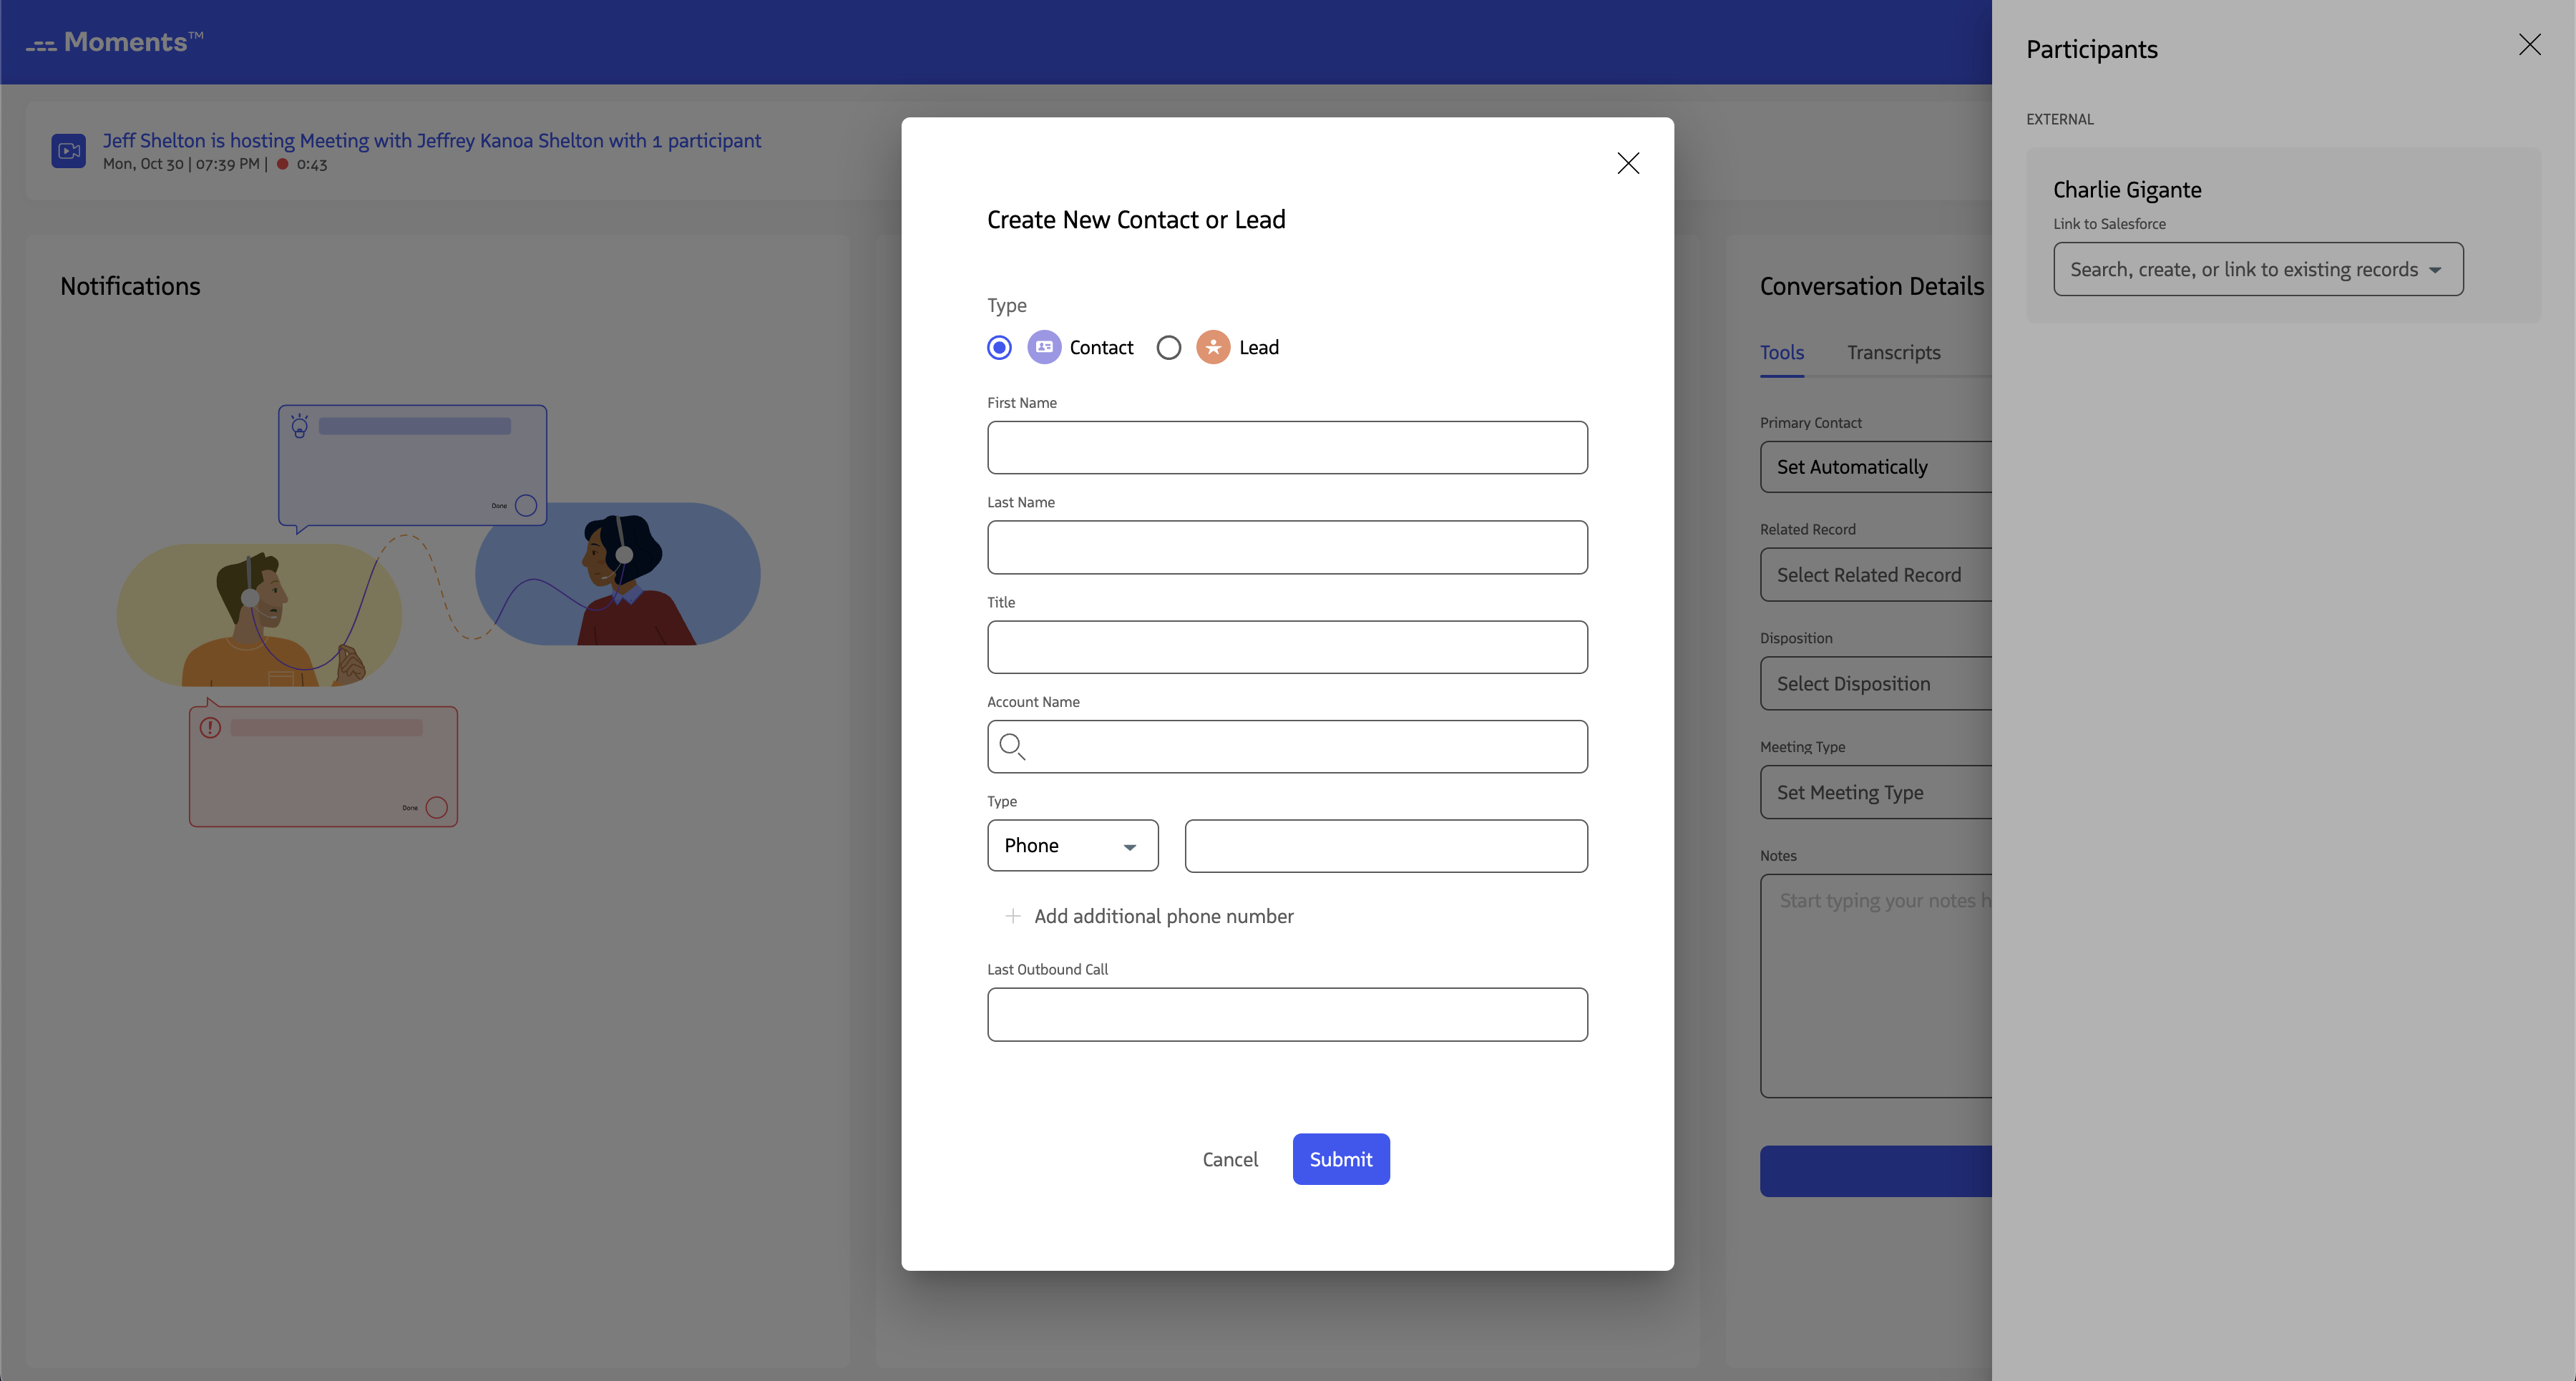
Create a New Lead or Contact
For new participants who don’t have a Salesforce record, you can create a lead or contact directly in the Moments™ App.
Steps to create a new record:
- Click Create New Contact or Lead next to the participant
- In the modal, select Contact or Lead (Contact is selected by default)
- Fill in the required fields
- Click Submit to create the record and link it to the participant
The form includes default fields for each record type, plus any custom fields configured by your Revenue admin in the Revenue admin console.

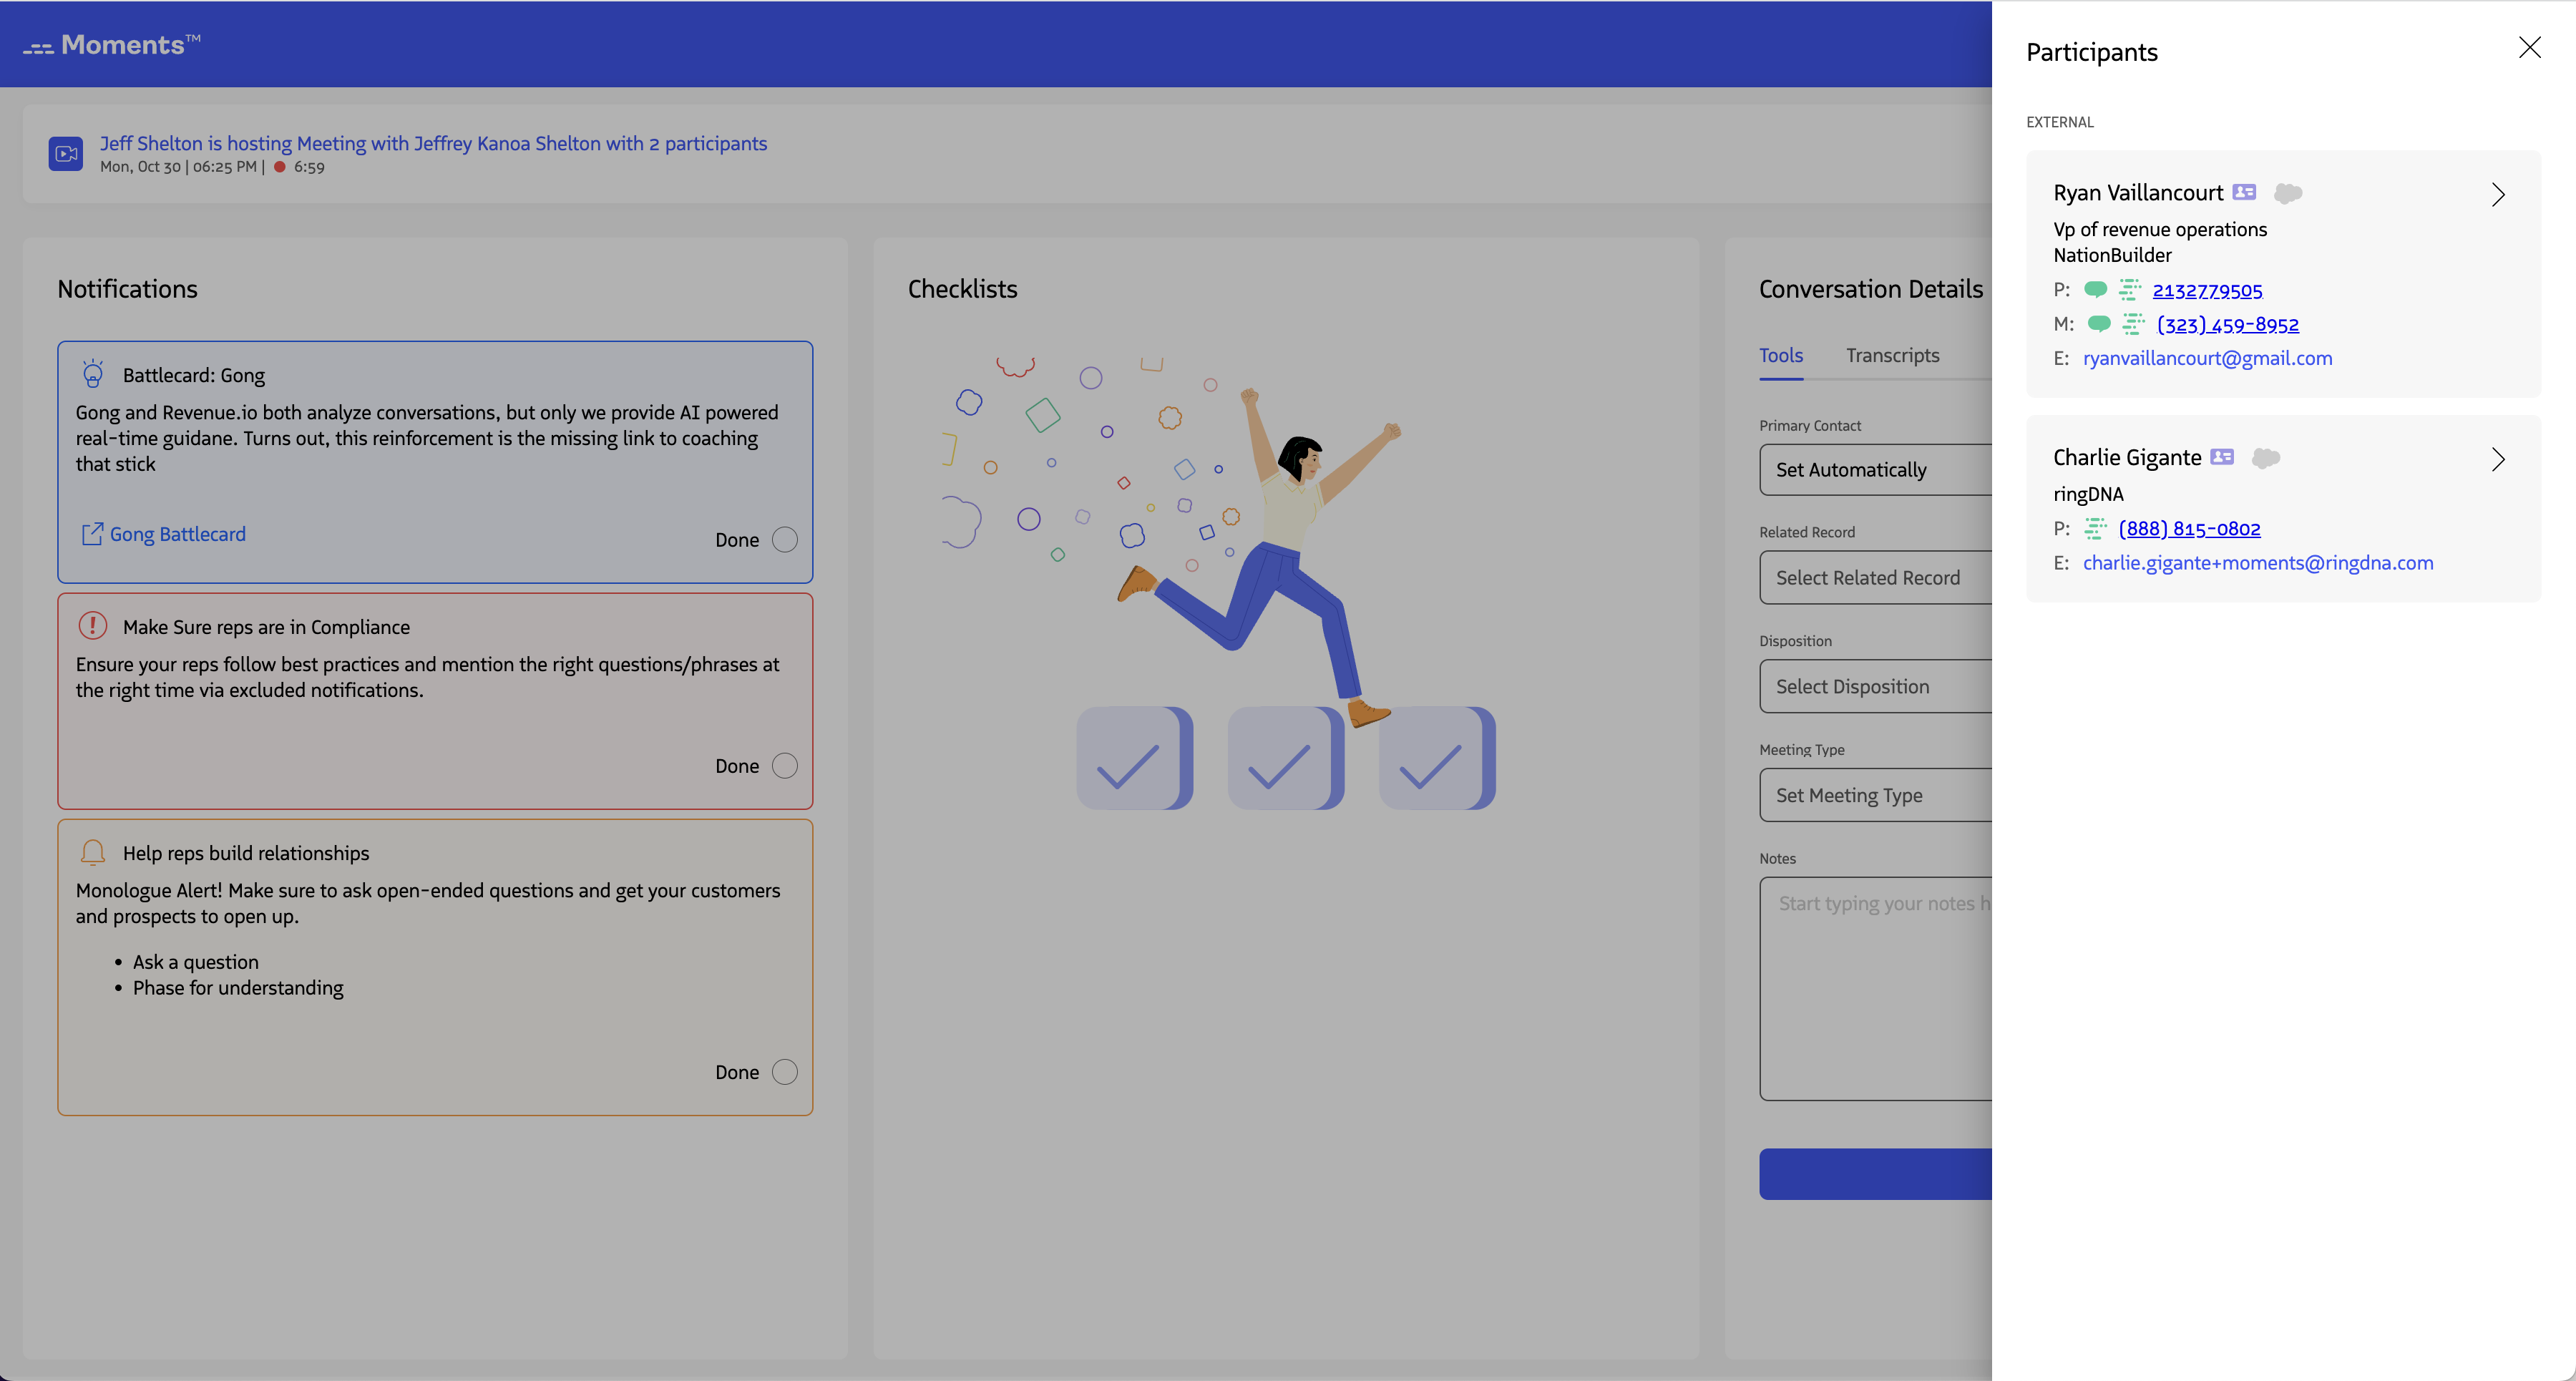
View Information Associated with a Record
Once you’ve linked Salesforce records to participants, you can view detailed information about each participant without leaving the Moments™ App.
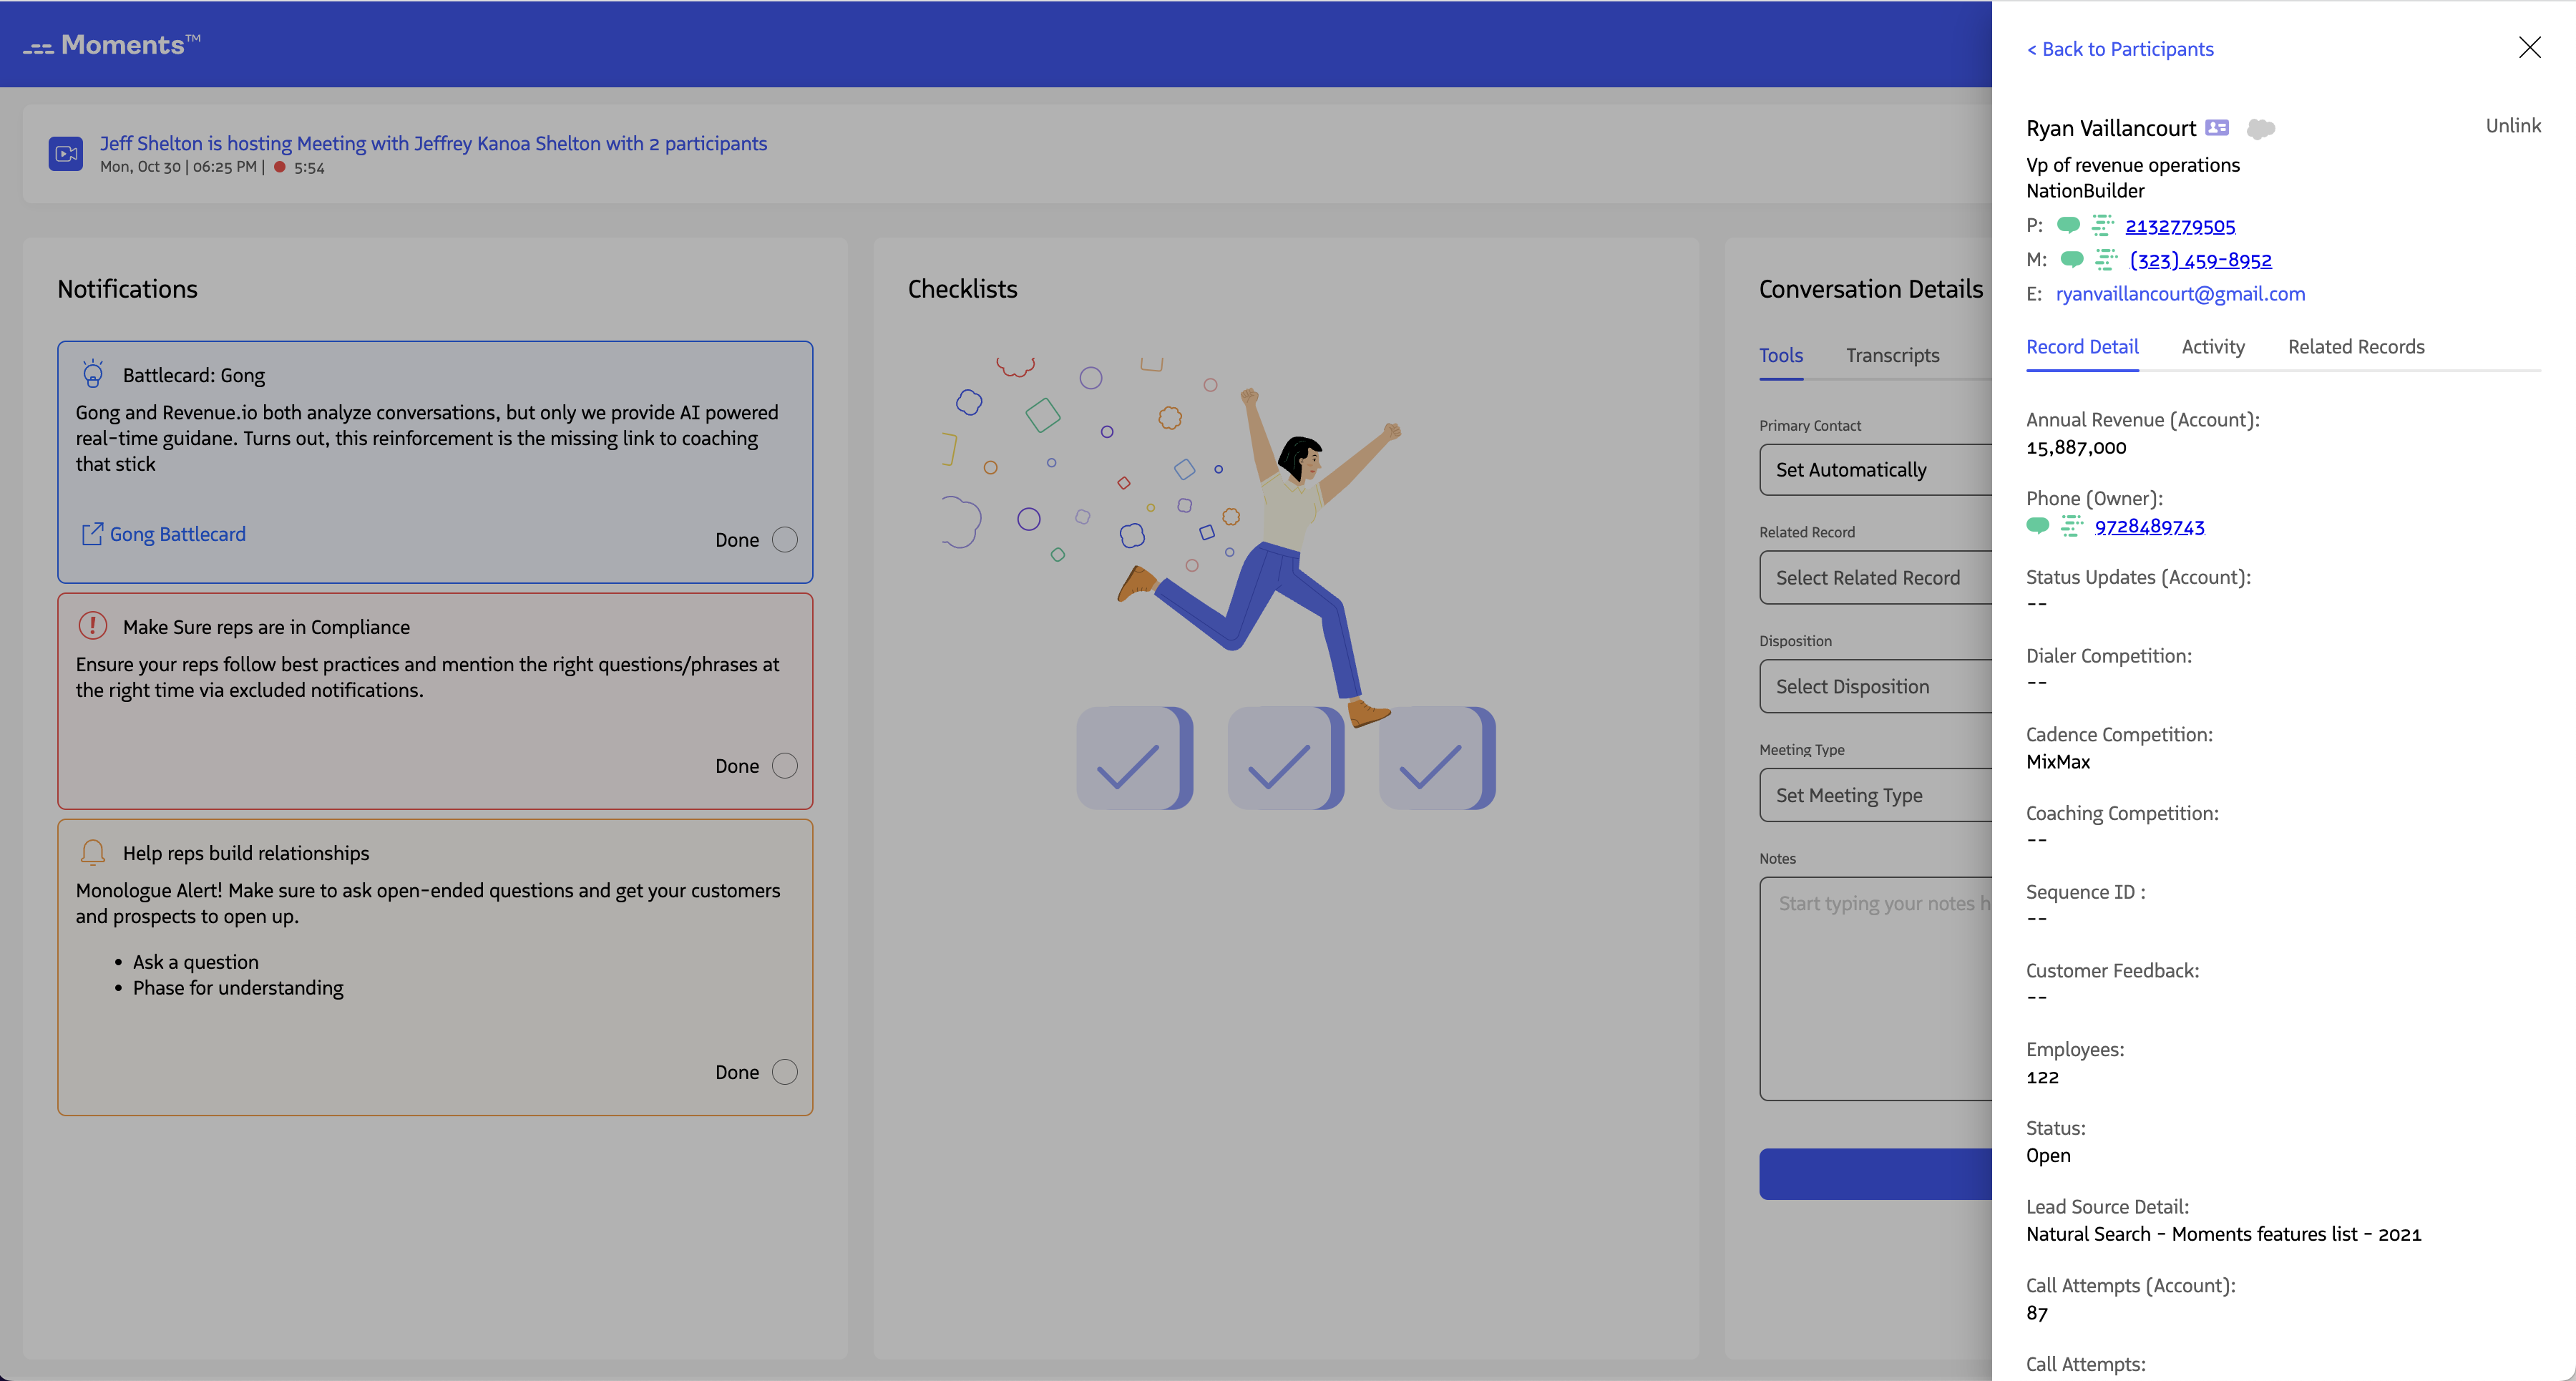
View Record Details
Select a participant with a linked Salesforce record to view their information. The default tab shows basic details:
- Name
- Company
- Phone Number(s)
The record detail section also displays all fields configured in the Revenue admin that are relevant to your Salesforce profile. This ensures you see the fields you need based on your role and team goals.

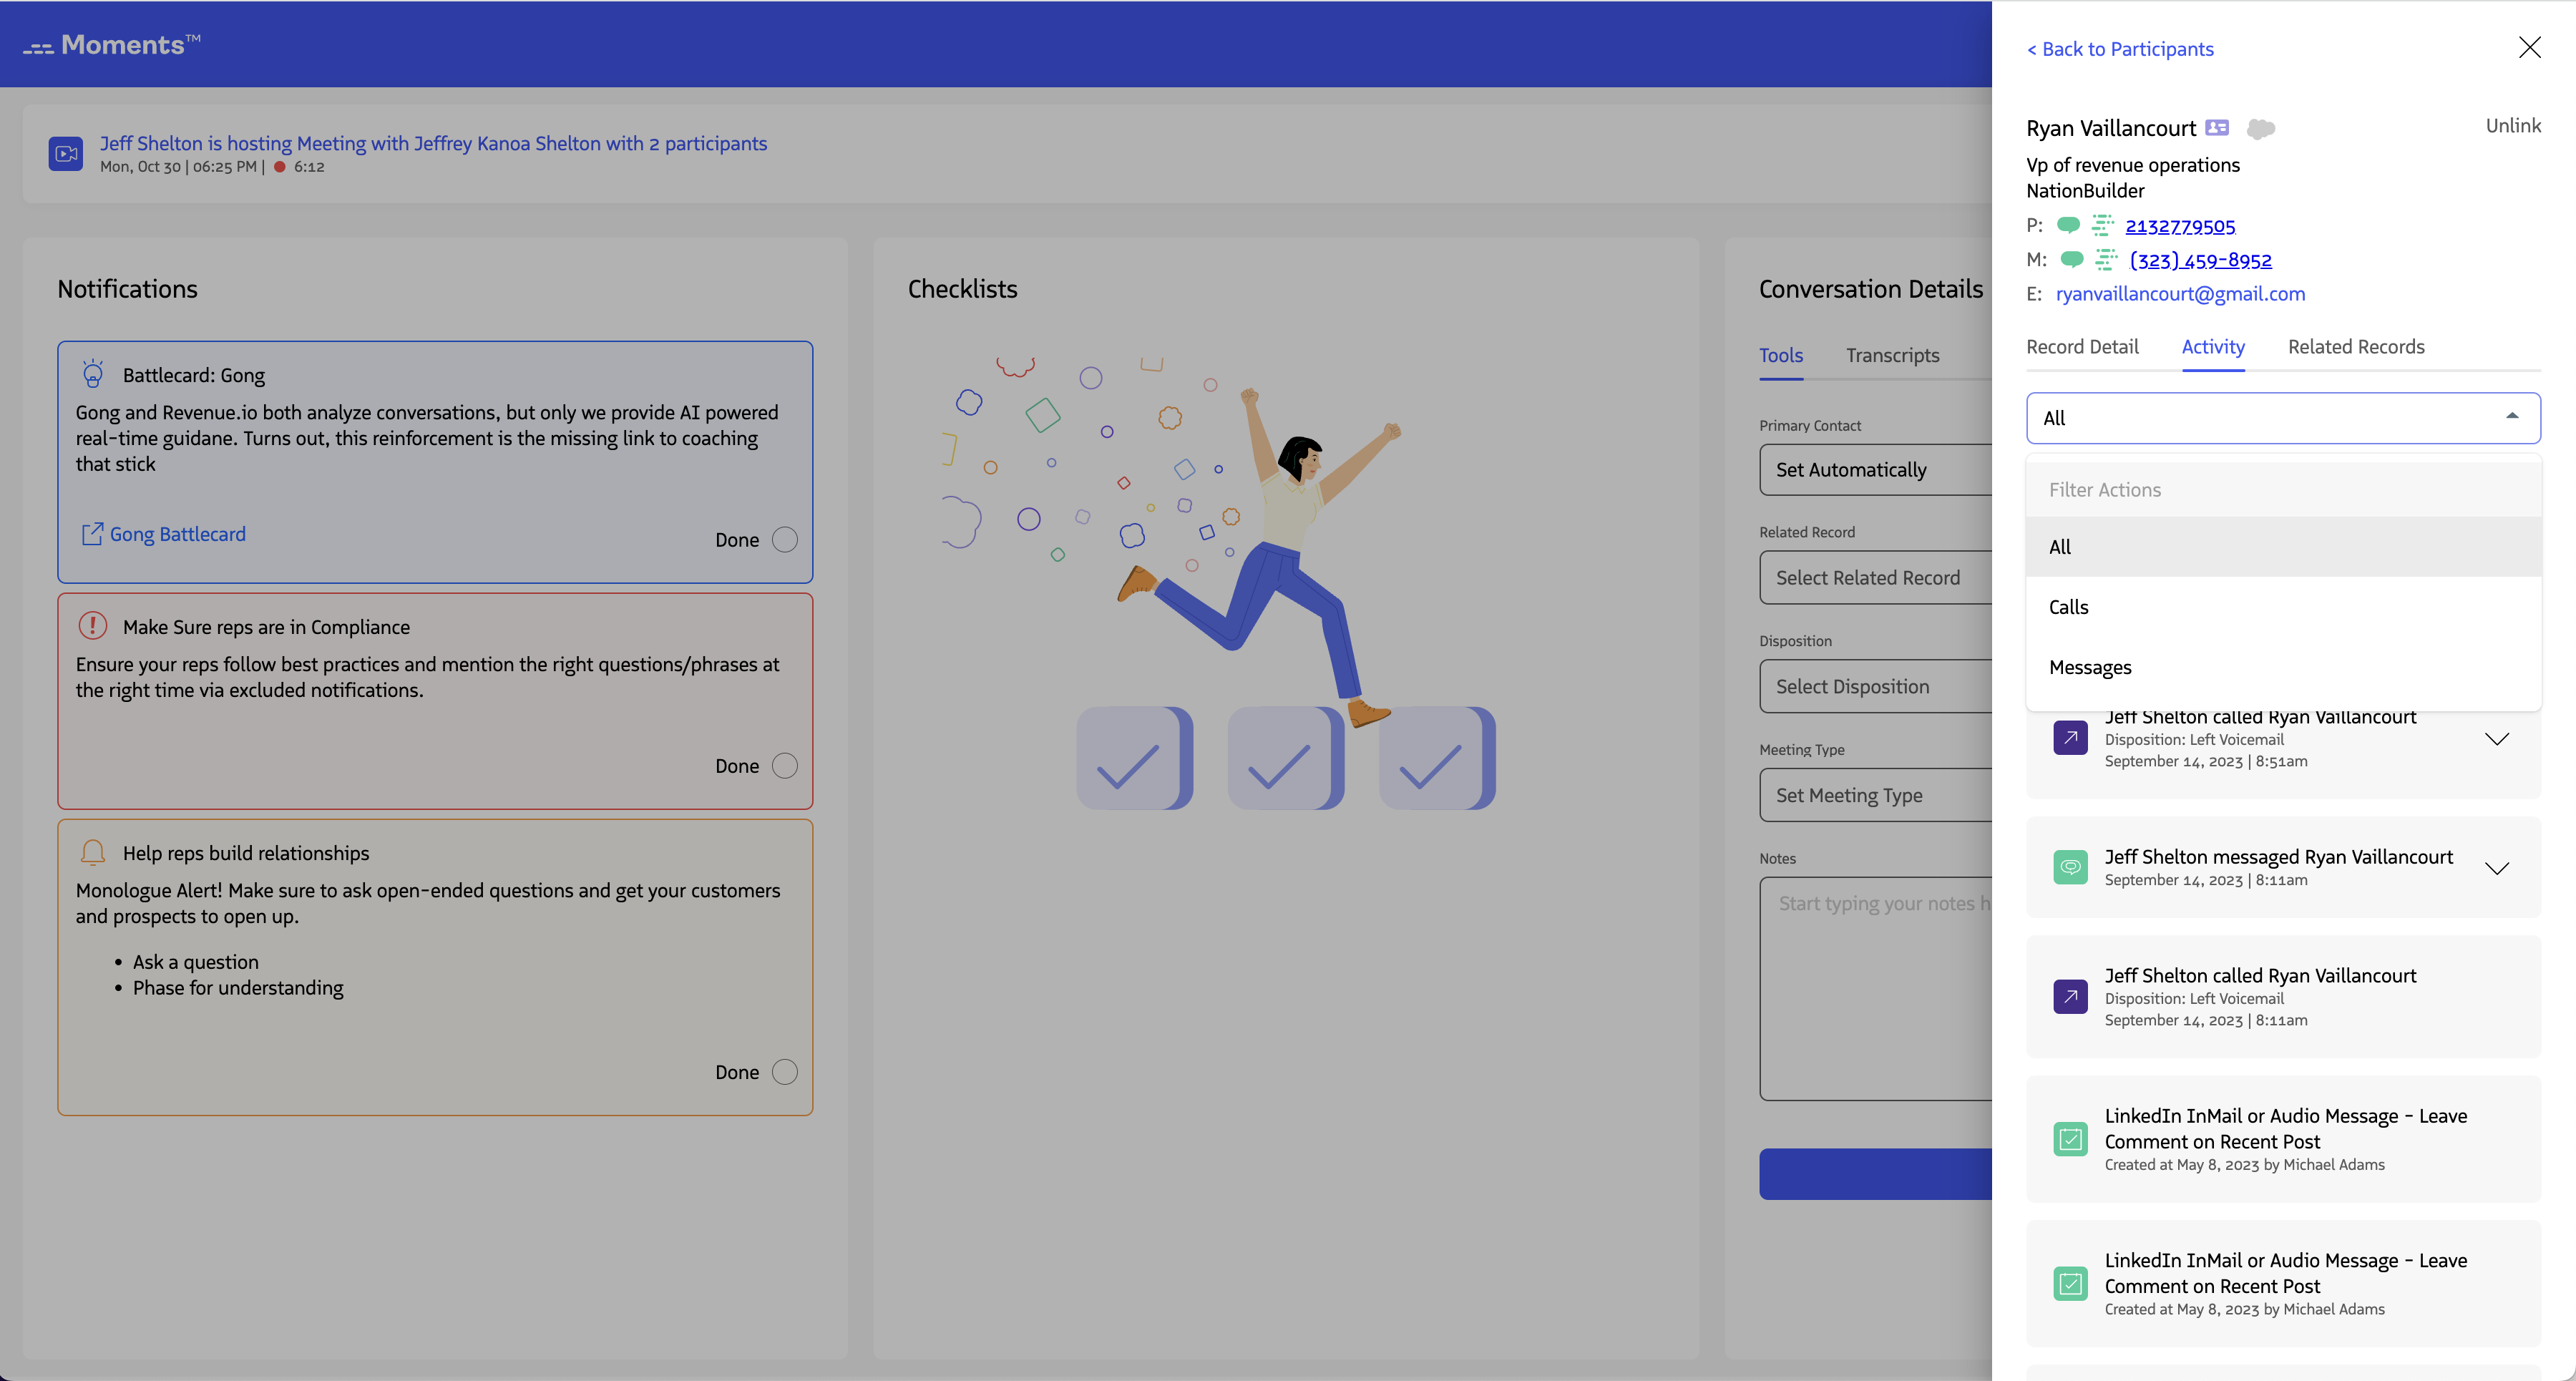
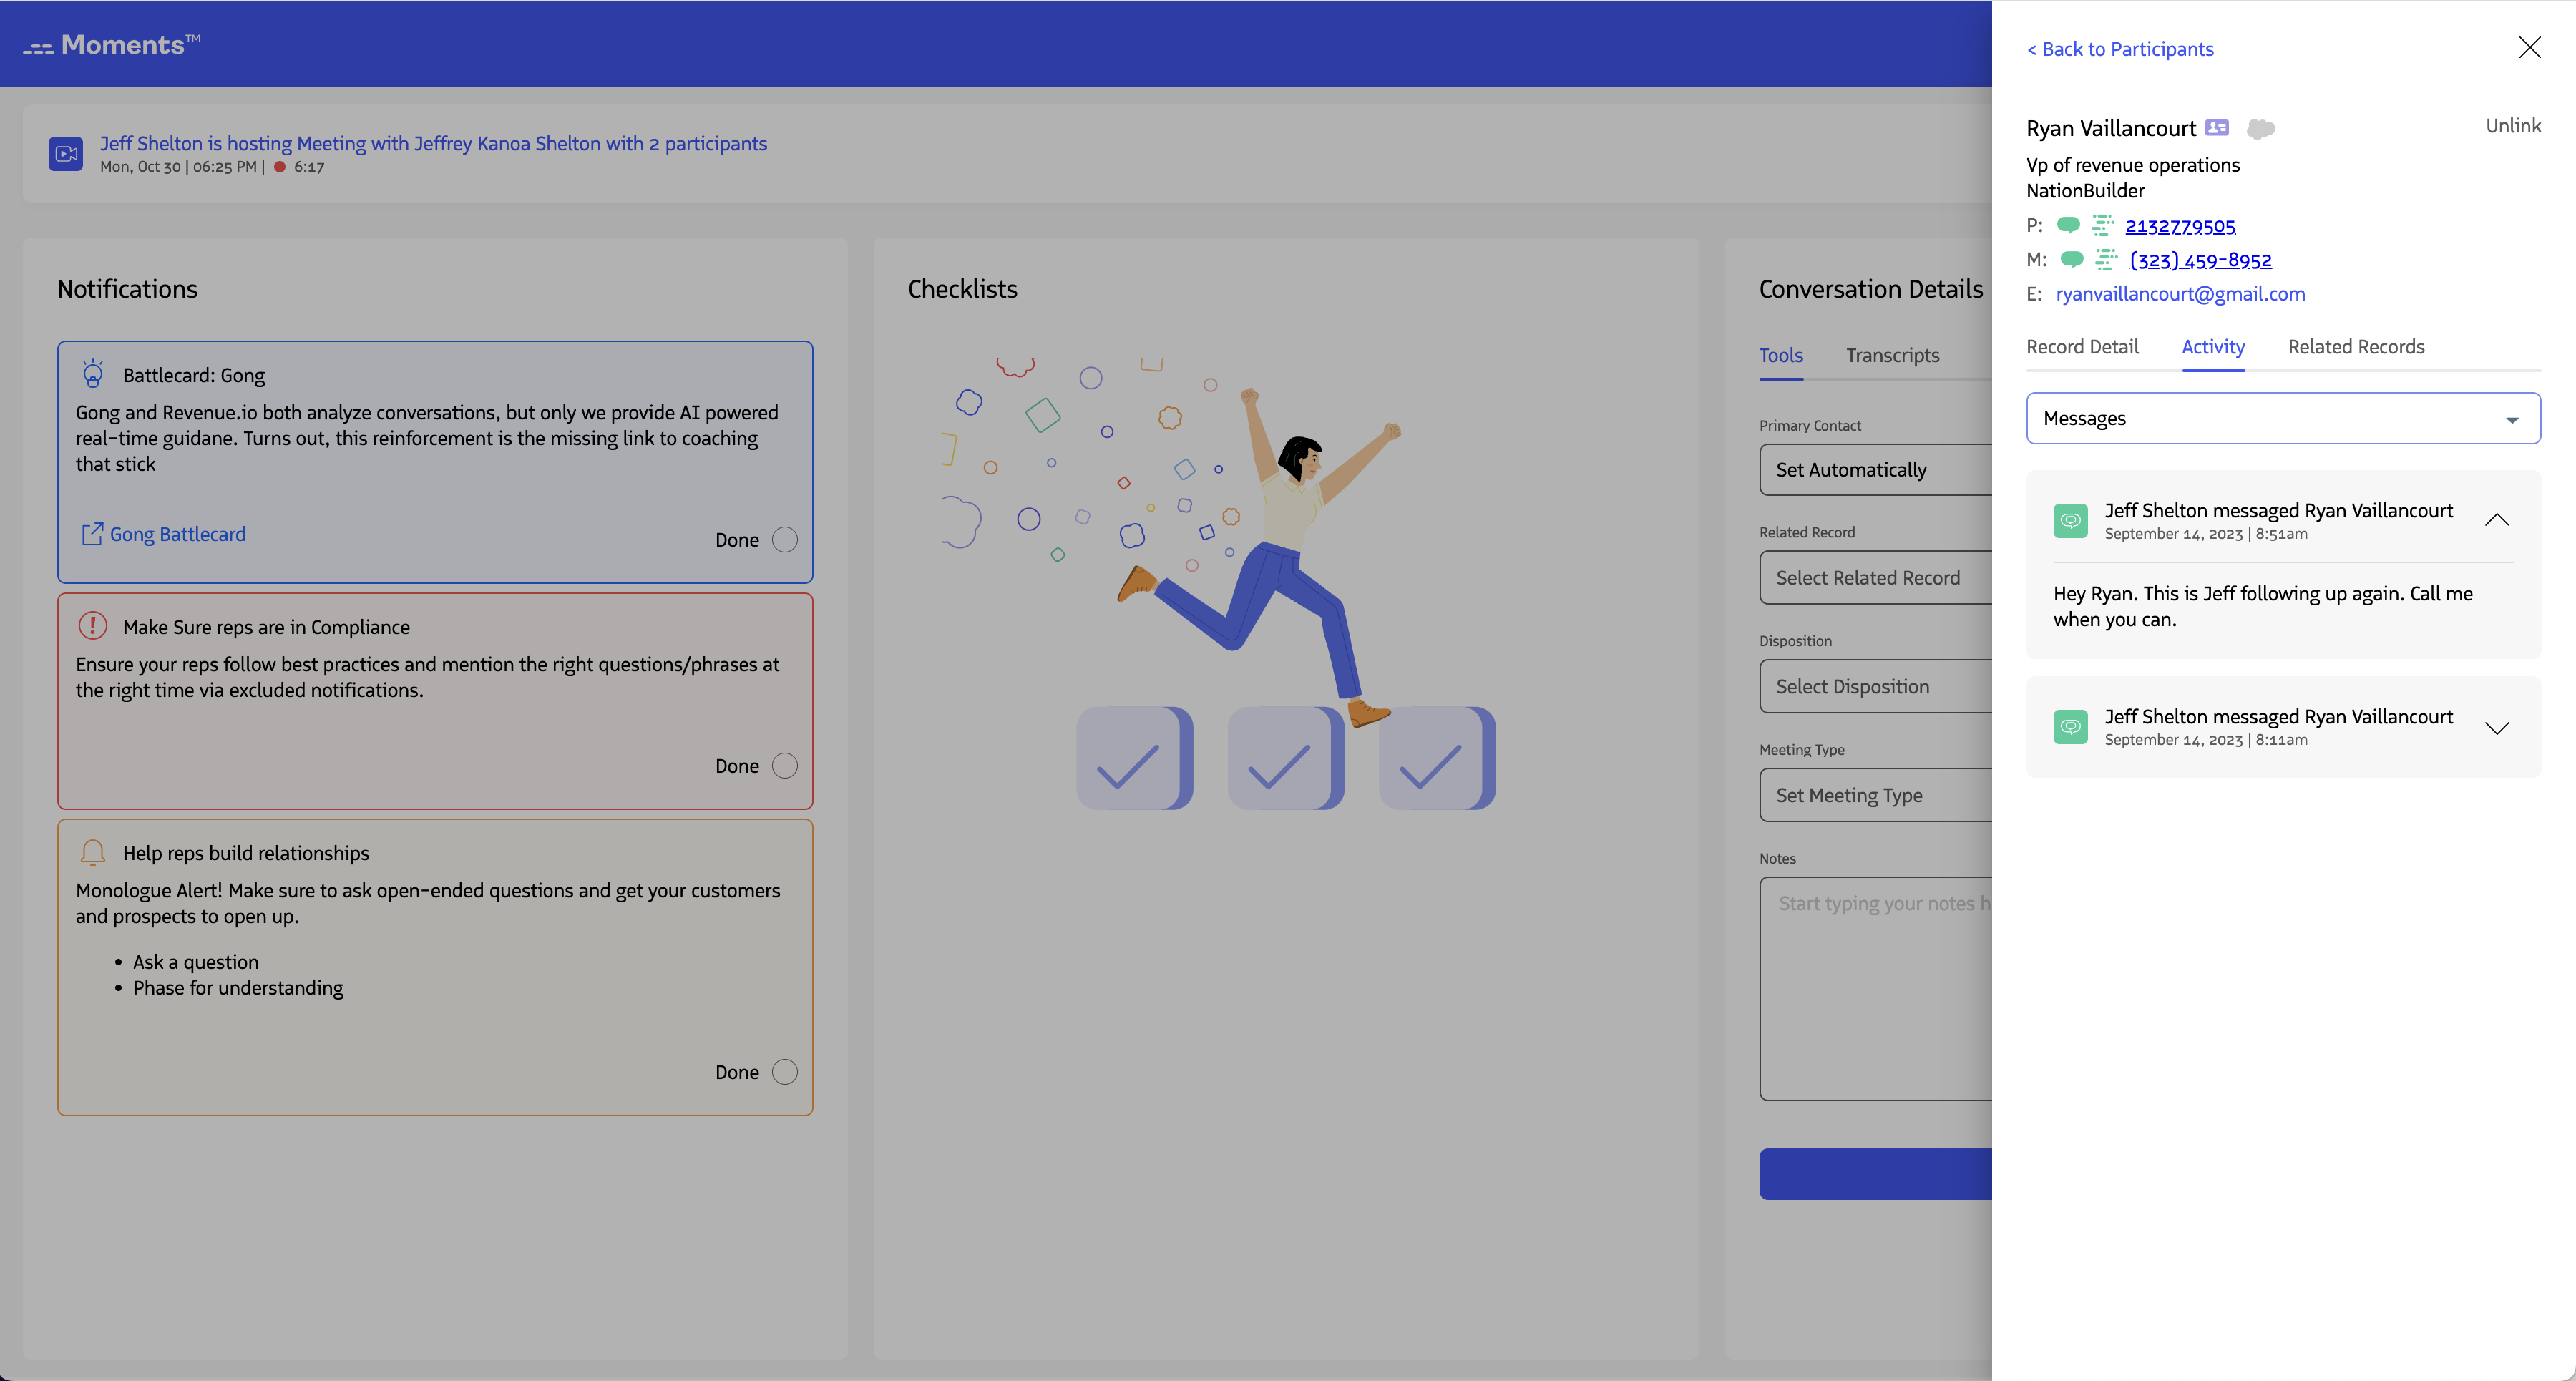
View Activity Associated with a Record
The second tab shows all activity associated with the record, including calls, emails, SMS messages, video meetings, and tasks. Activities are listed in chronological order with the most recent at the top.

Click the ⌄ icon next to any activity to view additional details:
- SMS message text
- Call notes
- Email body and text
- Task descriptions


To filter activities by type, select an activity type from the dropdown above the activity list. Select All to show all activities again.
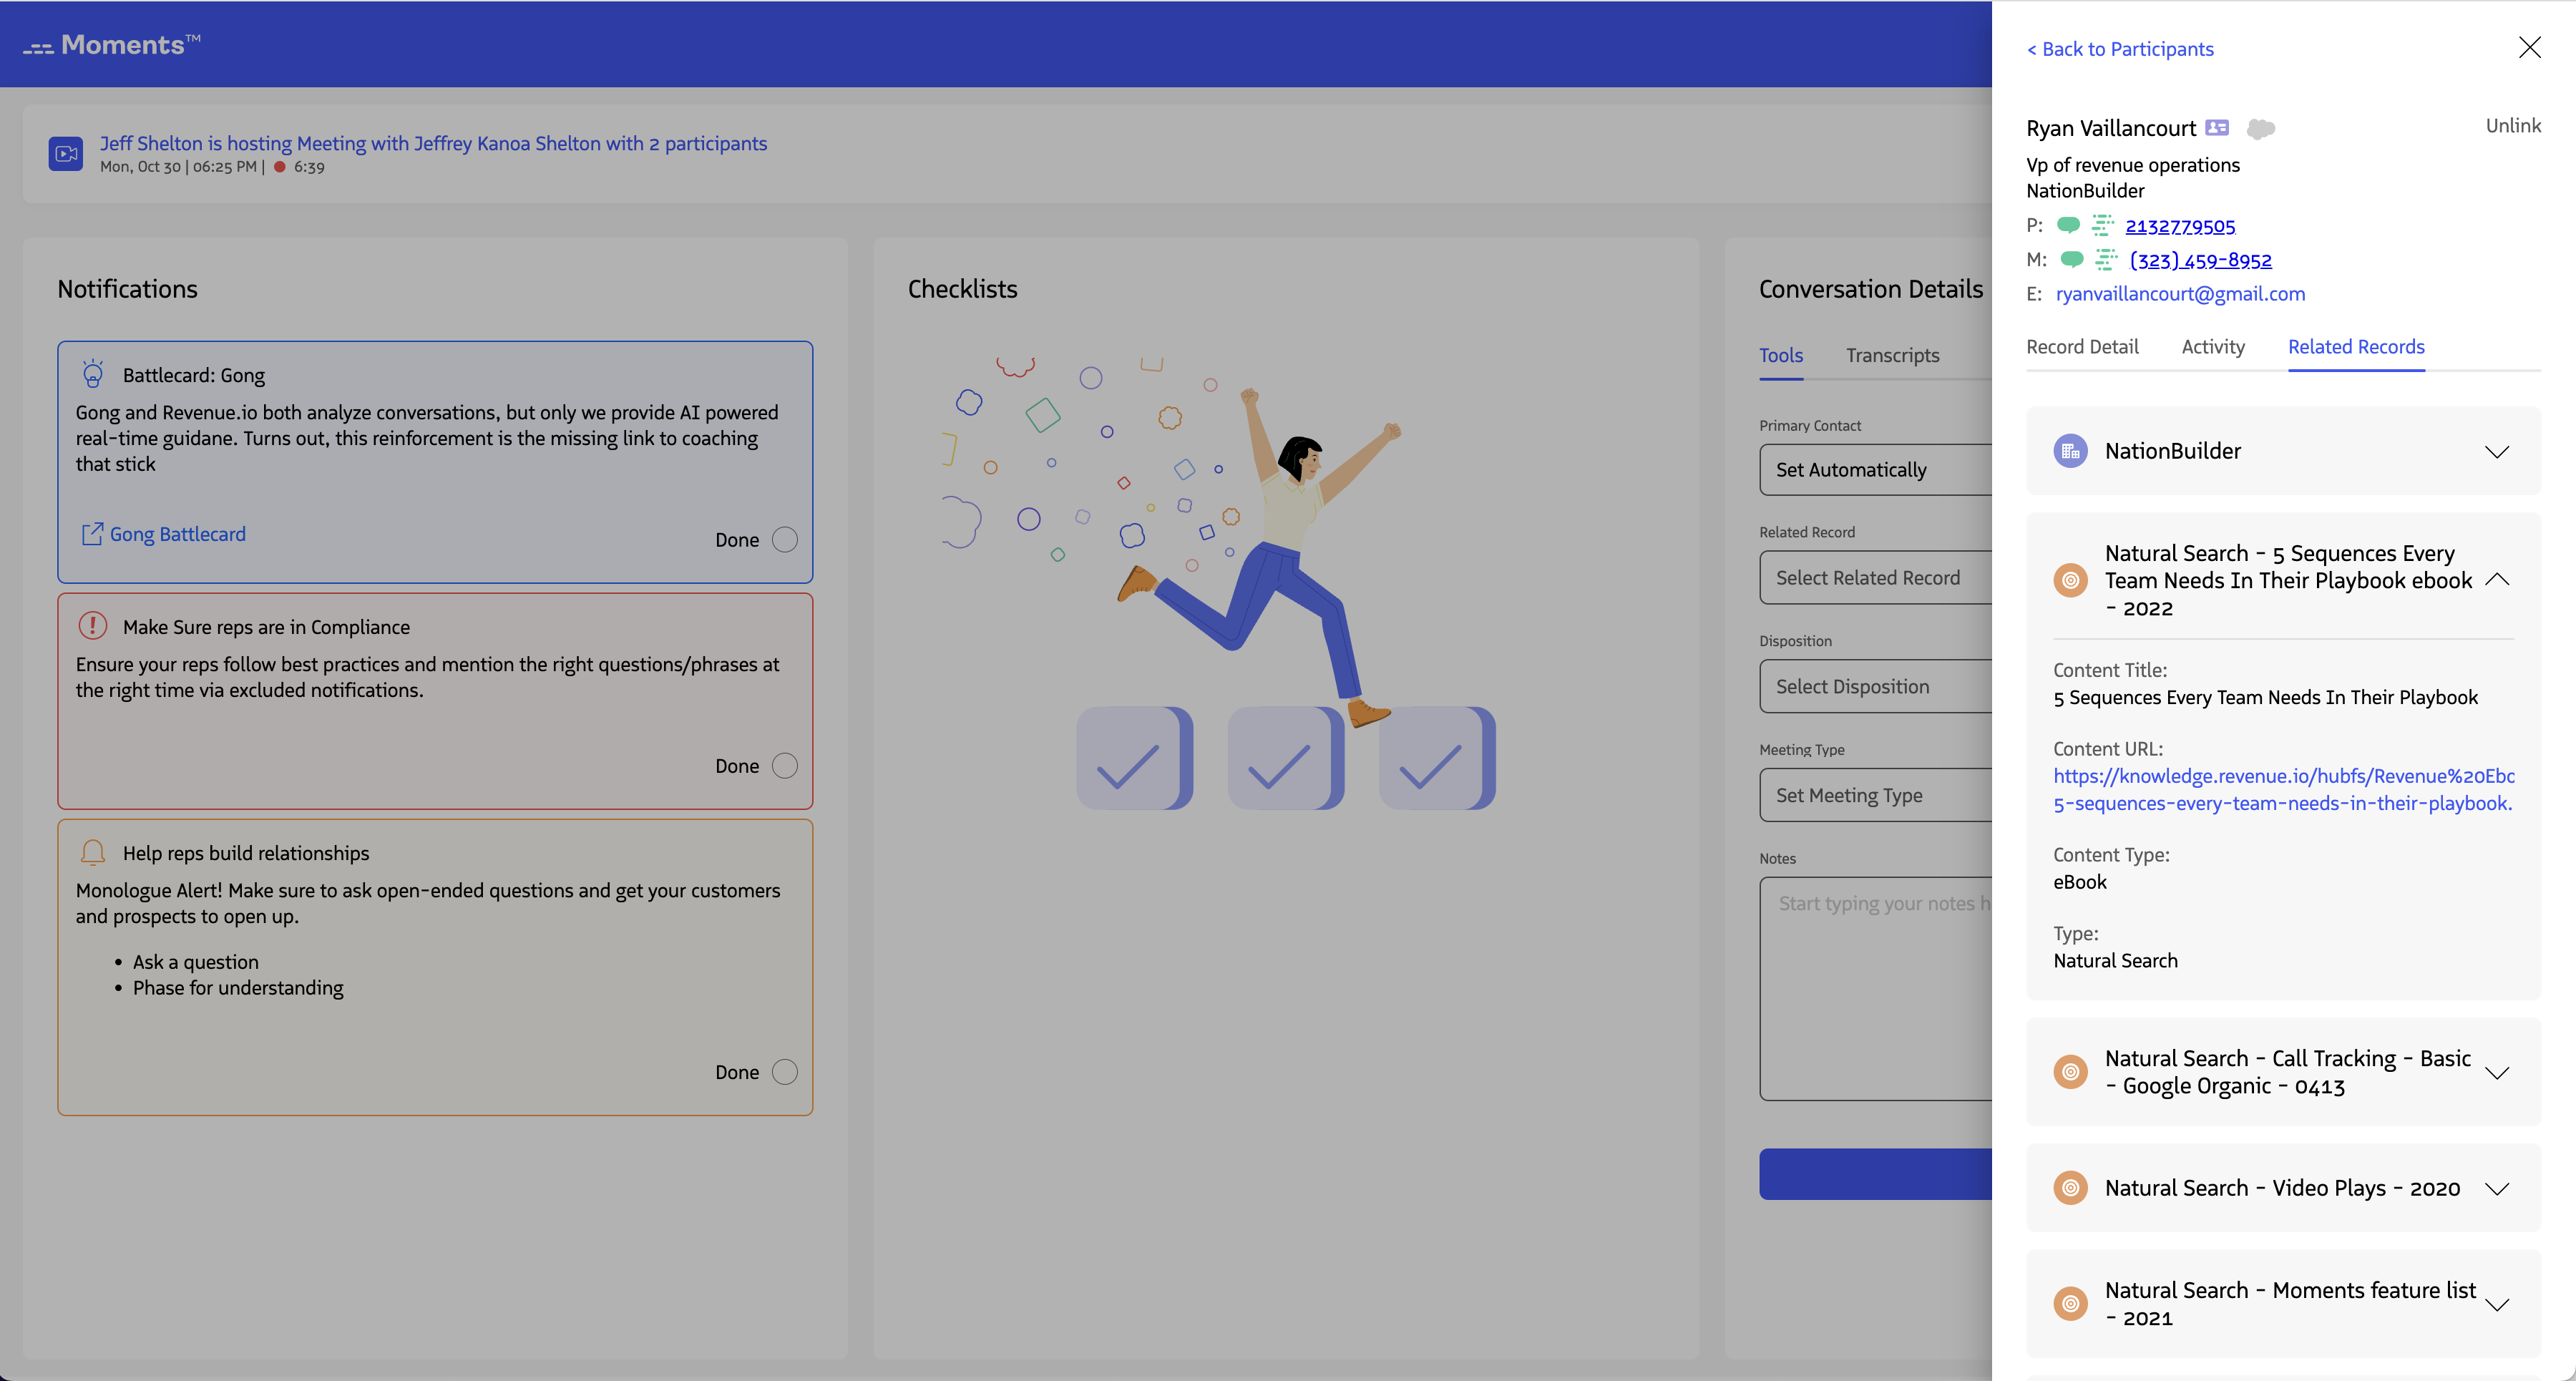
View Related Records
The third tab shows related records associated with the lead or contact, including accounts, opportunities, cases, campaigns, and custom object records.
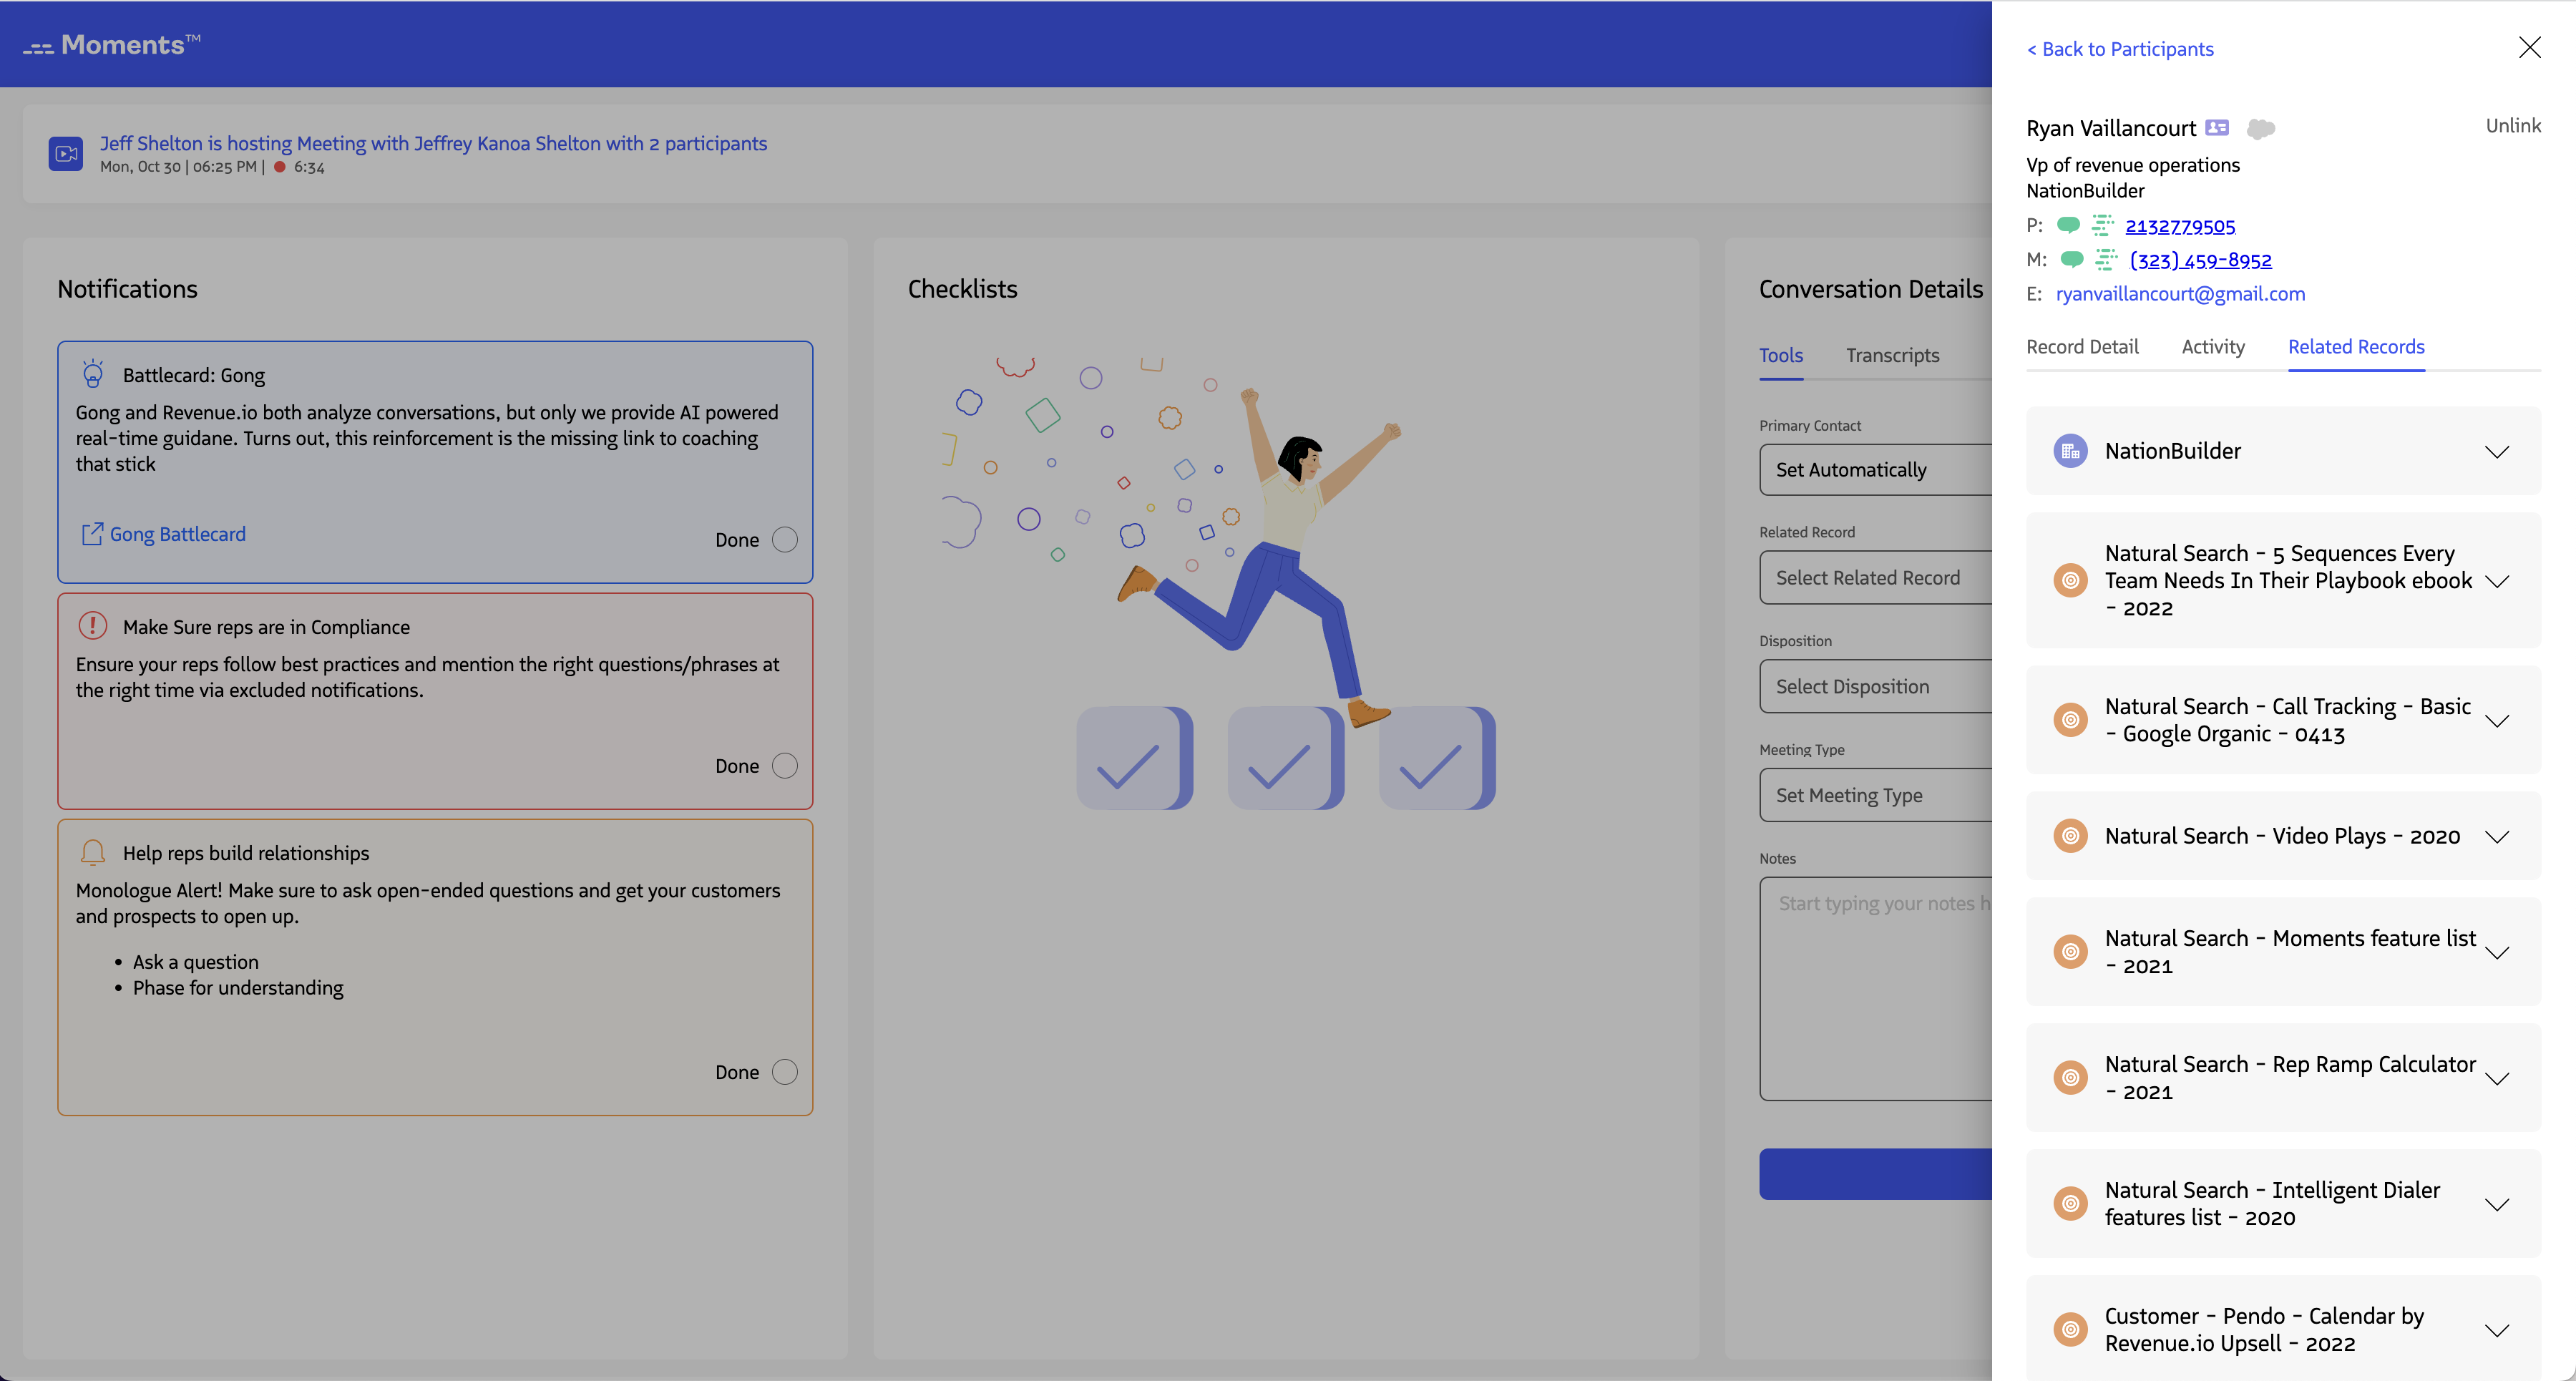
Click the ⌄ icon next to any related record to view its default and custom fields.
Unlink a Lead or Contact from a Participant
To disassociate a lead or contact from a participant, click unlink at the top right of the participant record.
The Moments™ App disassociates the record and returns the participant to an unlinked state. If you manually unlink a record, you’ll need to manually link it again in future meetings using the suggested list, search, or by creating a new record.
