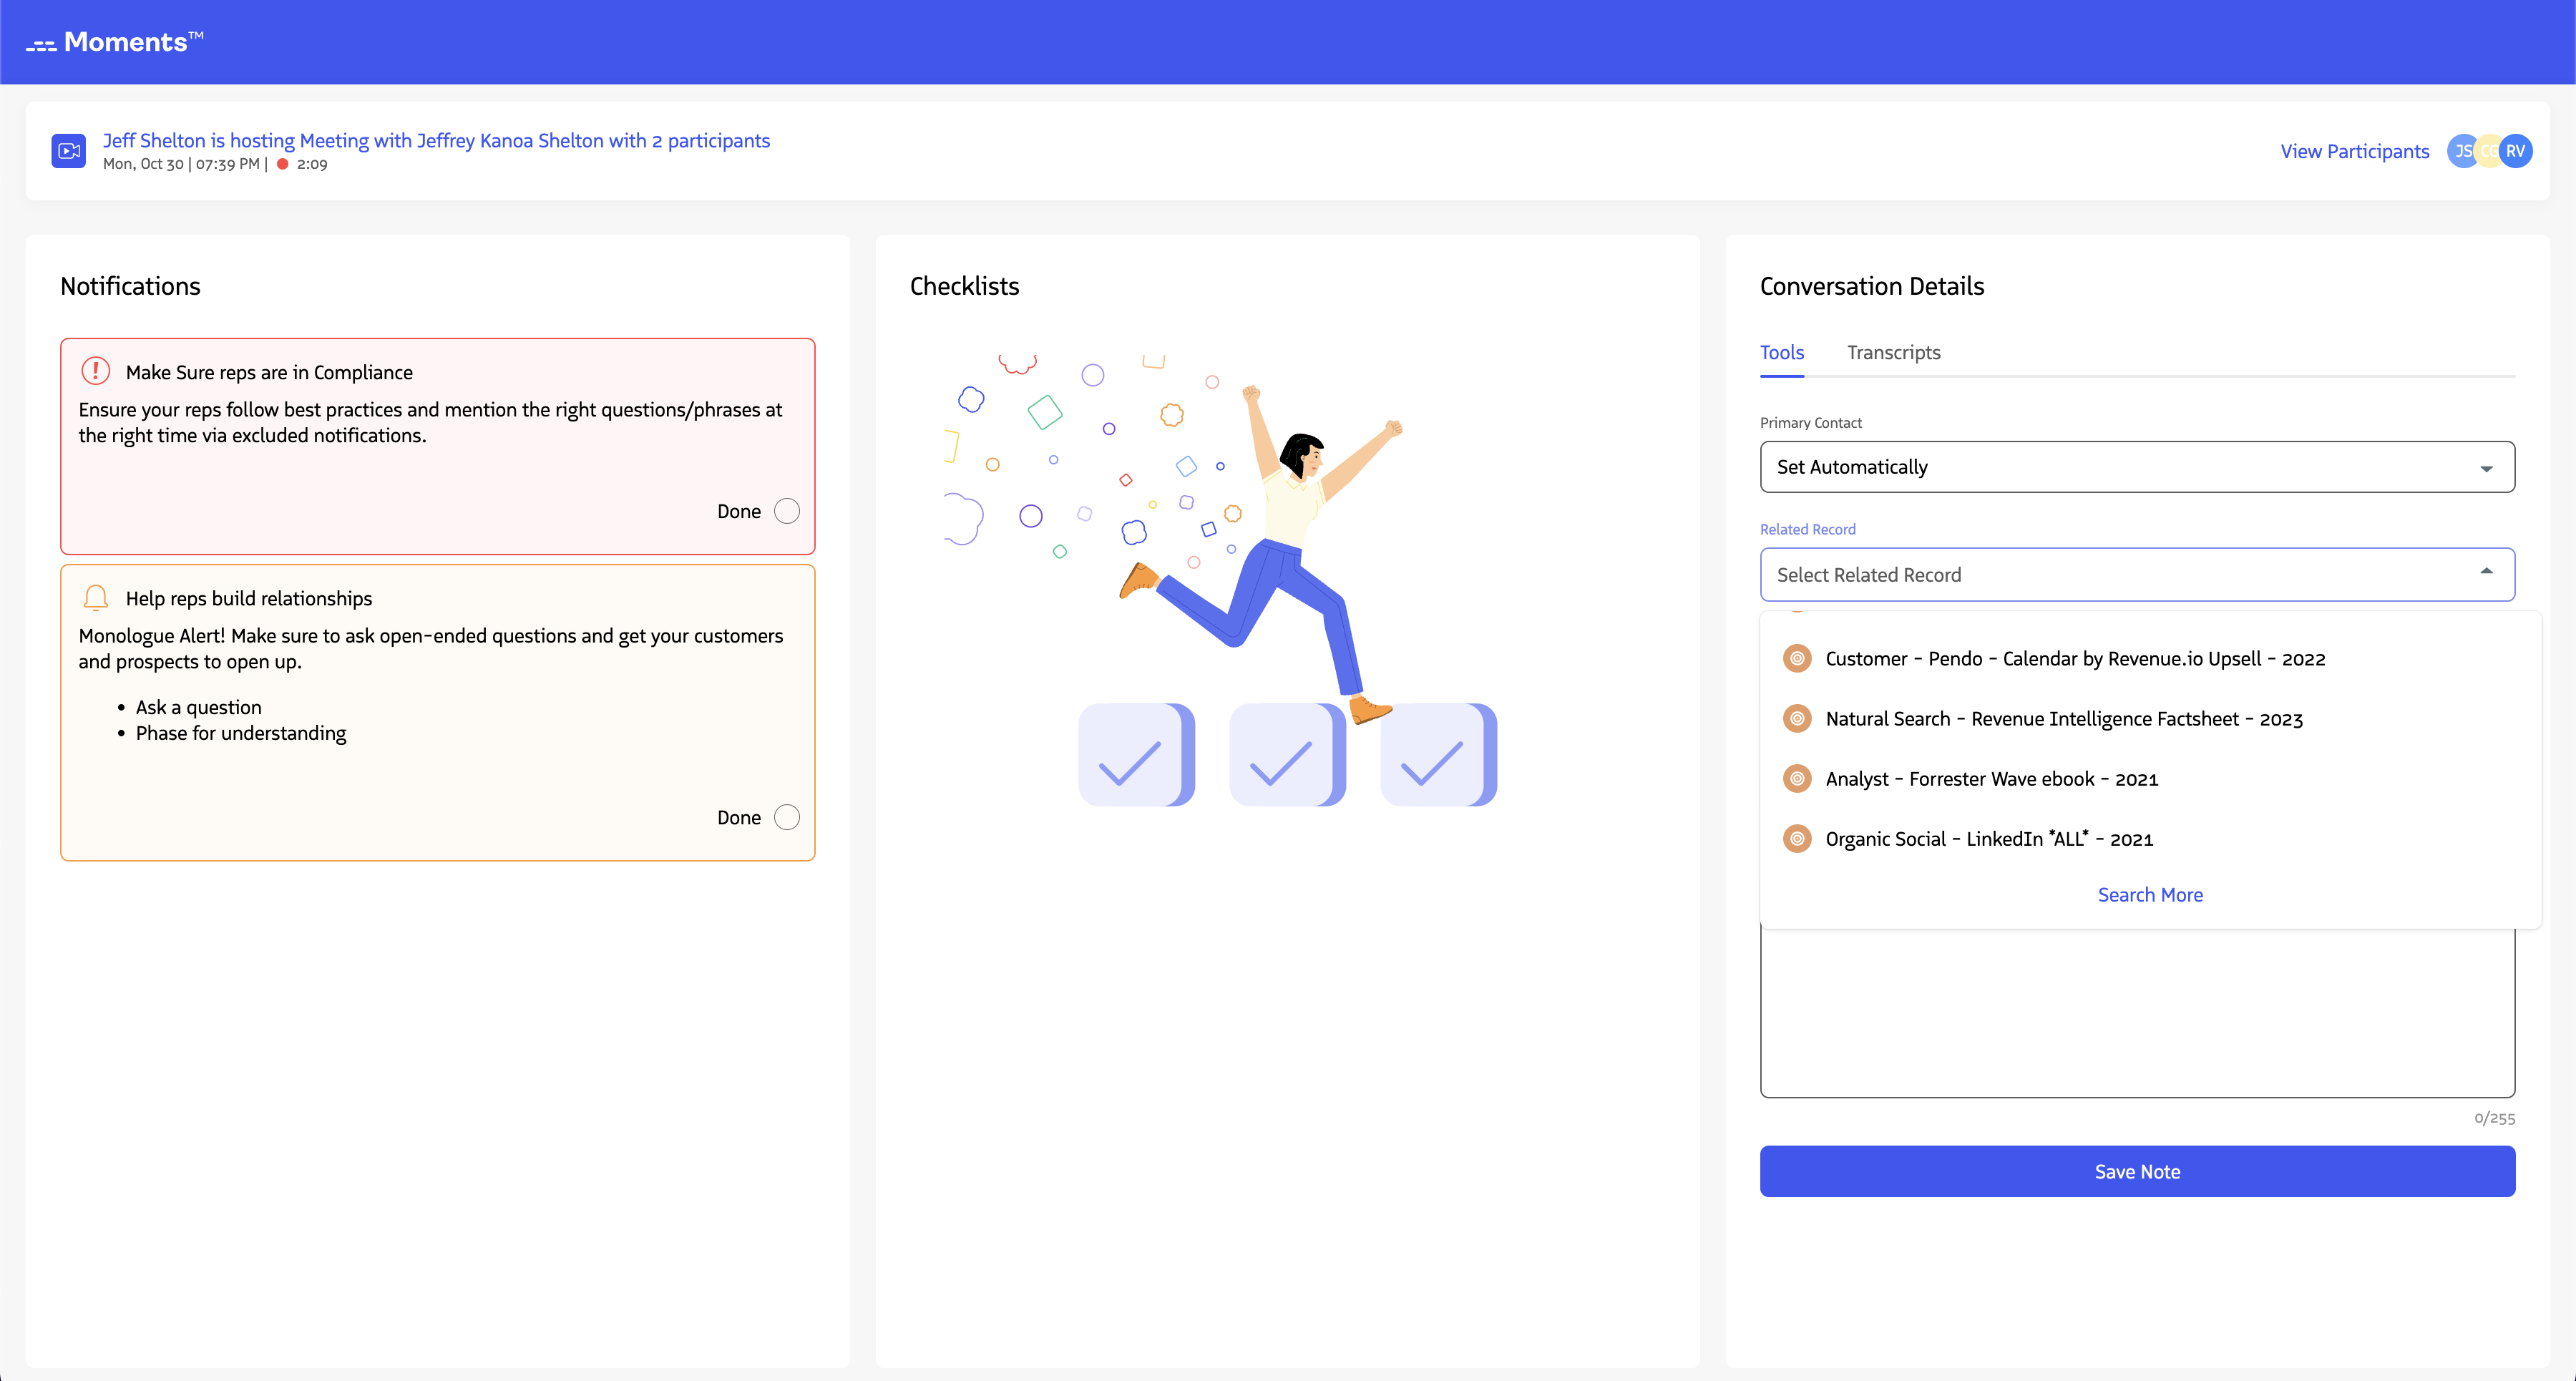
Capture Conversation Details in Moments™
During live calls and meetings, you can capture key information about your conversation and log it directly to Salesforce. This ensures your conversations are properly linked to contacts, leads, and related records, and include important details like dispositions, meeting types, and notes.
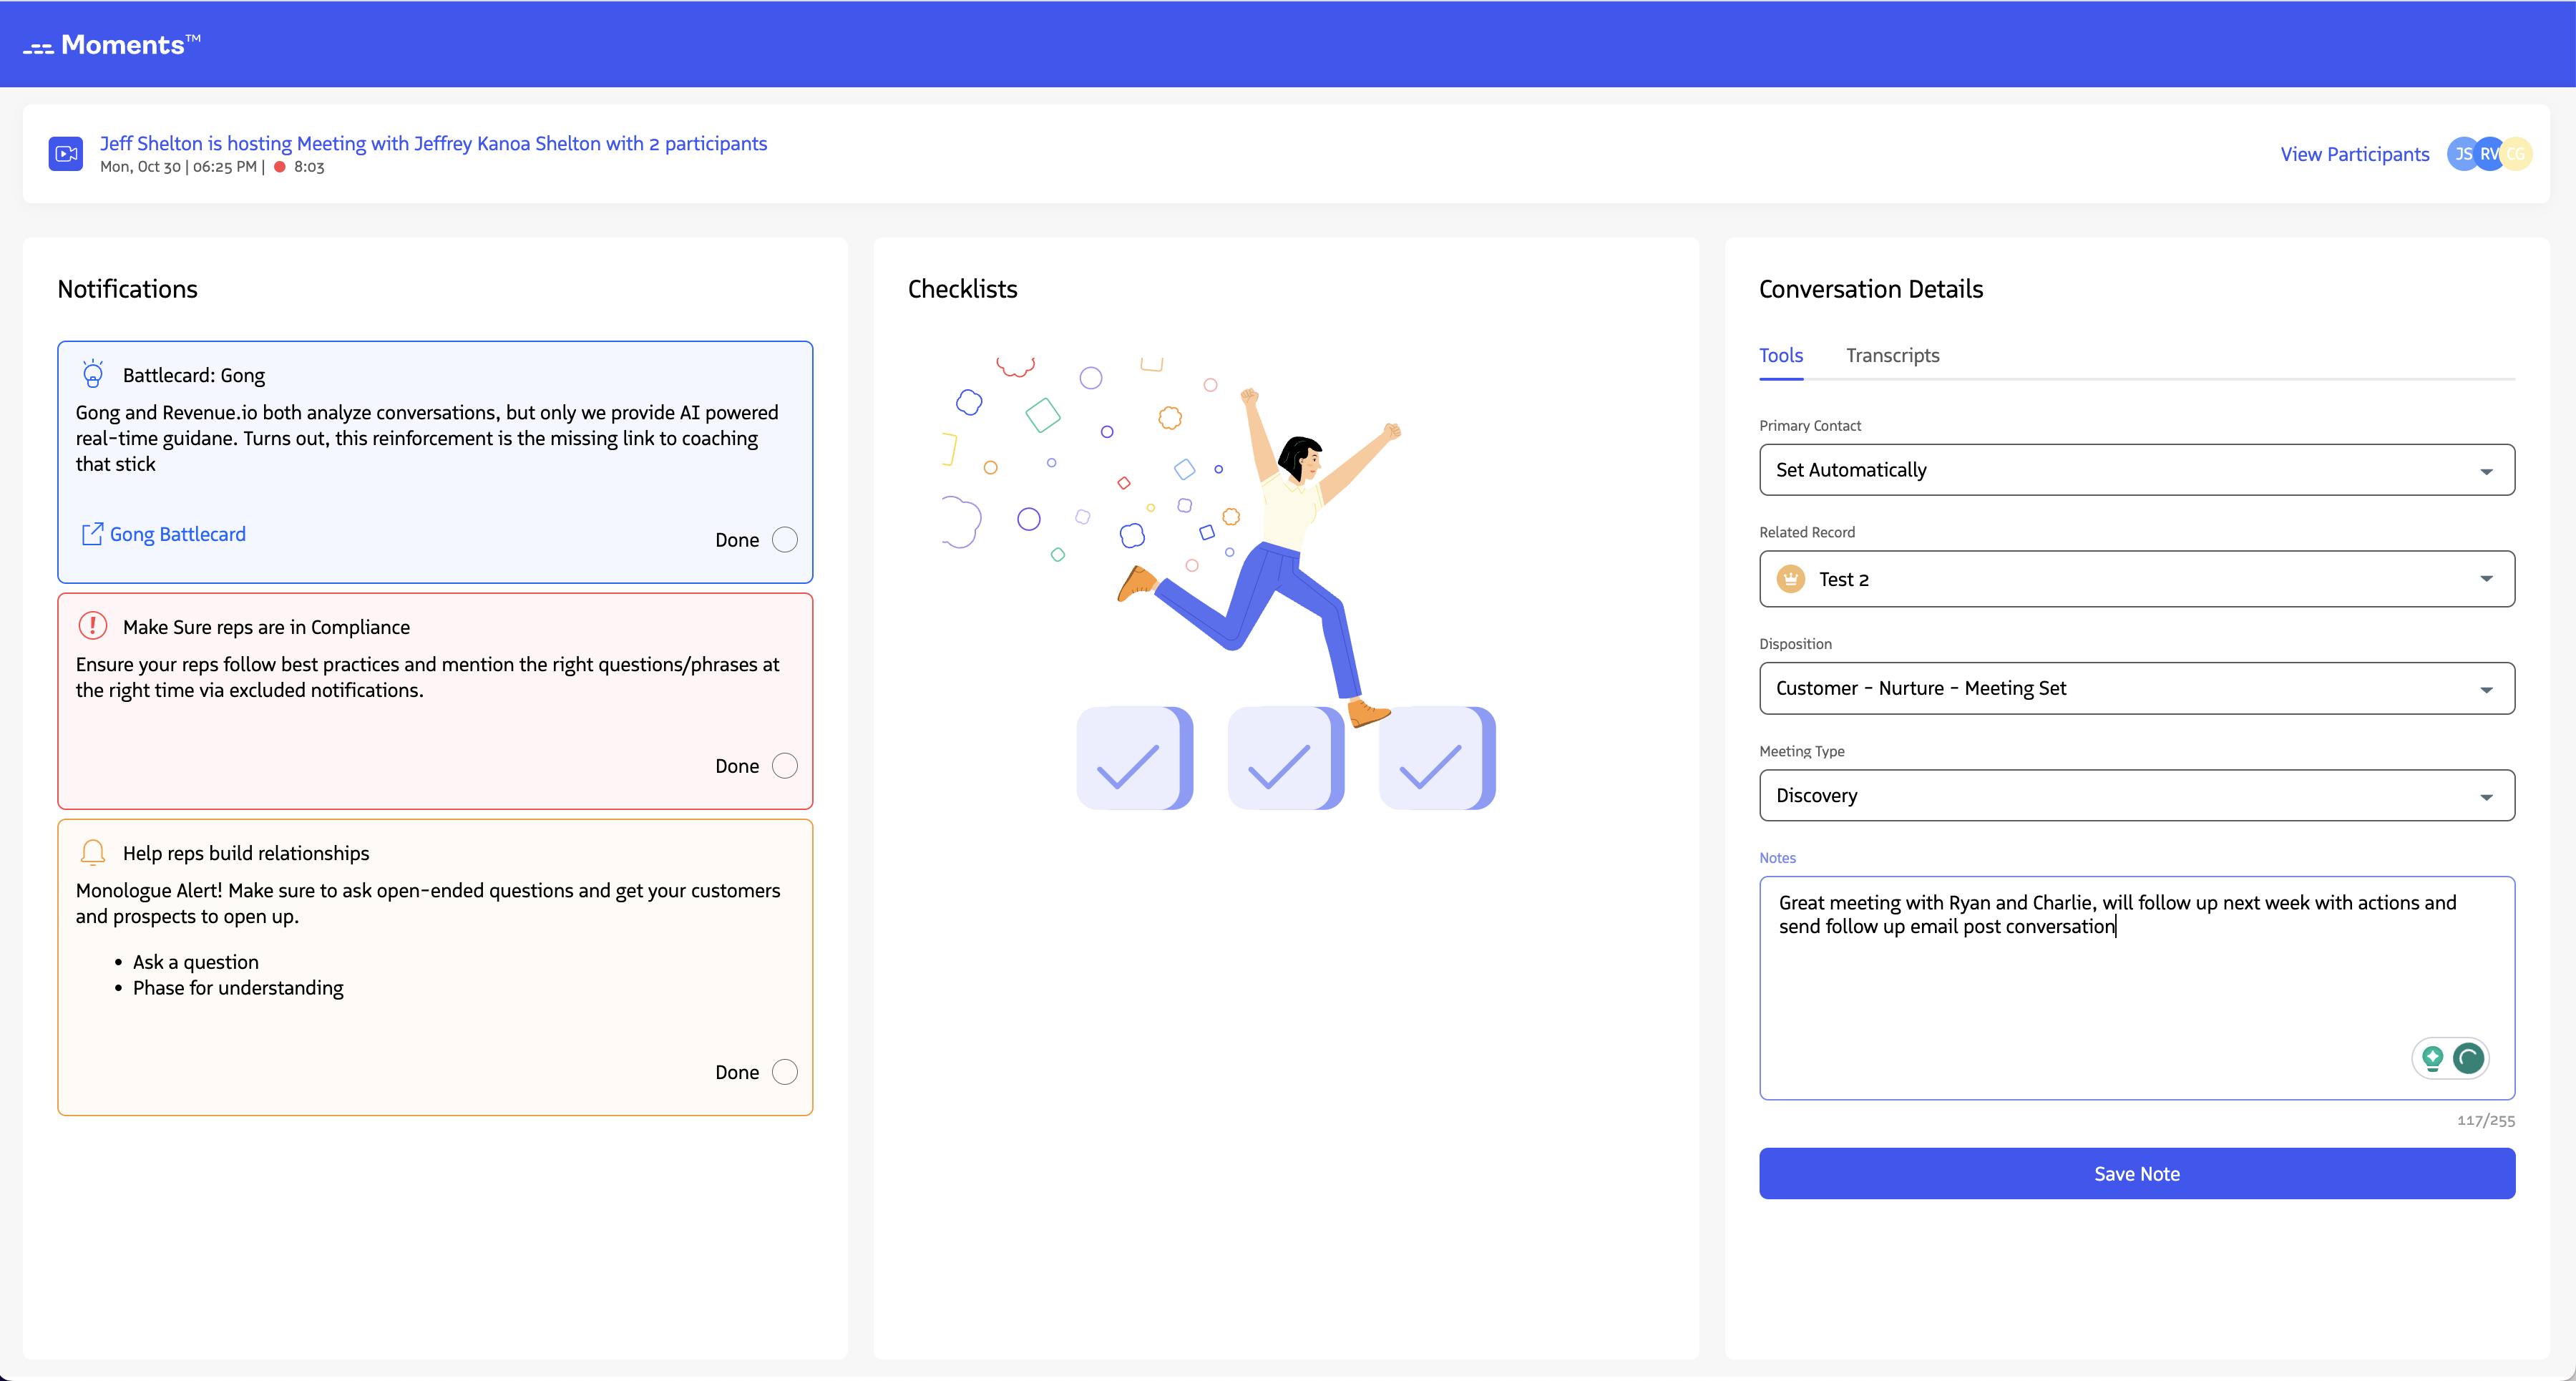
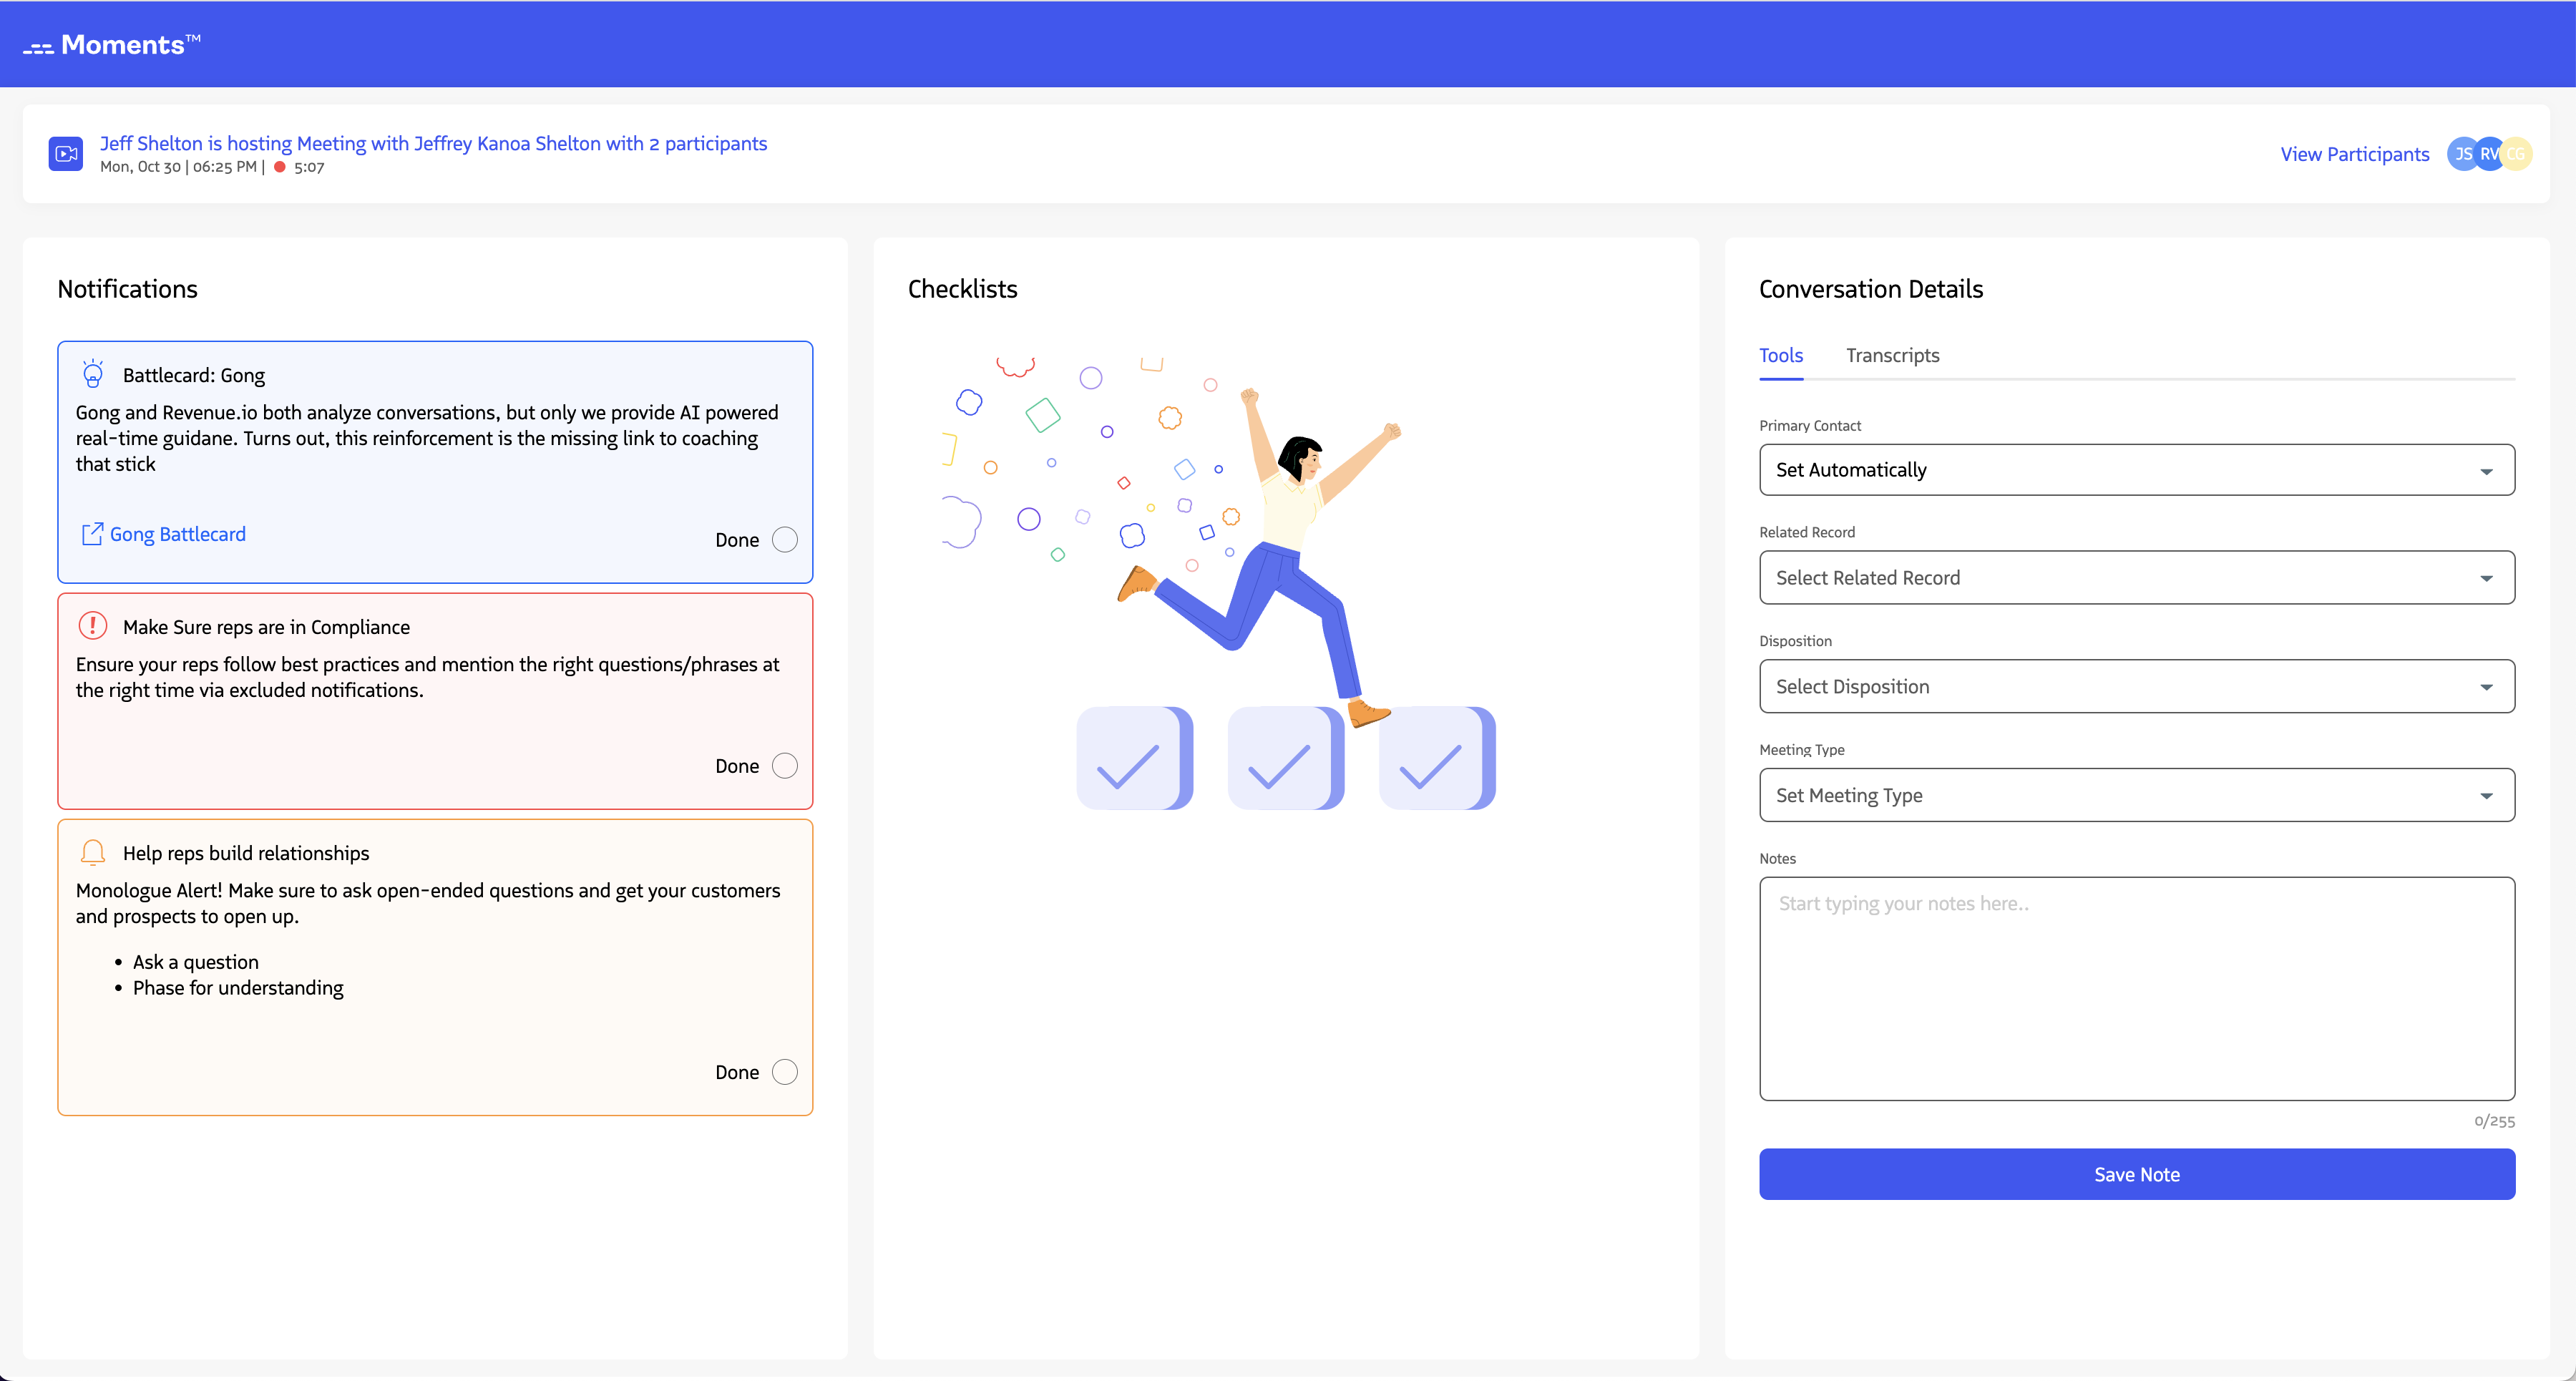
Set the Primary Contact
The primary contact (also called “WhoID” or “Name”) links your conversation to the right person in Salesforce. This ensures the activity record is associated with the correct contact or lead.
Set Primary Contact Automatically
By default, the primary contact is set to Set Automatically. Revenue uses the following logic to automatically link a lead or contact:
- Only participants with a linked Salesforce lead or contact are considered. You can manage participant links using the View and Manage Conversation Participants features.
- Contacts are always prioritized over leads.
- If multiple contacts are associated with the conversation, Revenue selects the record that was updated most recently.
If no Salesforce records are linked to participants, no primary contact is set.
At the end of the conversation, Revenue sets the primary contact based on this logic.
Set Primary Contact Manually
You can manually select the Salesforce record to use as the primary contact. Click the Primary Contact dropdown to view available records.
Note: The dropdown only shows participants with linked lead or contact records. If you don’t see the record you need, link it to a participant first.
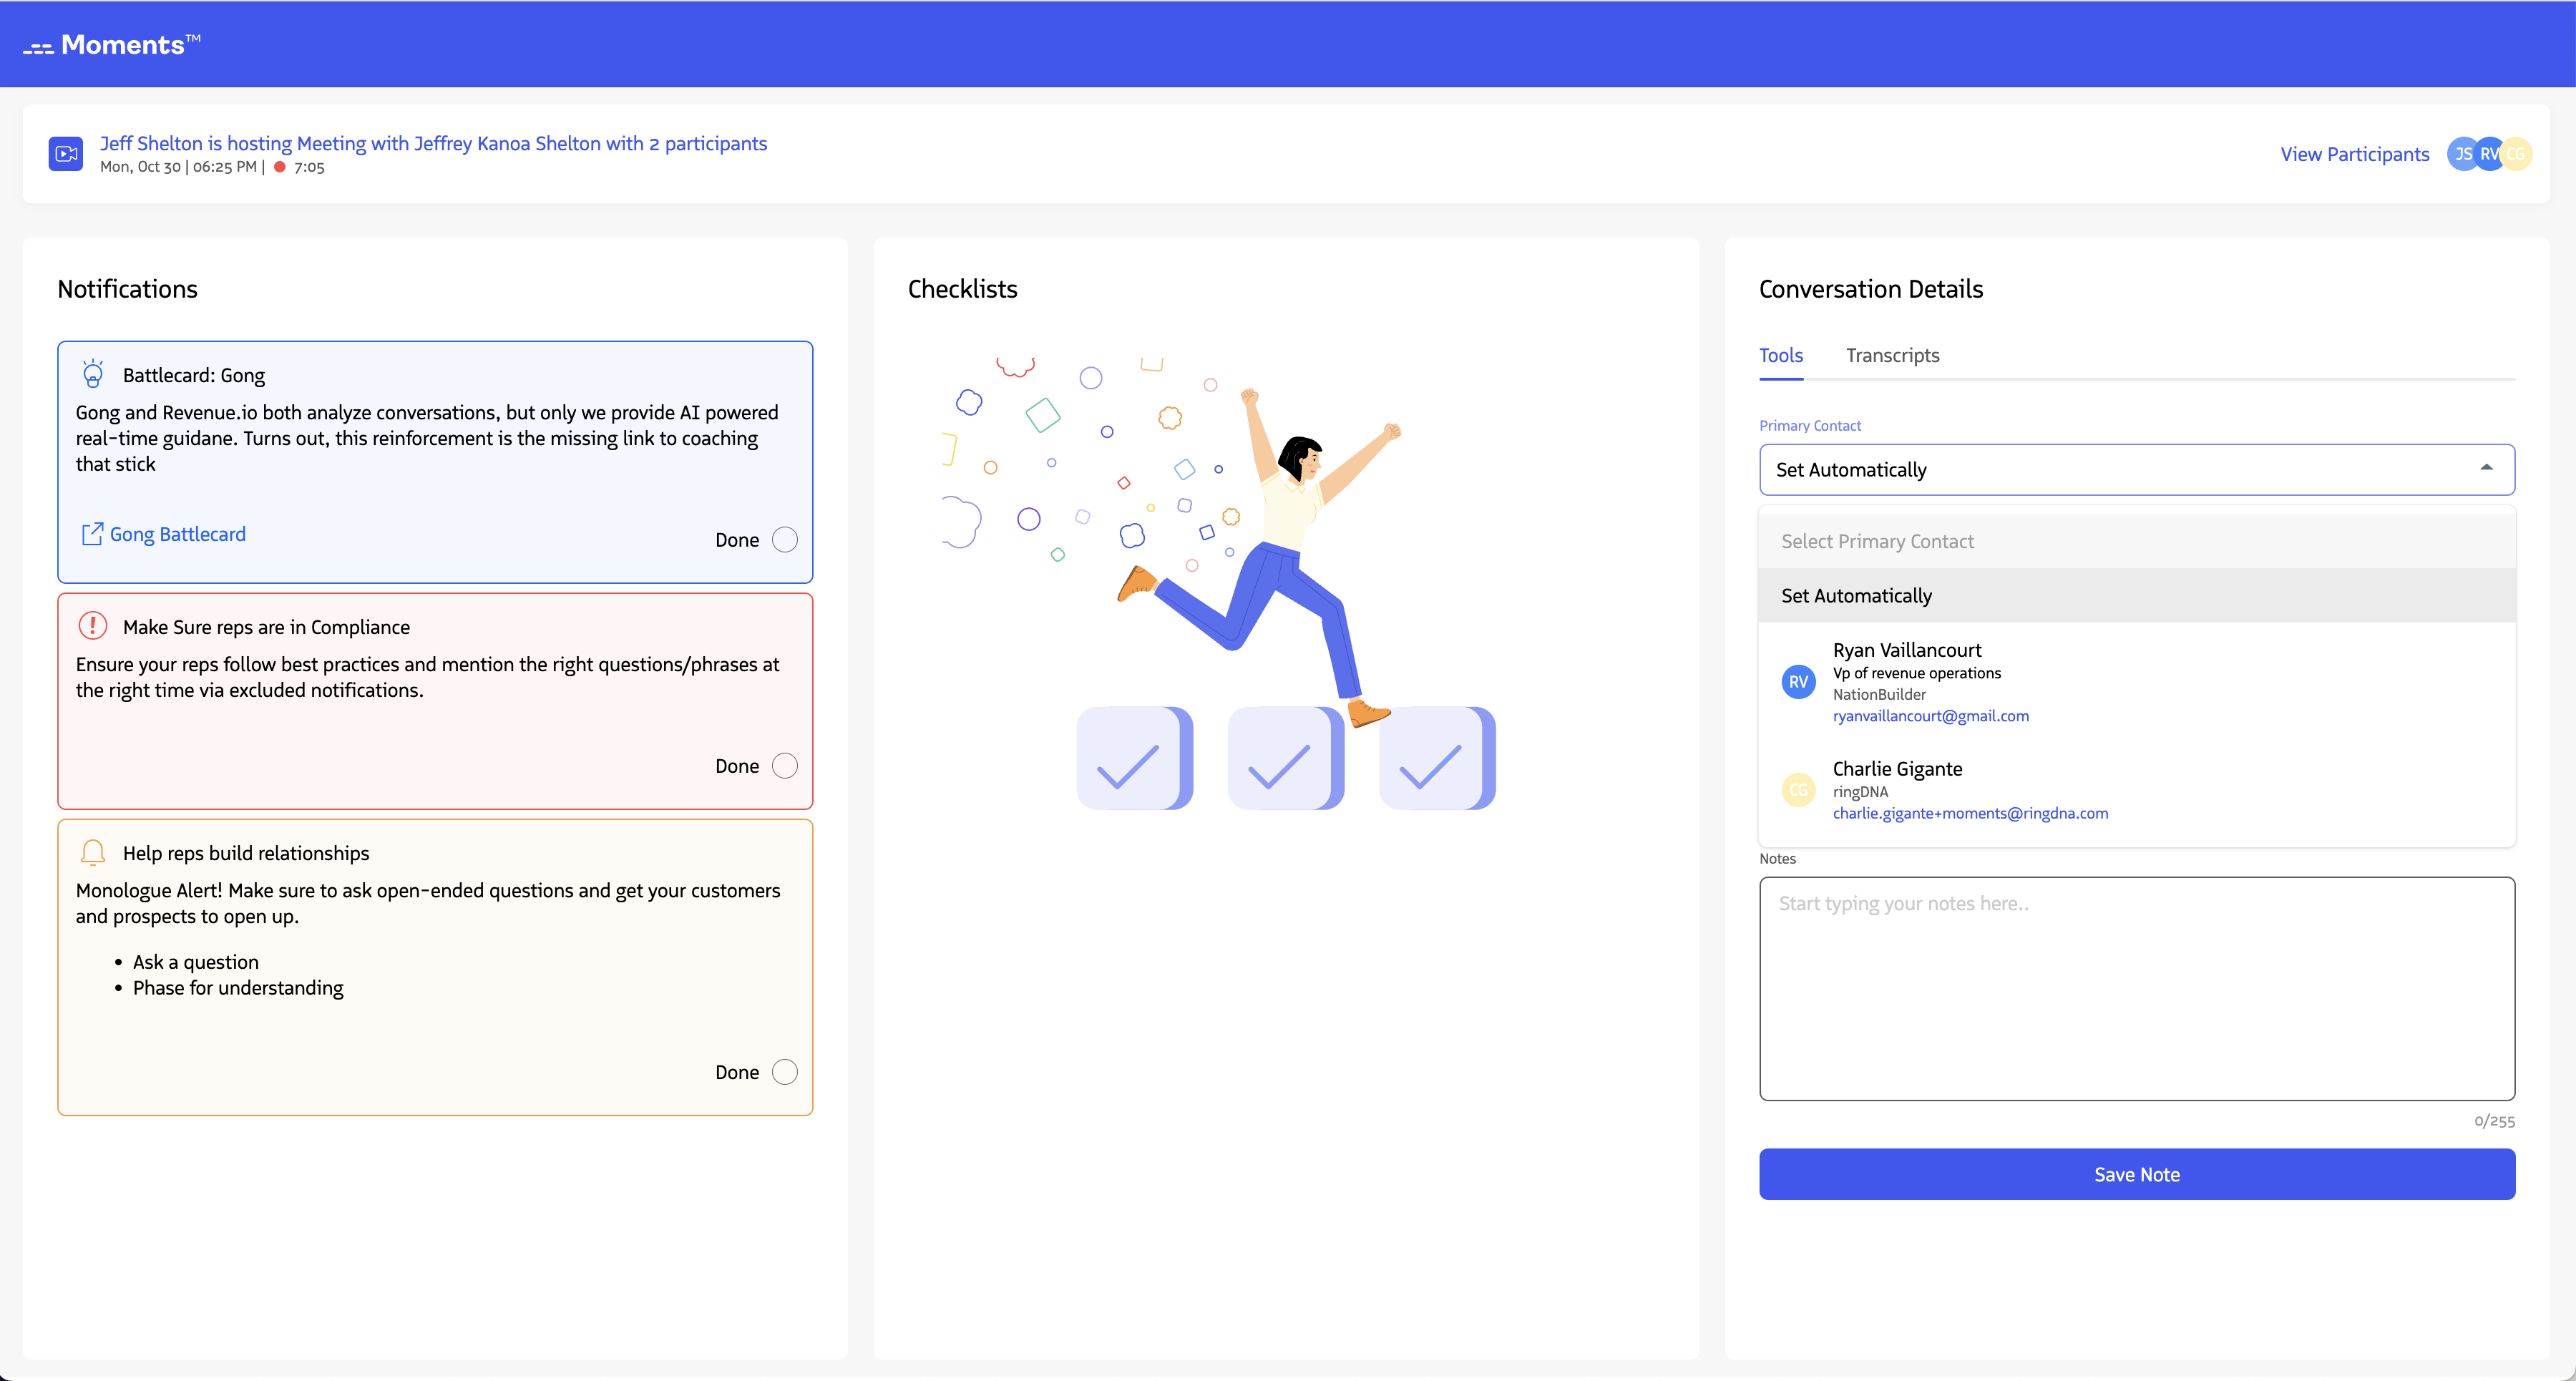
Once you select a lead or contact, it’s set as the primary contact for the activity associated with the conversation.
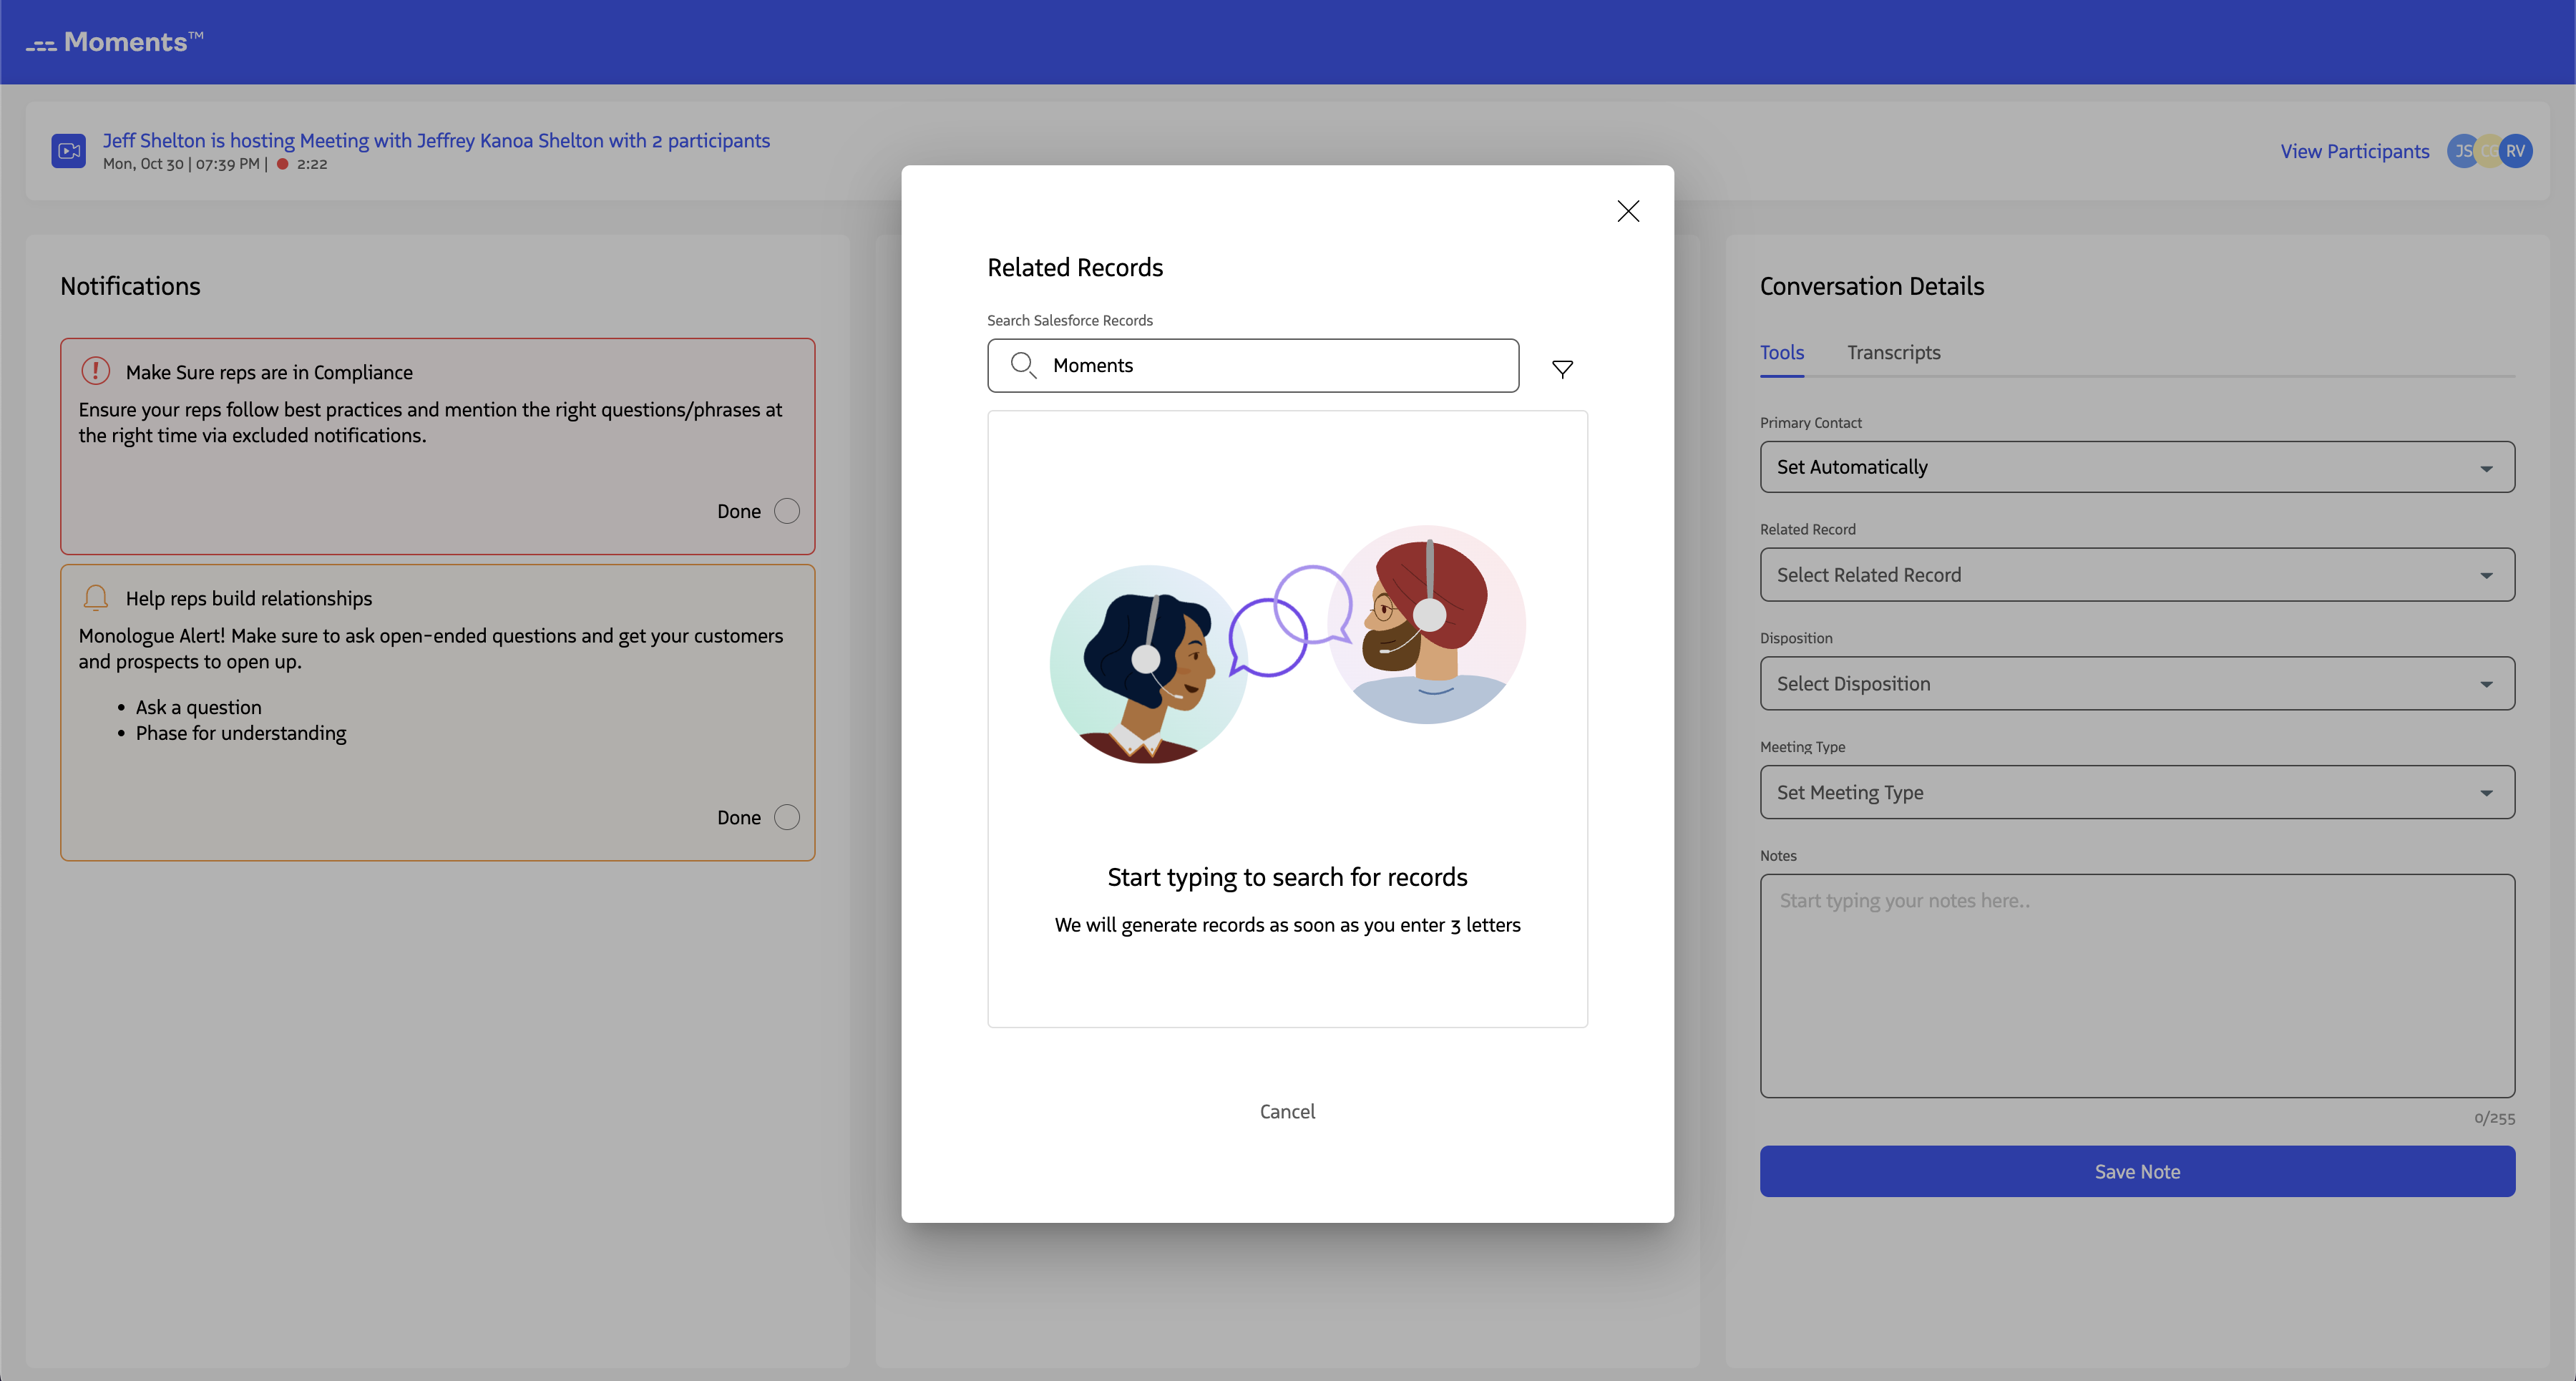
Associate a Related Record
Linking a related record captures the context of your conversation. Related records represent the “what” and help connect conversations to your customer journey.
Use Suggested Related Records
Click the Related Record dropdown in the Conversation Details section to see a list of suggested records. This list includes opportunities, accounts, campaigns, cases, and custom object records based on conversation participants and their linked Salesforce records.
Revenue admins can configure the rules that generate these suggestions in related record rules.
Selecting a suggested record automatically sets it as the related record (the “What”) for the activity.
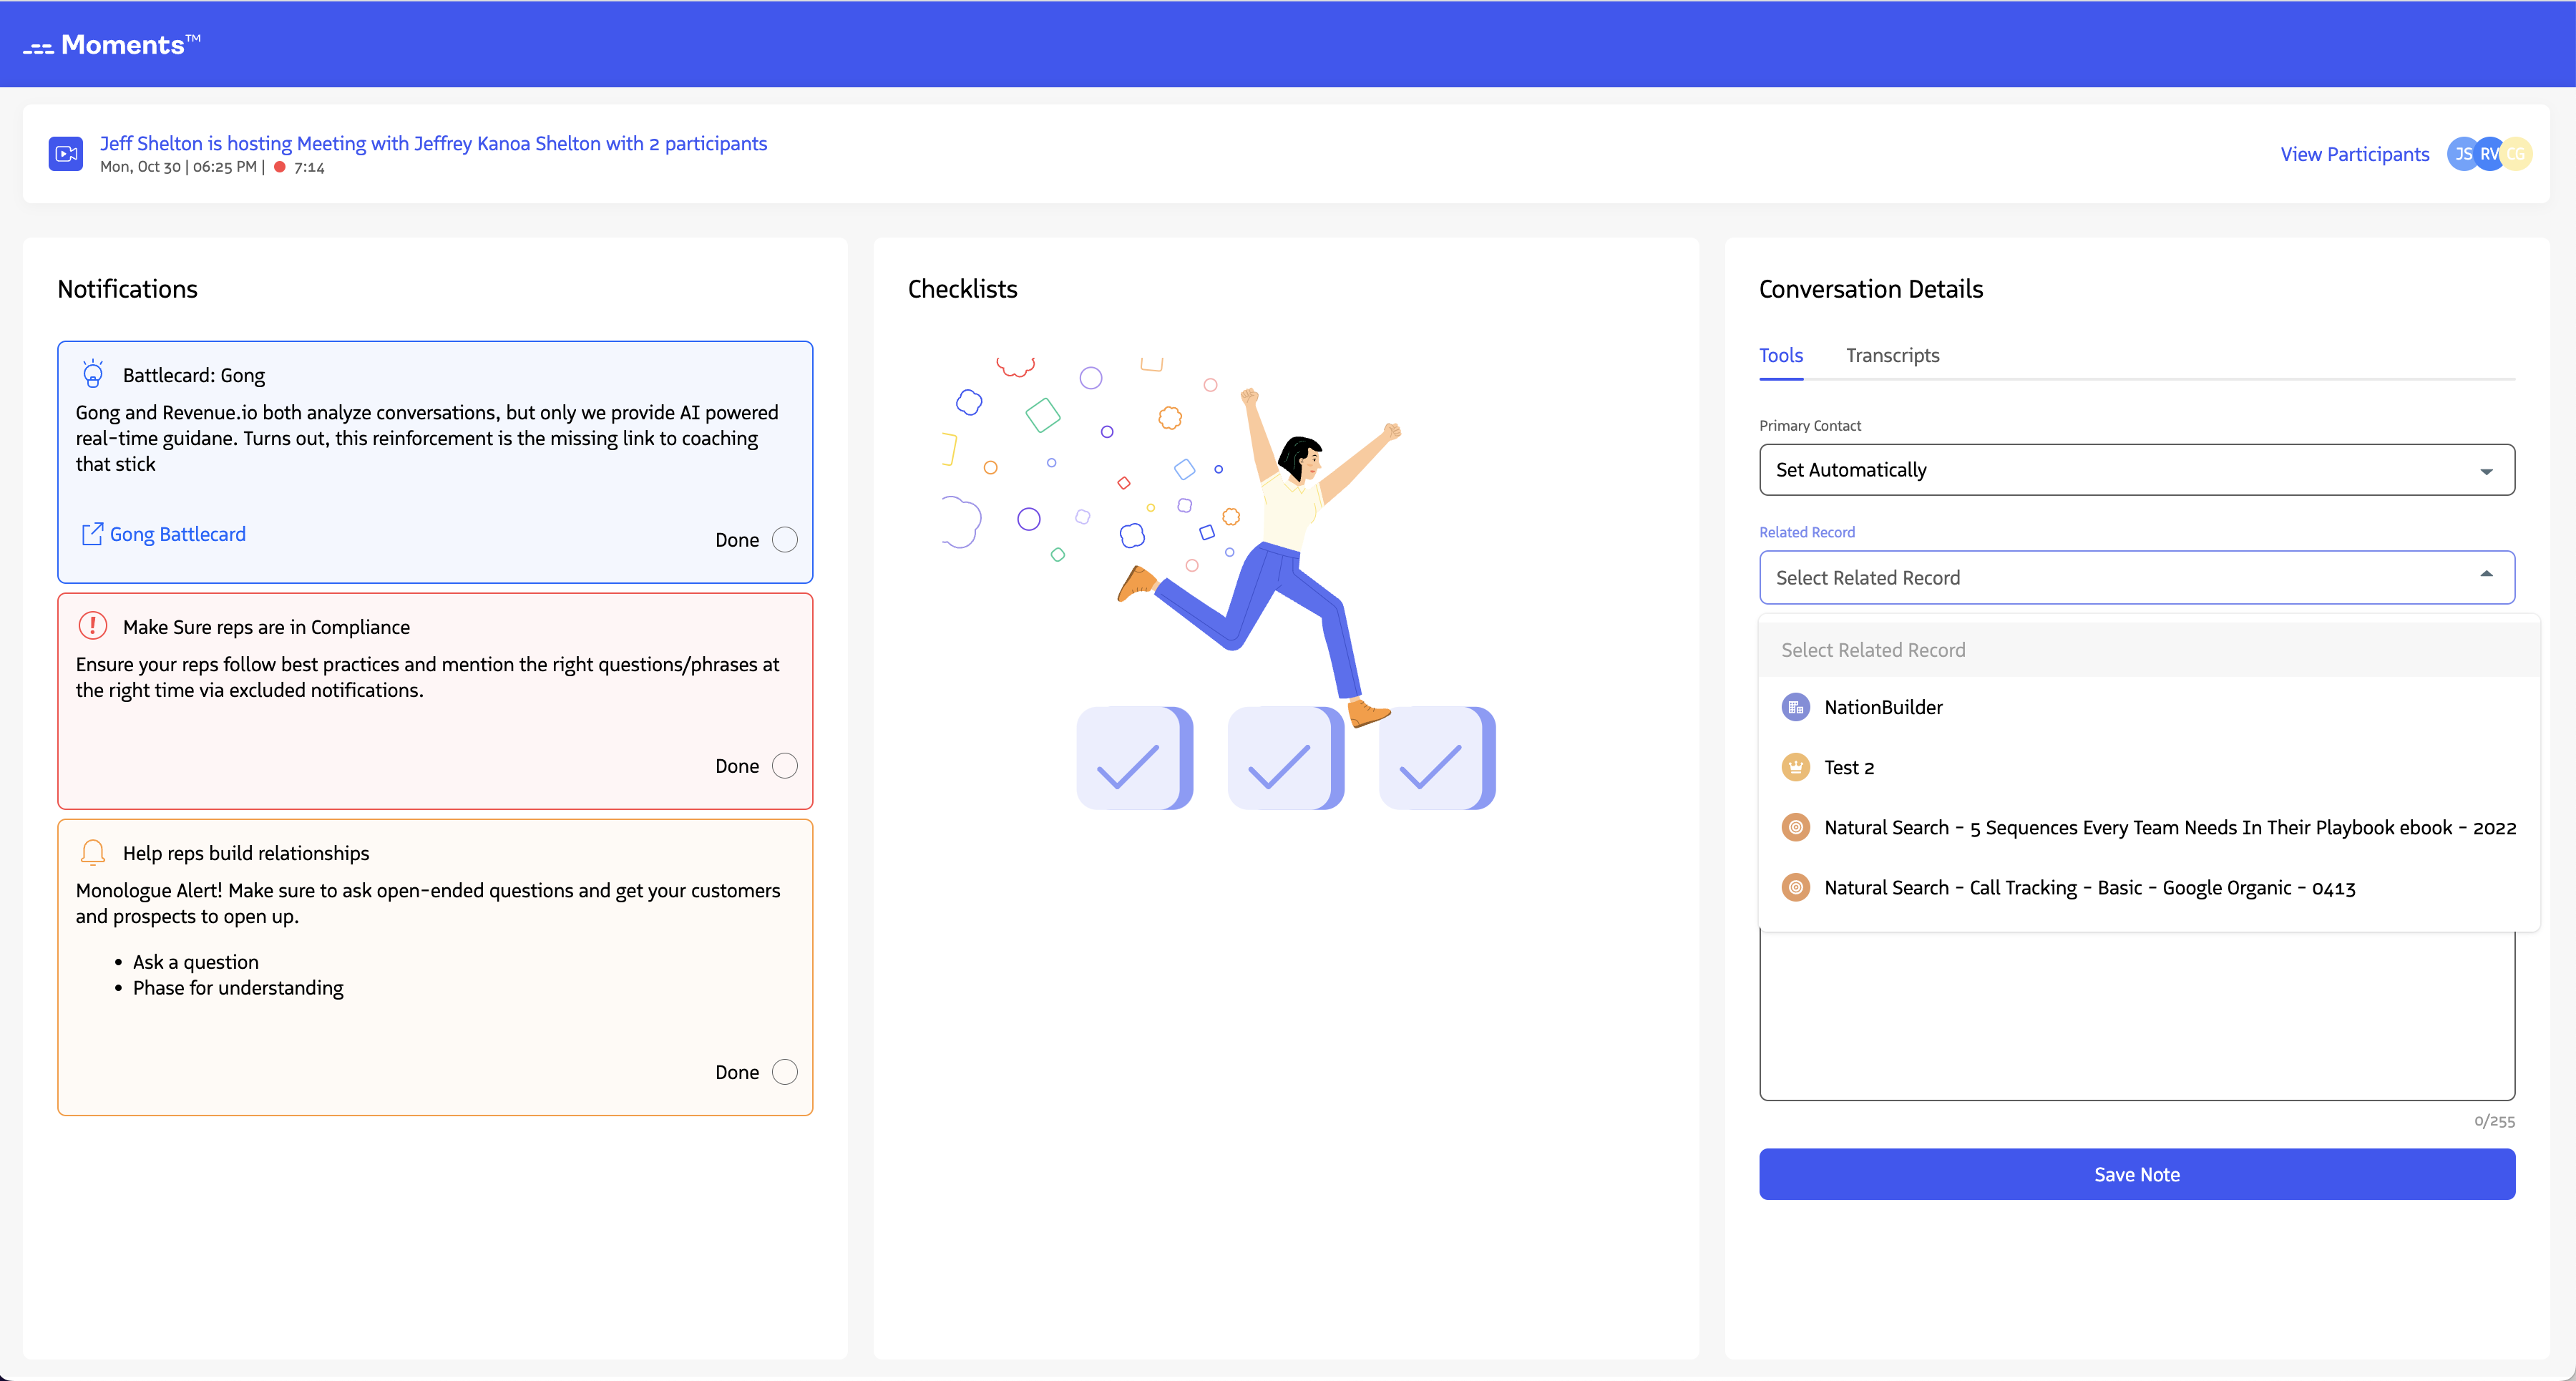
Search for Related Records
If you don’t see the right record in the suggestions, or if no suggestions appear, scroll to the bottom of the list and click Search More.
Steps to search:
- Enter at least 3 characters of the record name
- Optionally filter by record type (opportunities, accounts, cases, campaigns)
- Press Enter or click search to execute
- Select a record from the results to link it to the conversation
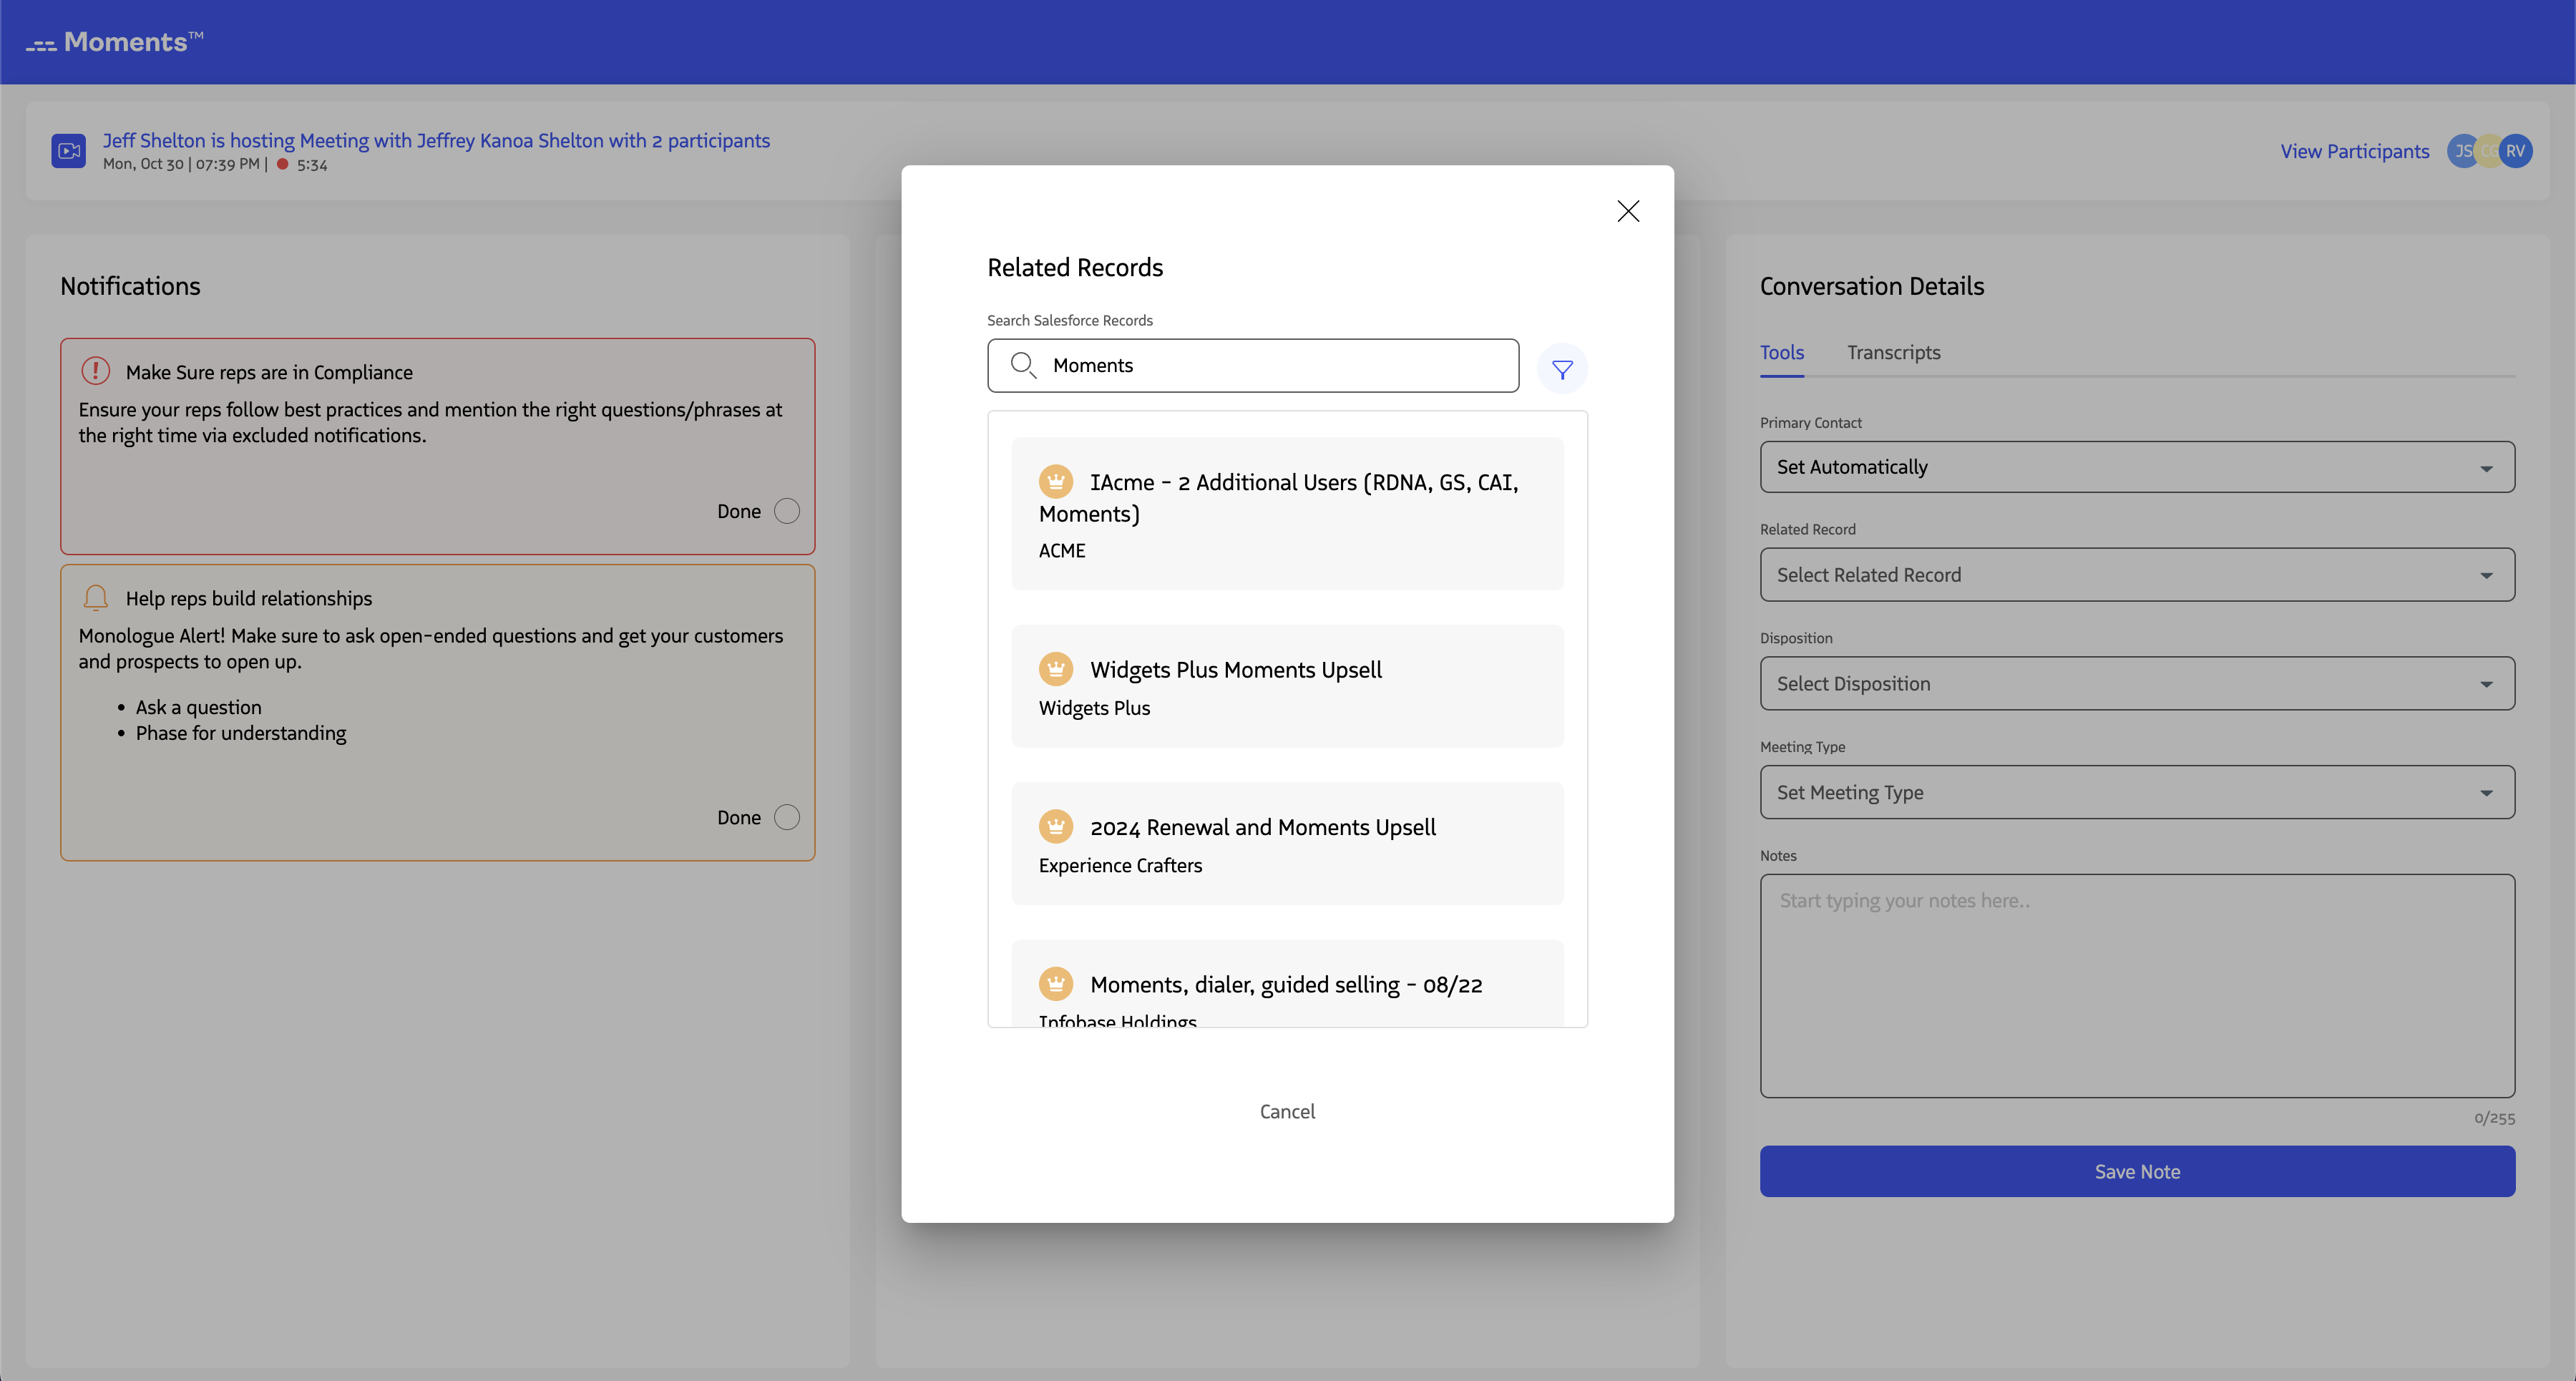
The selected record is linked to the activity associated with the conversation in Salesforce.
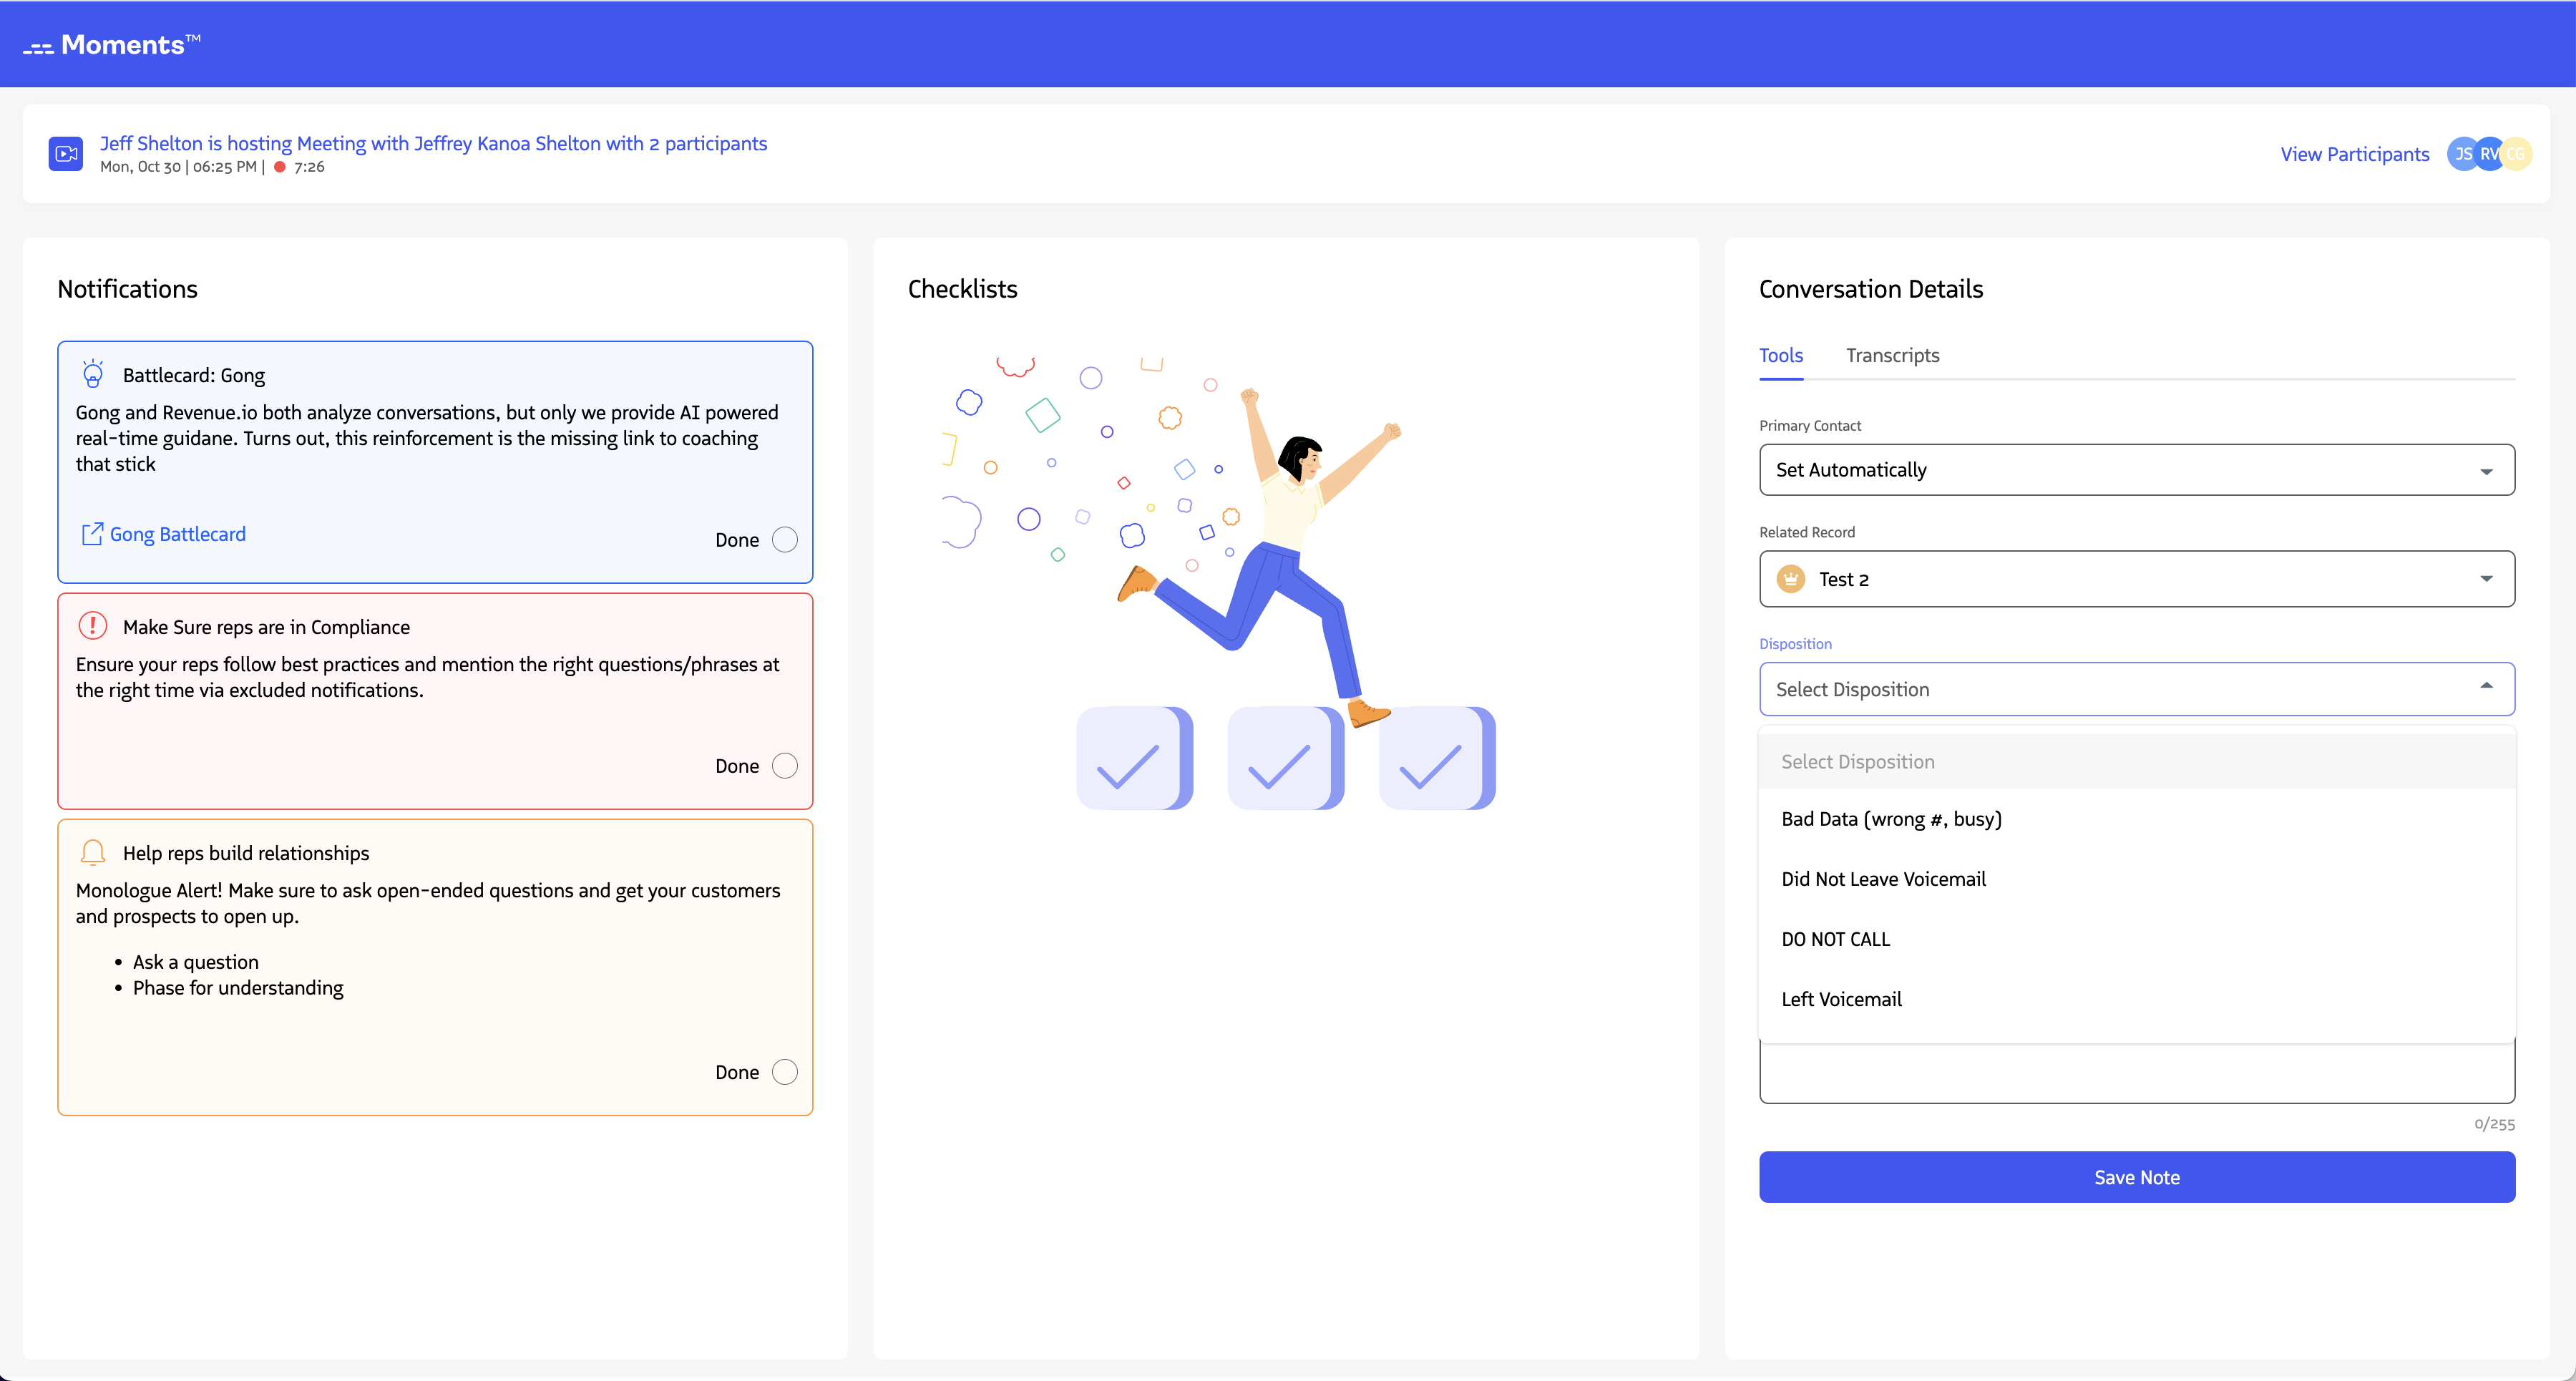
Set a Call Disposition
Dispositions track the outcome of your conversation. They’re categorized as positive, negative, or neutral to help measure conversation effectiveness. You can set dispositions for both audio calls and video meetings in the Moments™ App.
Steps to set a disposition:
- Click the Disposition dropdown
- Select a disposition from the available list
Dispositions set in the Moments™ App also appear in the RingDNA Communication Hub, and vice versa.
Revenue admins can configure dispositions in the Revenue administrative console to provide a comprehensive list of outcomes that reflect your team’s values.
Set a Meeting Type for a Video Conversation
For video meetings, you can select a meeting type to categorize the conversation. Meeting type values come from your Salesforce administrator’s configuration.
Steps to set a meeting type:
- Click the Meeting Type dropdown
- Select a meeting type from the list
The selected meeting type is associated with the event activity linked to the video meeting.
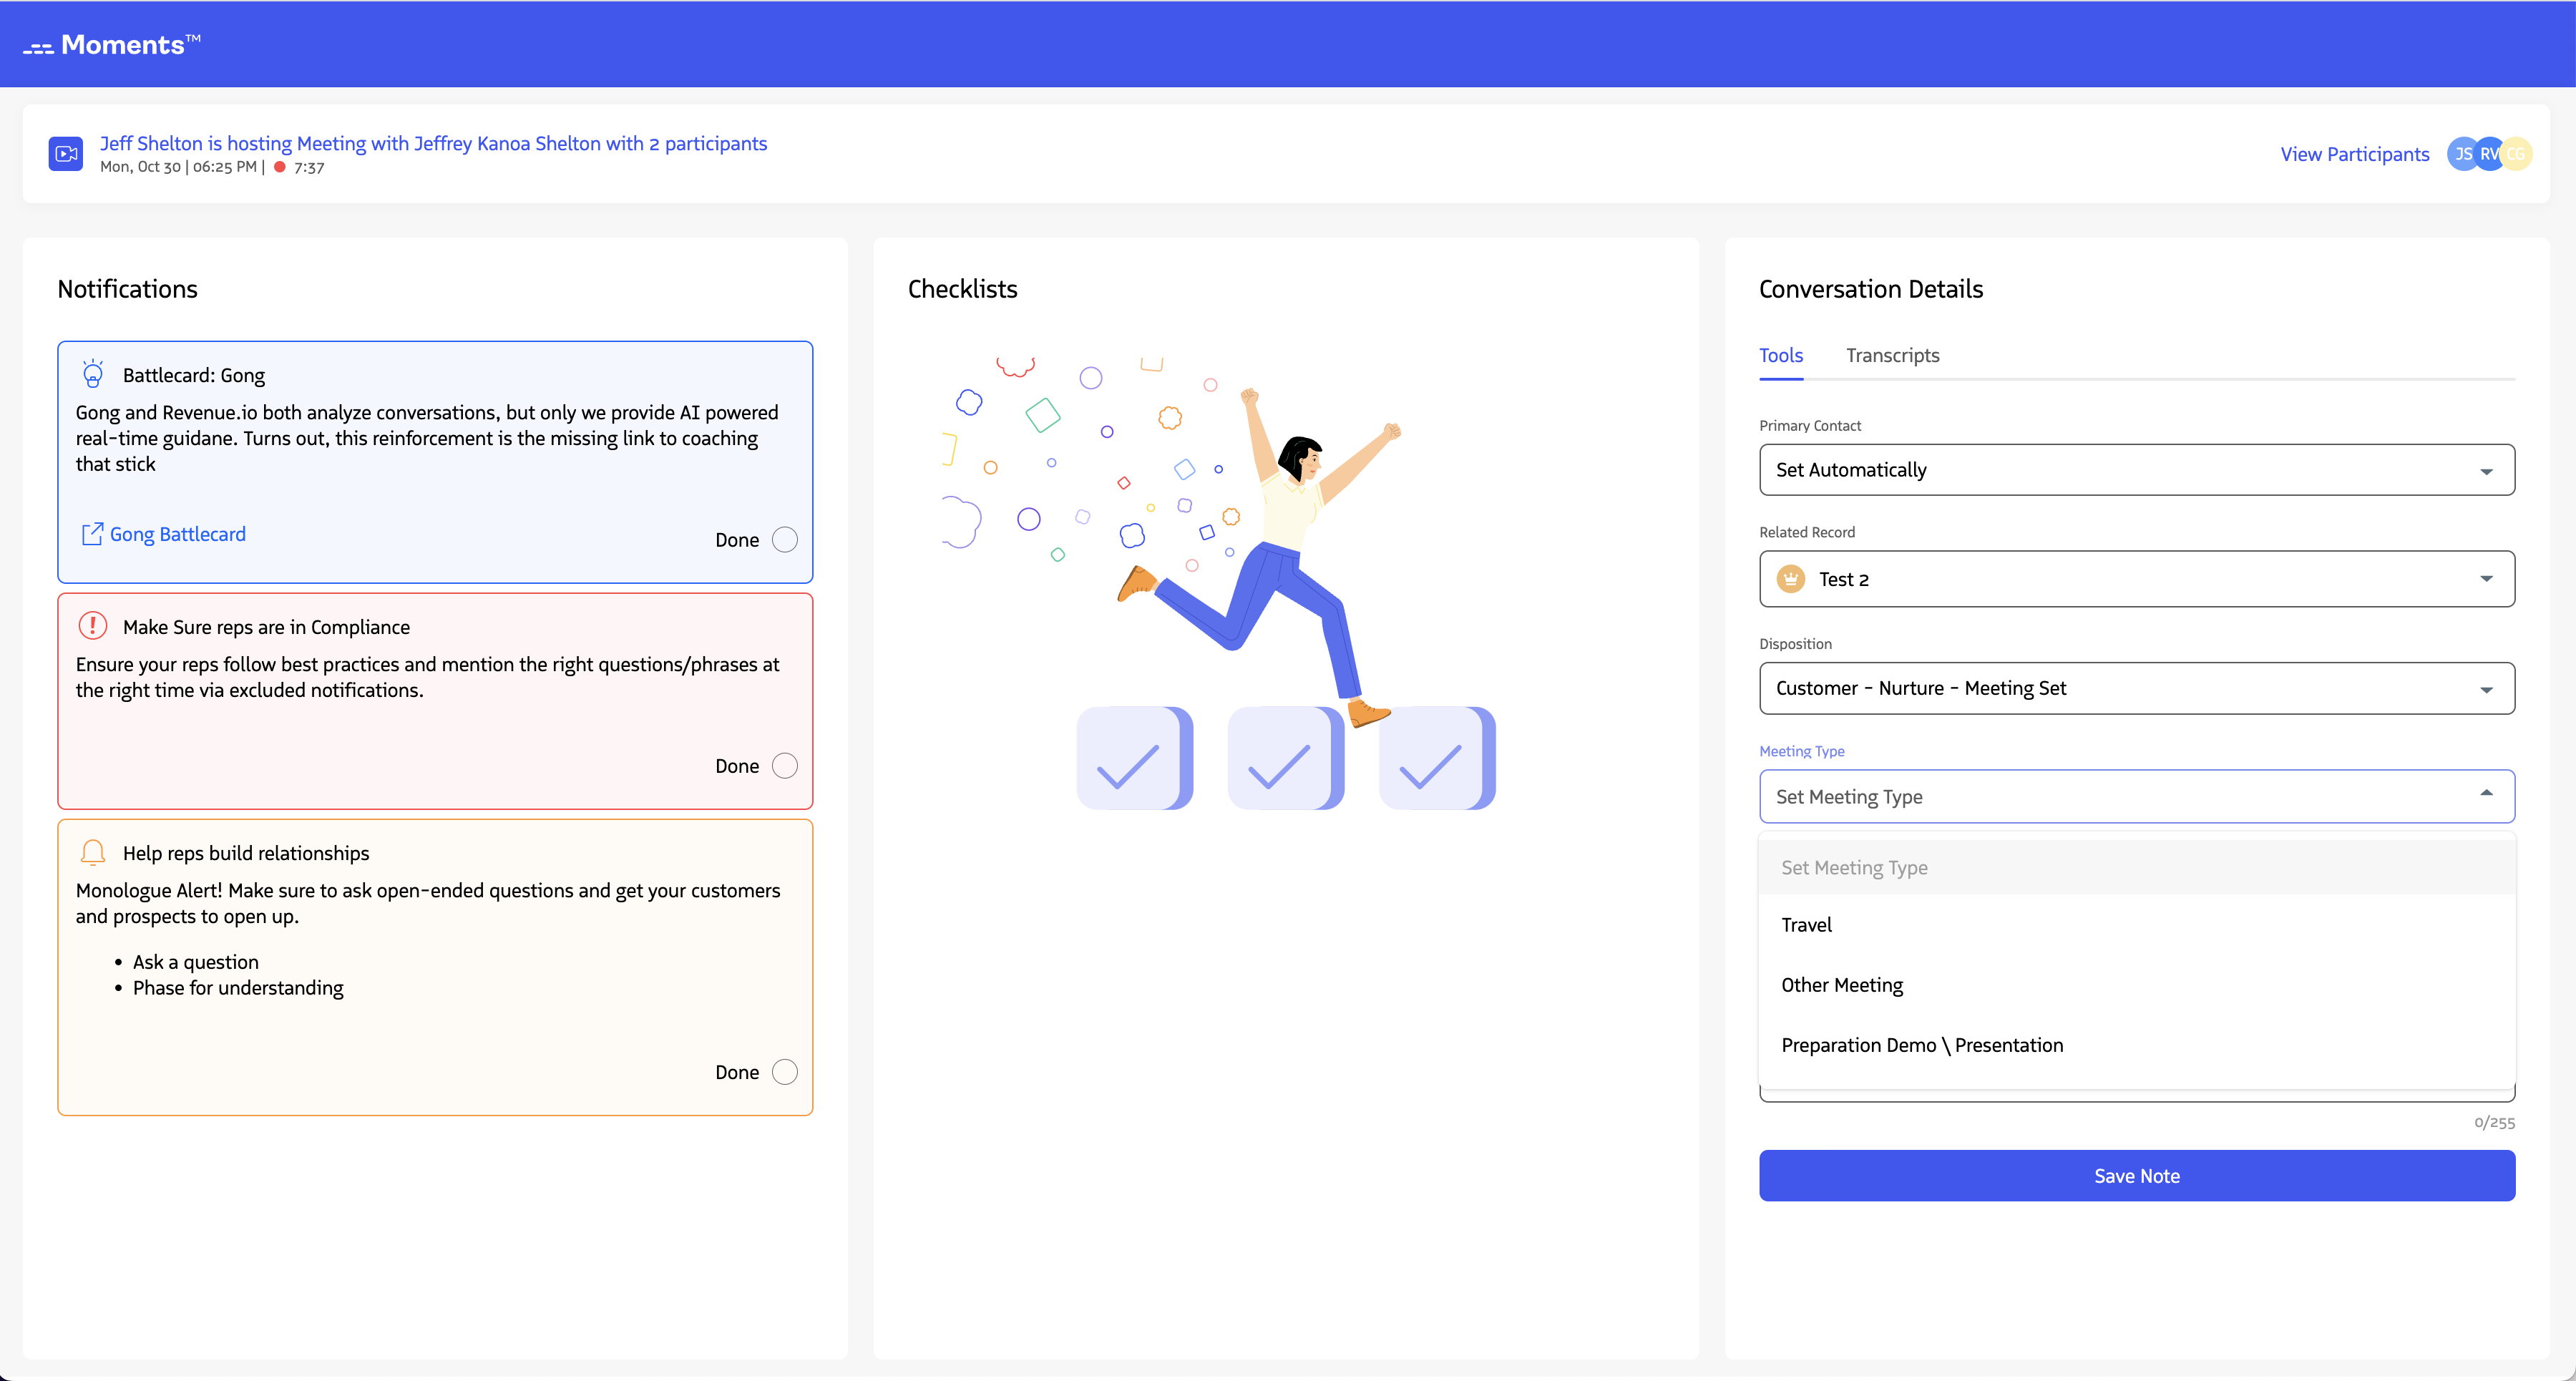
Add Meeting Notes
Enter free-form notes to log directly to Salesforce. Notes are saved to the description field of the associated activity record.
Steps to add notes:
- Enter your notes in the notes field
- Click Save Note to log the notes to Salesforce
Note: Any updates to the notes field require clicking Save Note again to update the value in Salesforce.