Creating your First Moments™ Notification
This guide walks you through creating your first Moments™ notification using a template. Templates provide pre-configured notifications that you can customize for your organization, making it easy to get started quickly.
Moments™ notifications deliver real-time coaching to agents during live conversations. When specific conditions are met (such as certain phrases being spoken, time elapsed, or behavioral metrics), agents receive targeted notifications to help guide their conversations.
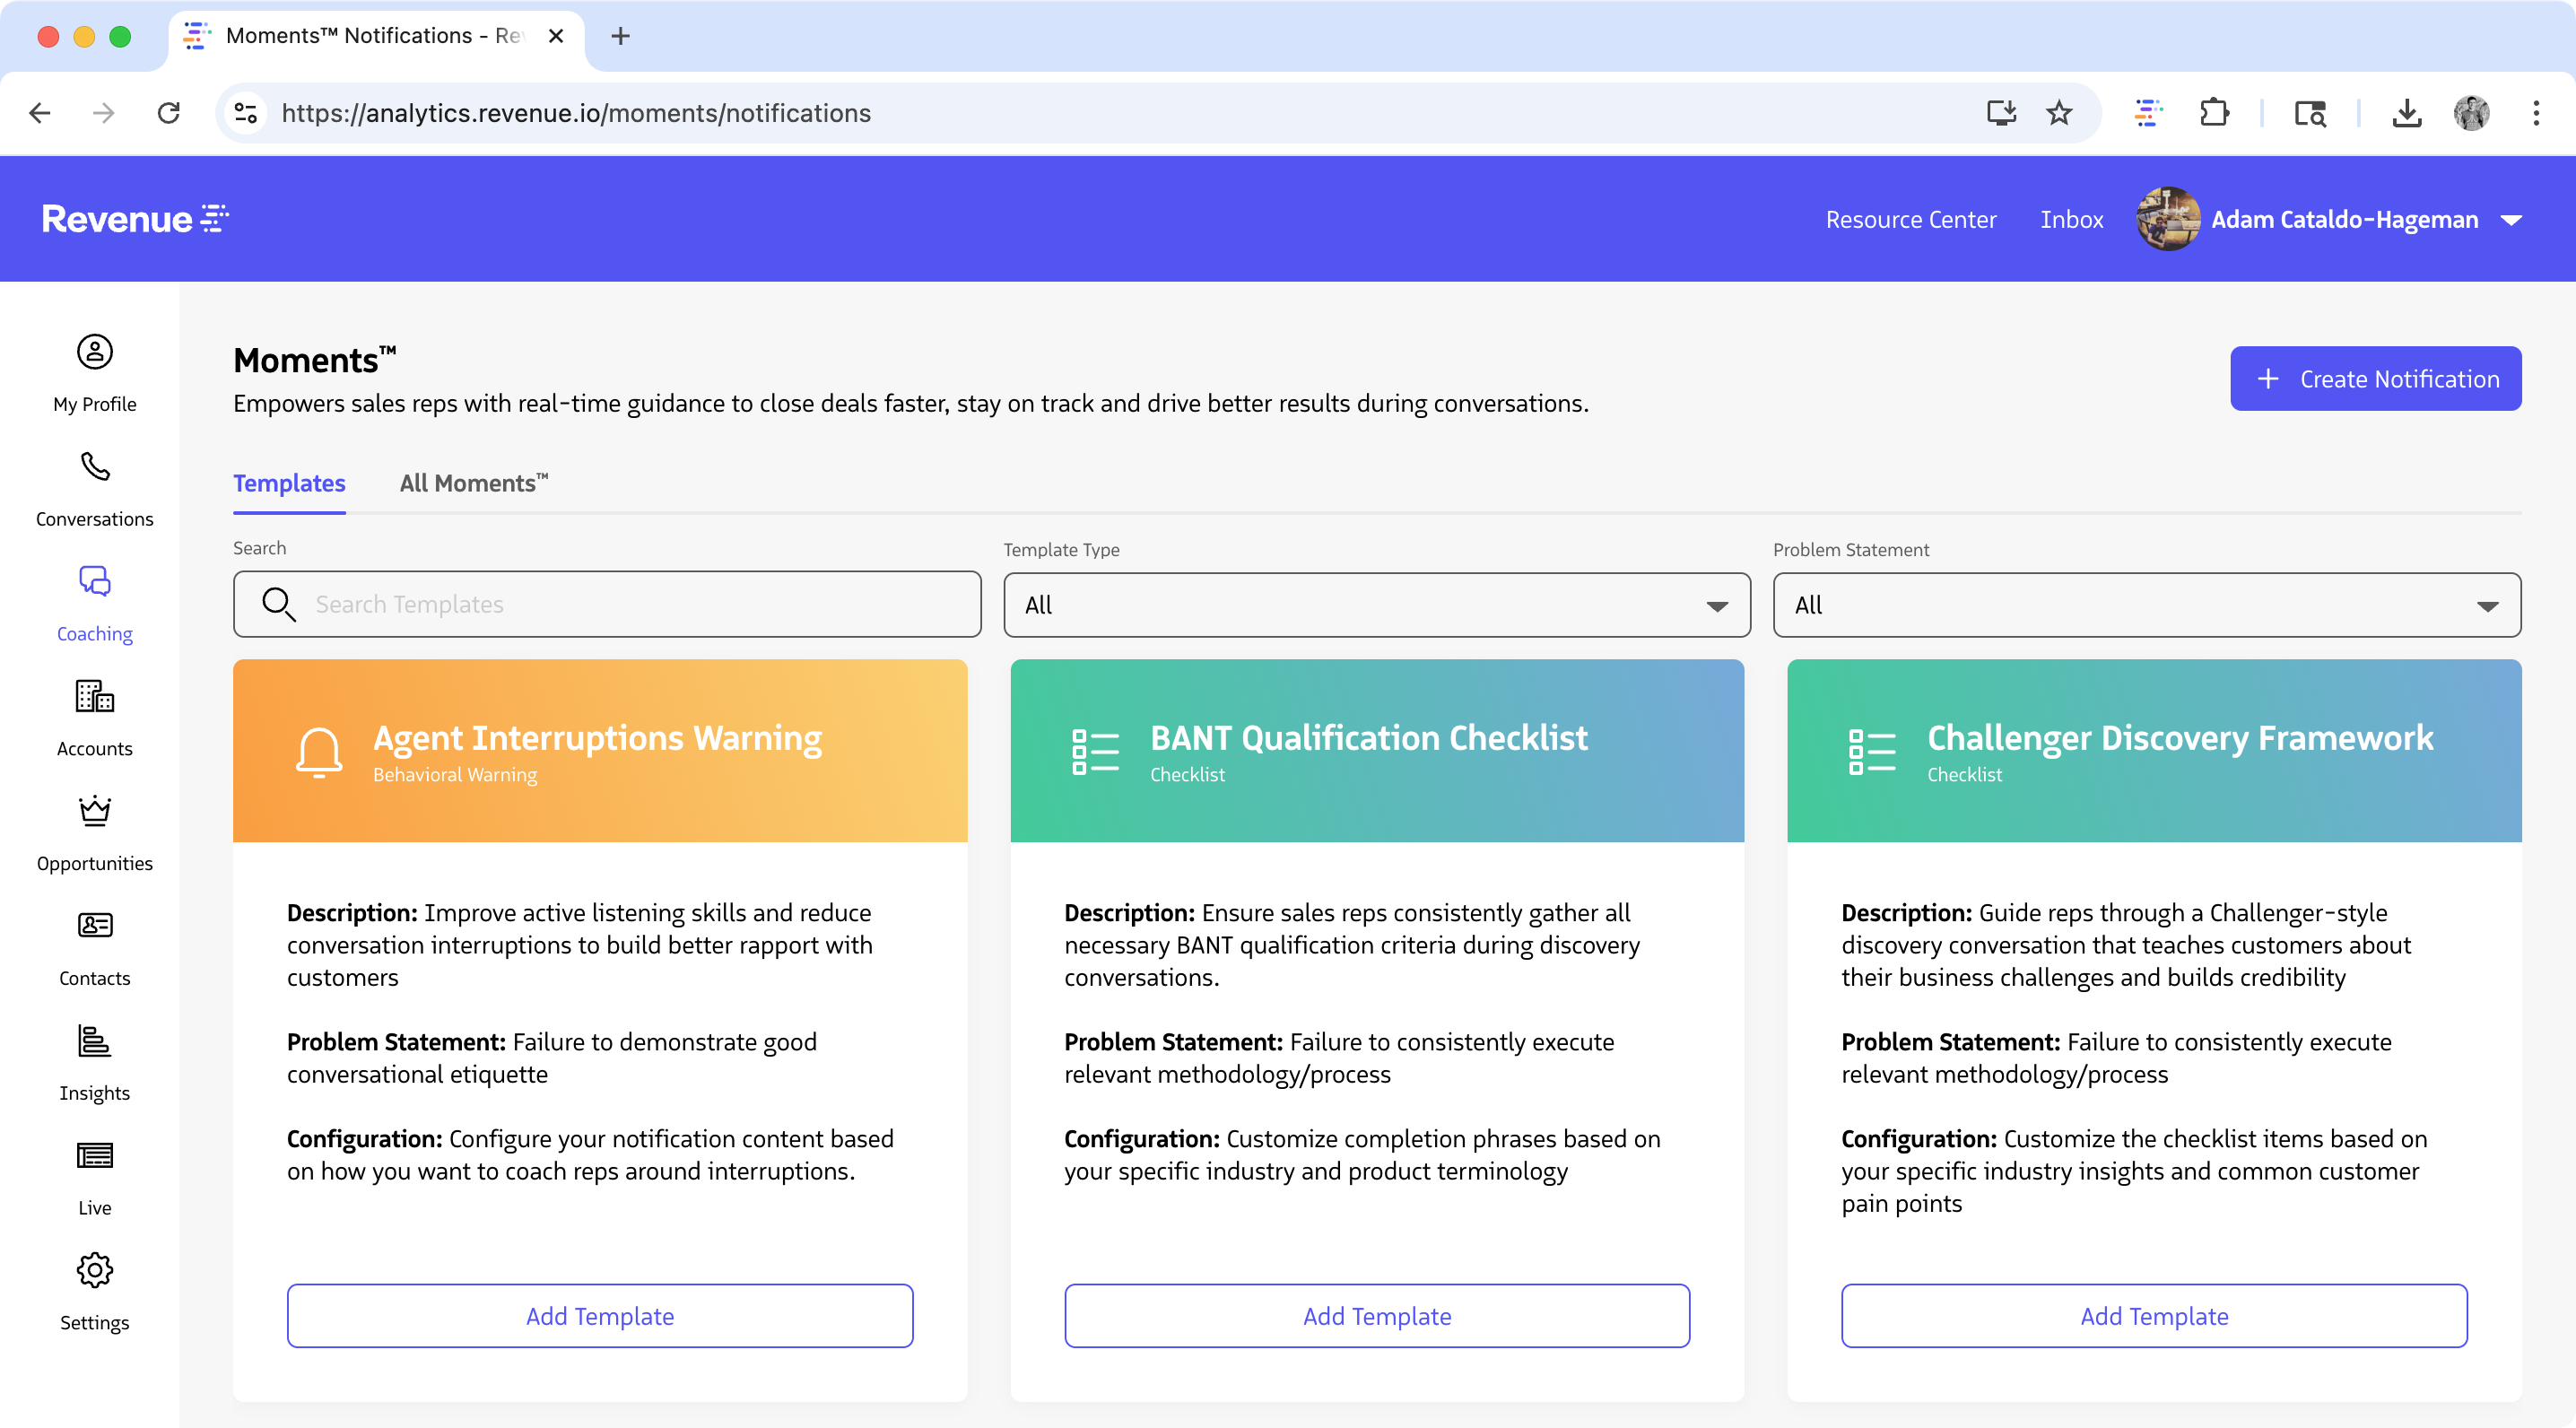
The easiest way to create your first notification is to use a template from the Templates Library. Templates are pre-configured notifications with content, triggering conditions, and targeting already set up. You can add a template to your account and customize it to fit your needs.
Templates Library in the Moments™ Console
Access the Moments™ Console
Before creating a notification, ensure you have access to the Moments™ Console:
- Navigate to the Revenue App in your browser
- Log in with your Salesforce credentials
- Hover over Coaching and click Moments
- Ensure you are on the Templates tab on the top navigation menu
Browse and Select a Template
The Templates Library contains pre-configured notifications to get you started quickly:
- Browse the available templates (e.g., Compliance Alerts, Sales Best Practices, Behavioral Warnings)
- Filter by Template Type or Problem Statement
- Review the template previews to find one that matches your use case
- Click the Add Template button to preview it

Browse templates in the Templates Library and click Add Template to preview
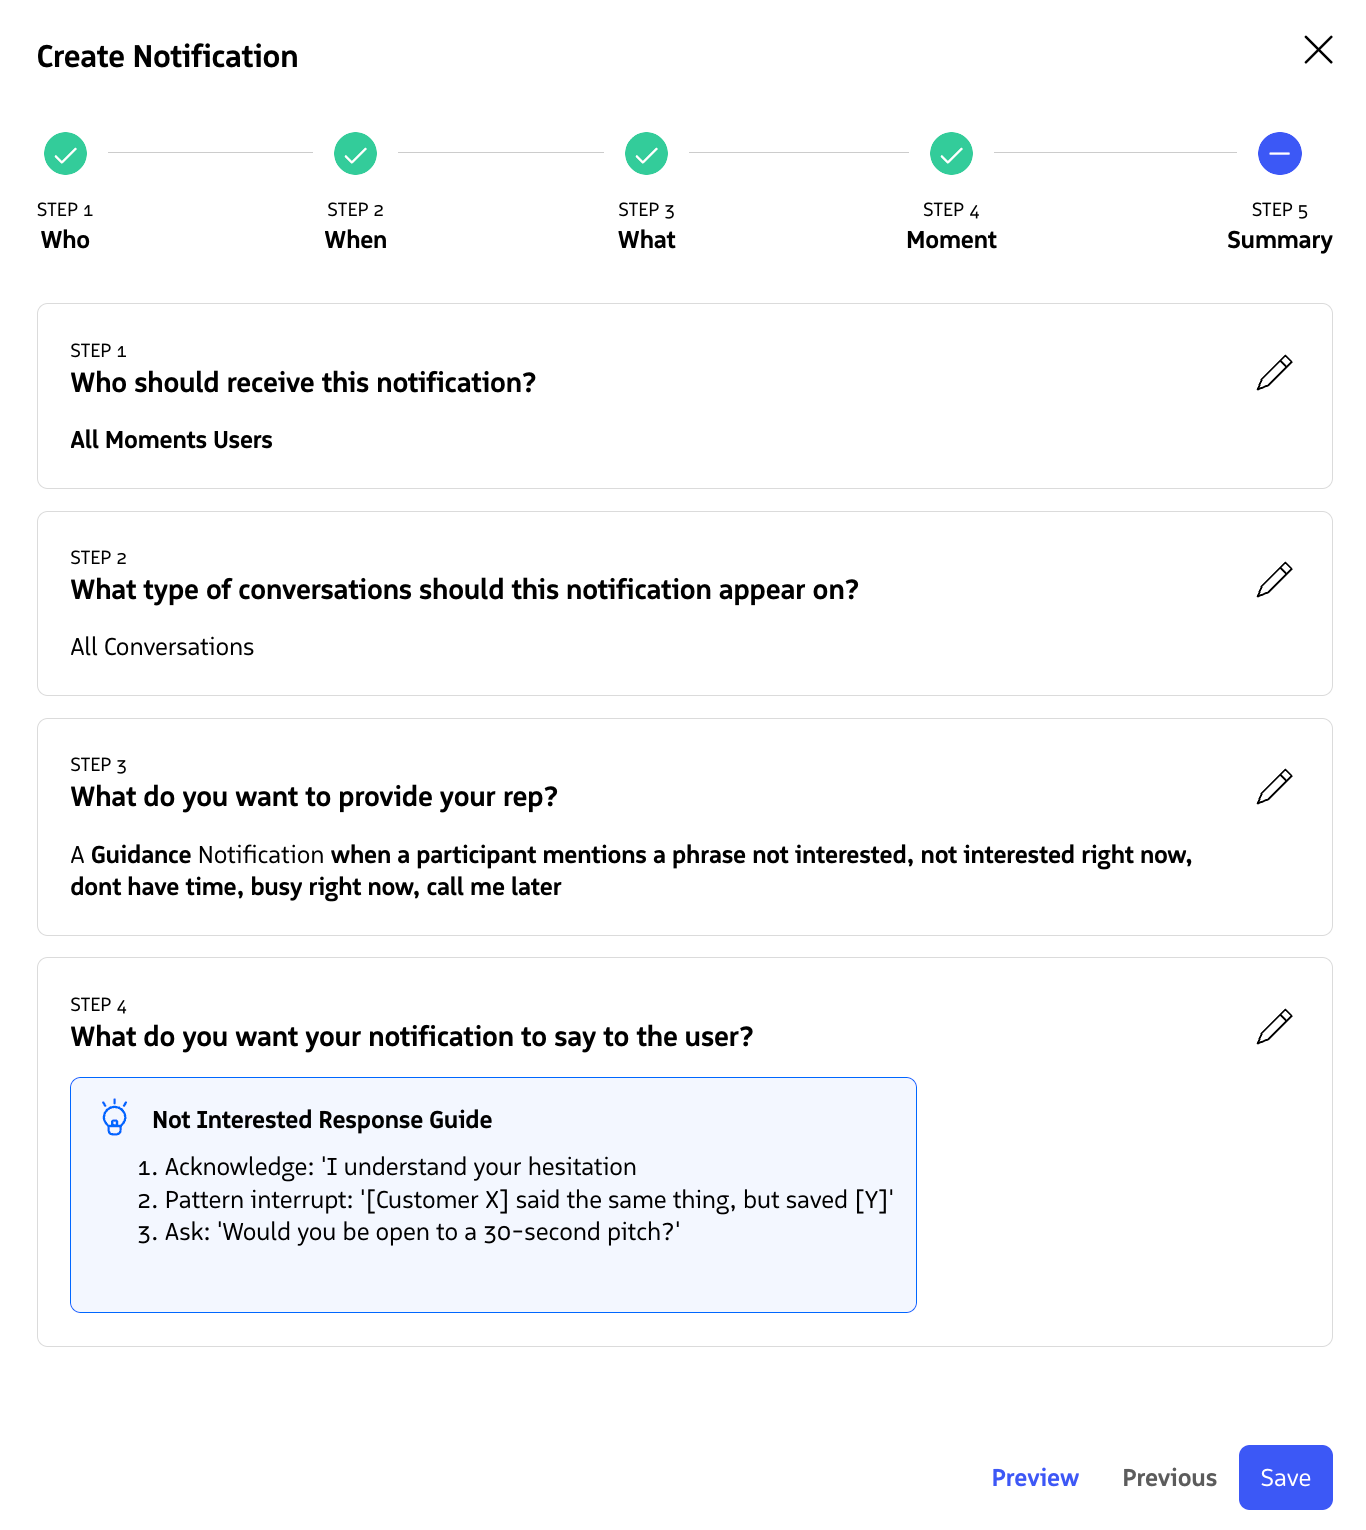
Review the template details in the preview panel, then click Save to add it to your account
Review the template details in the preview panel. To further customize the notification, you can click the pencil icon next to each step to dive deeper and edit its content or settings.
Click Save to create the Notification.
Enable Your Notification
After saving, you will be brought to the All Moments™ page.
Your notification is created but not yet active. To enable it:
- Find your notification in the list
- Toggle the switch under the Status column to activate it

Enable your notification
Next Steps
Now that you’ve created your first notification using a template:
- Explore creating custom notifications from scratch without templates
- Review Moments™ reports to see how your notifications are performing