Create a Sequence
Create and configure a sequence to guide participants through the sales process. Follow the steps below to create a new sequence, define criteria and actions, and activate it.
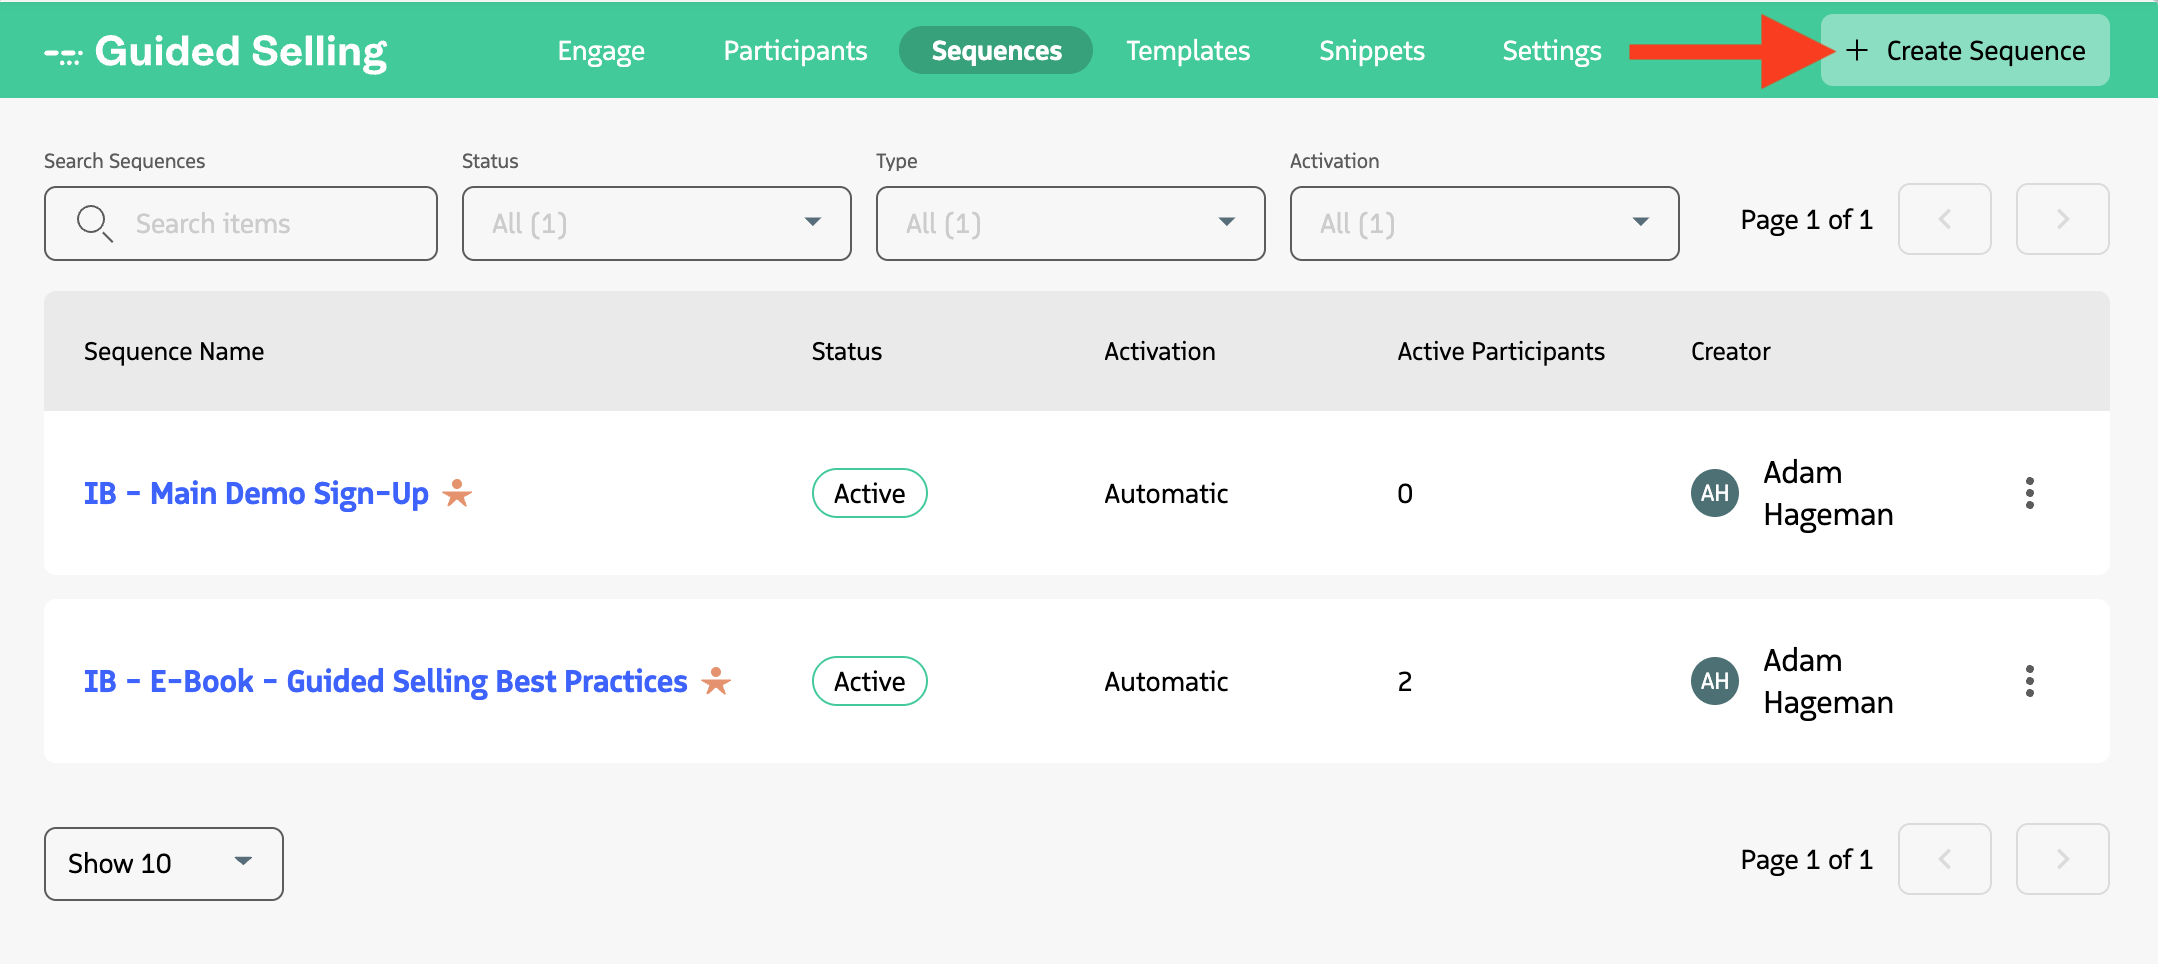
How to access Sequences
- Open Salesforce.
- Click the icon (App Launcher) in the Salesforce header to open the app menu.
- Search for Guided Selling.
- Click the
Sequencestab. - Click
Create Sequenceat the top right of the page.
Enter a Sequence name
Enter a name for your sequence. Consider using a naming structure that makes the sequence purpose clear, for example, prefix with IB/OB for Inbound or Outbound, or include team or campaign name. Users can filter by sequence name on the Engage tab; a clear name can help users find the right actions to prioritize.
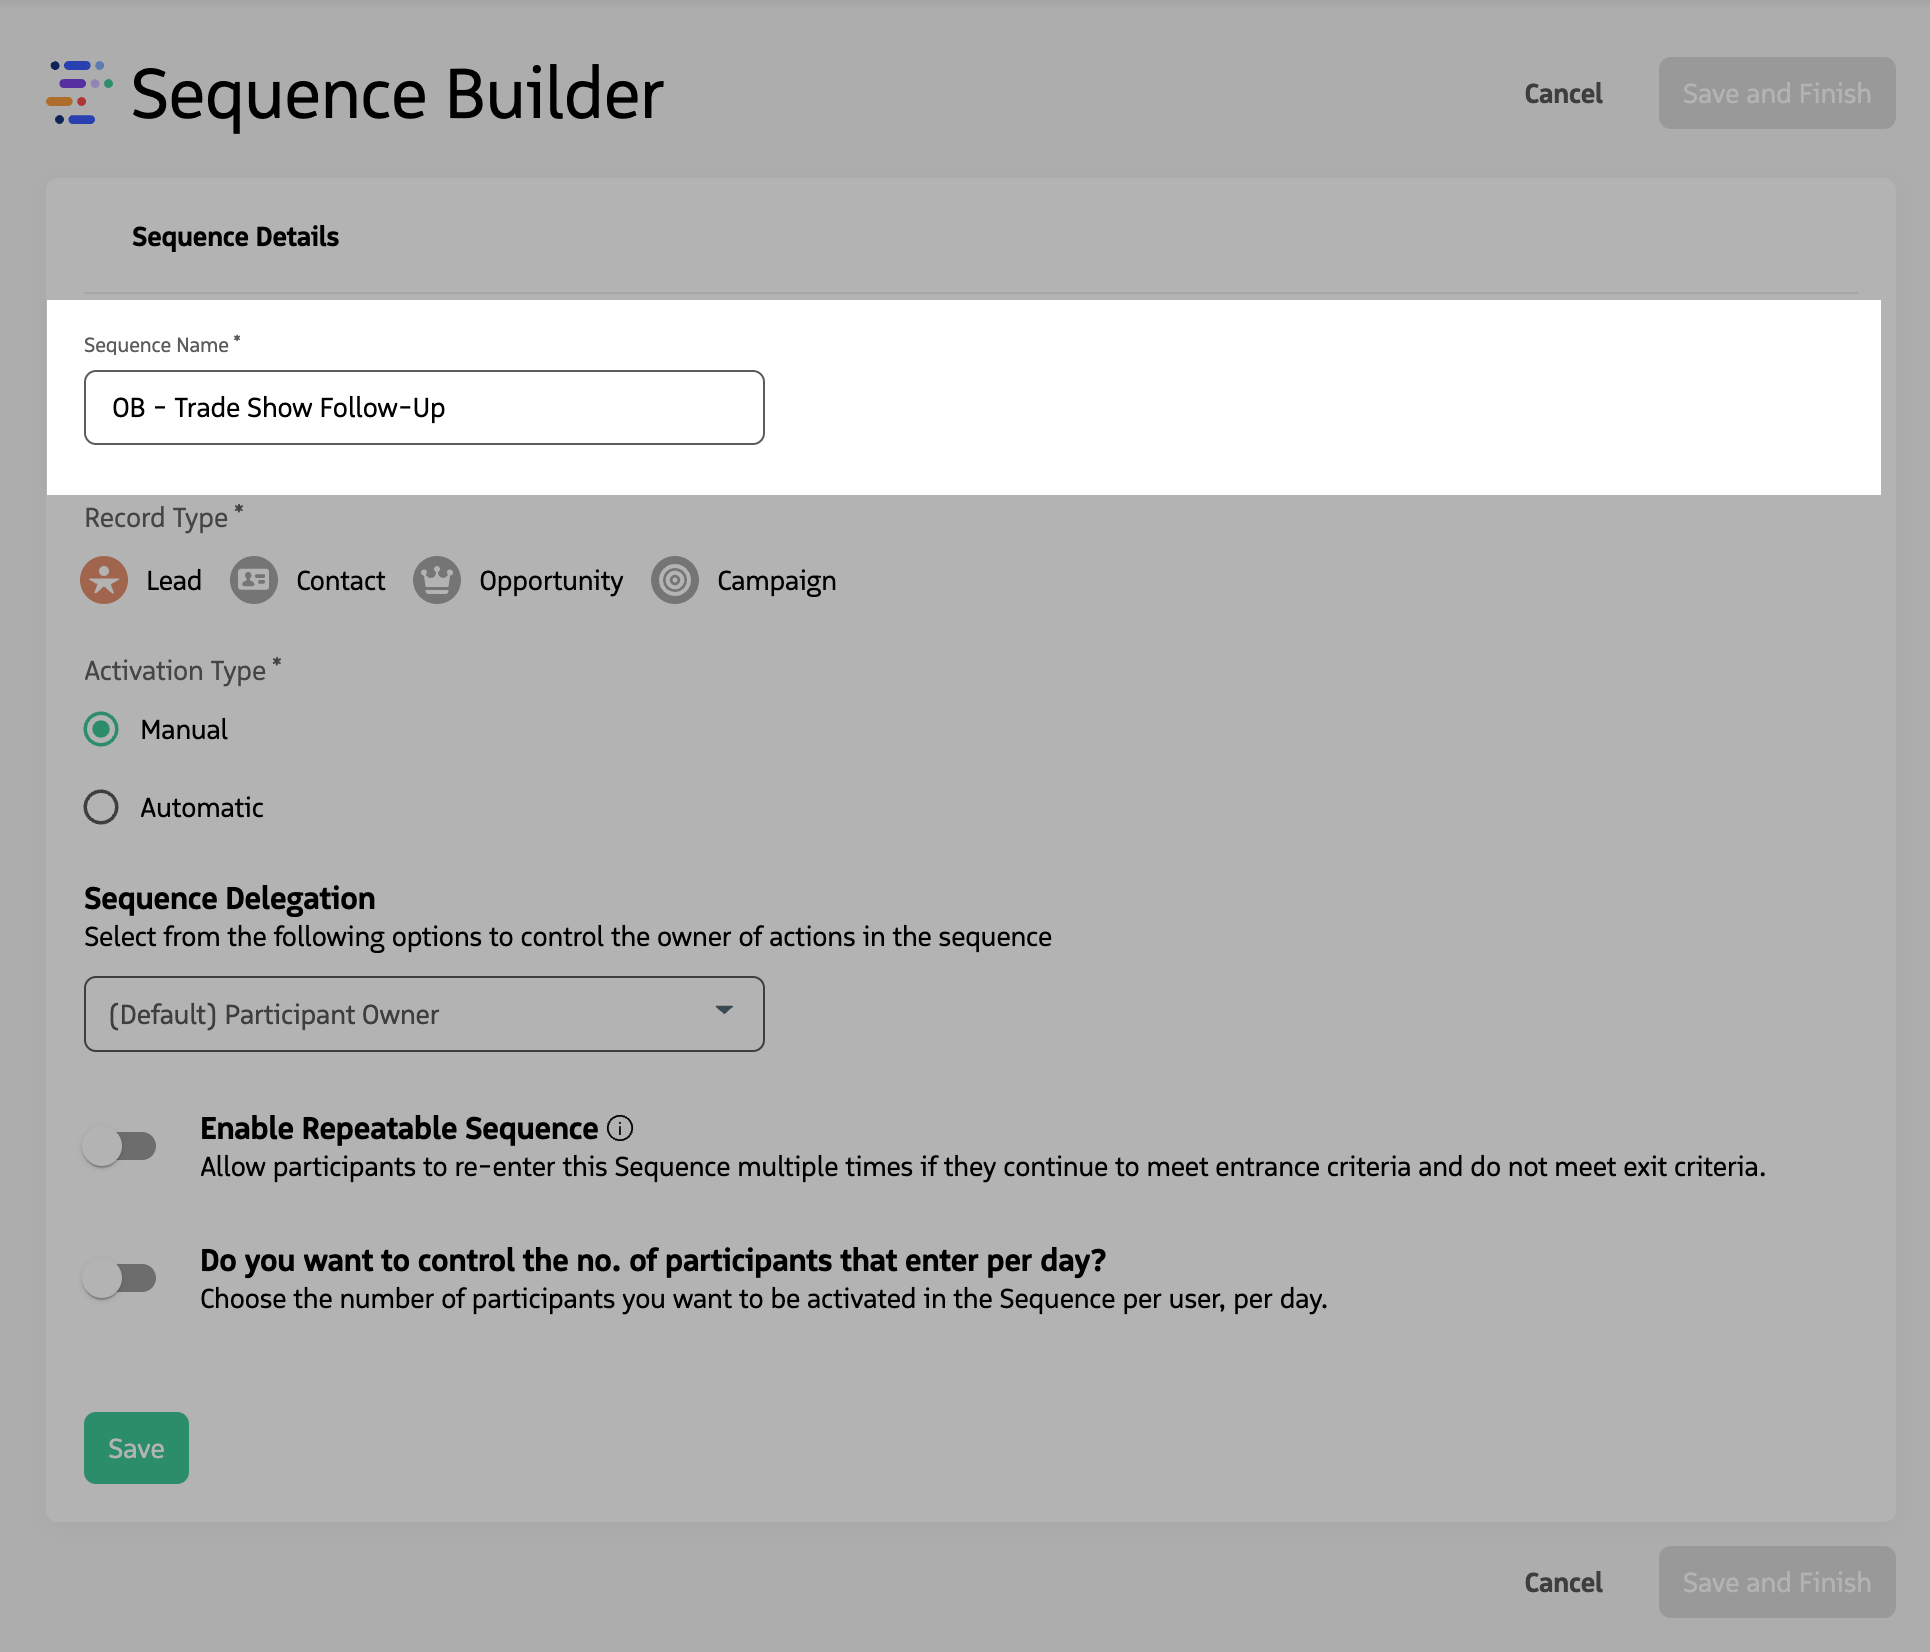
Configure Sequence details
Select the record type
The Record Type (Lead, Contact, Opportunity, or Campaign) defines which records can be enrolled in the sequence and which fields are available for criteria and delegation. Record type cannot be changed after the sequence is saved. For more information, see Record Types.
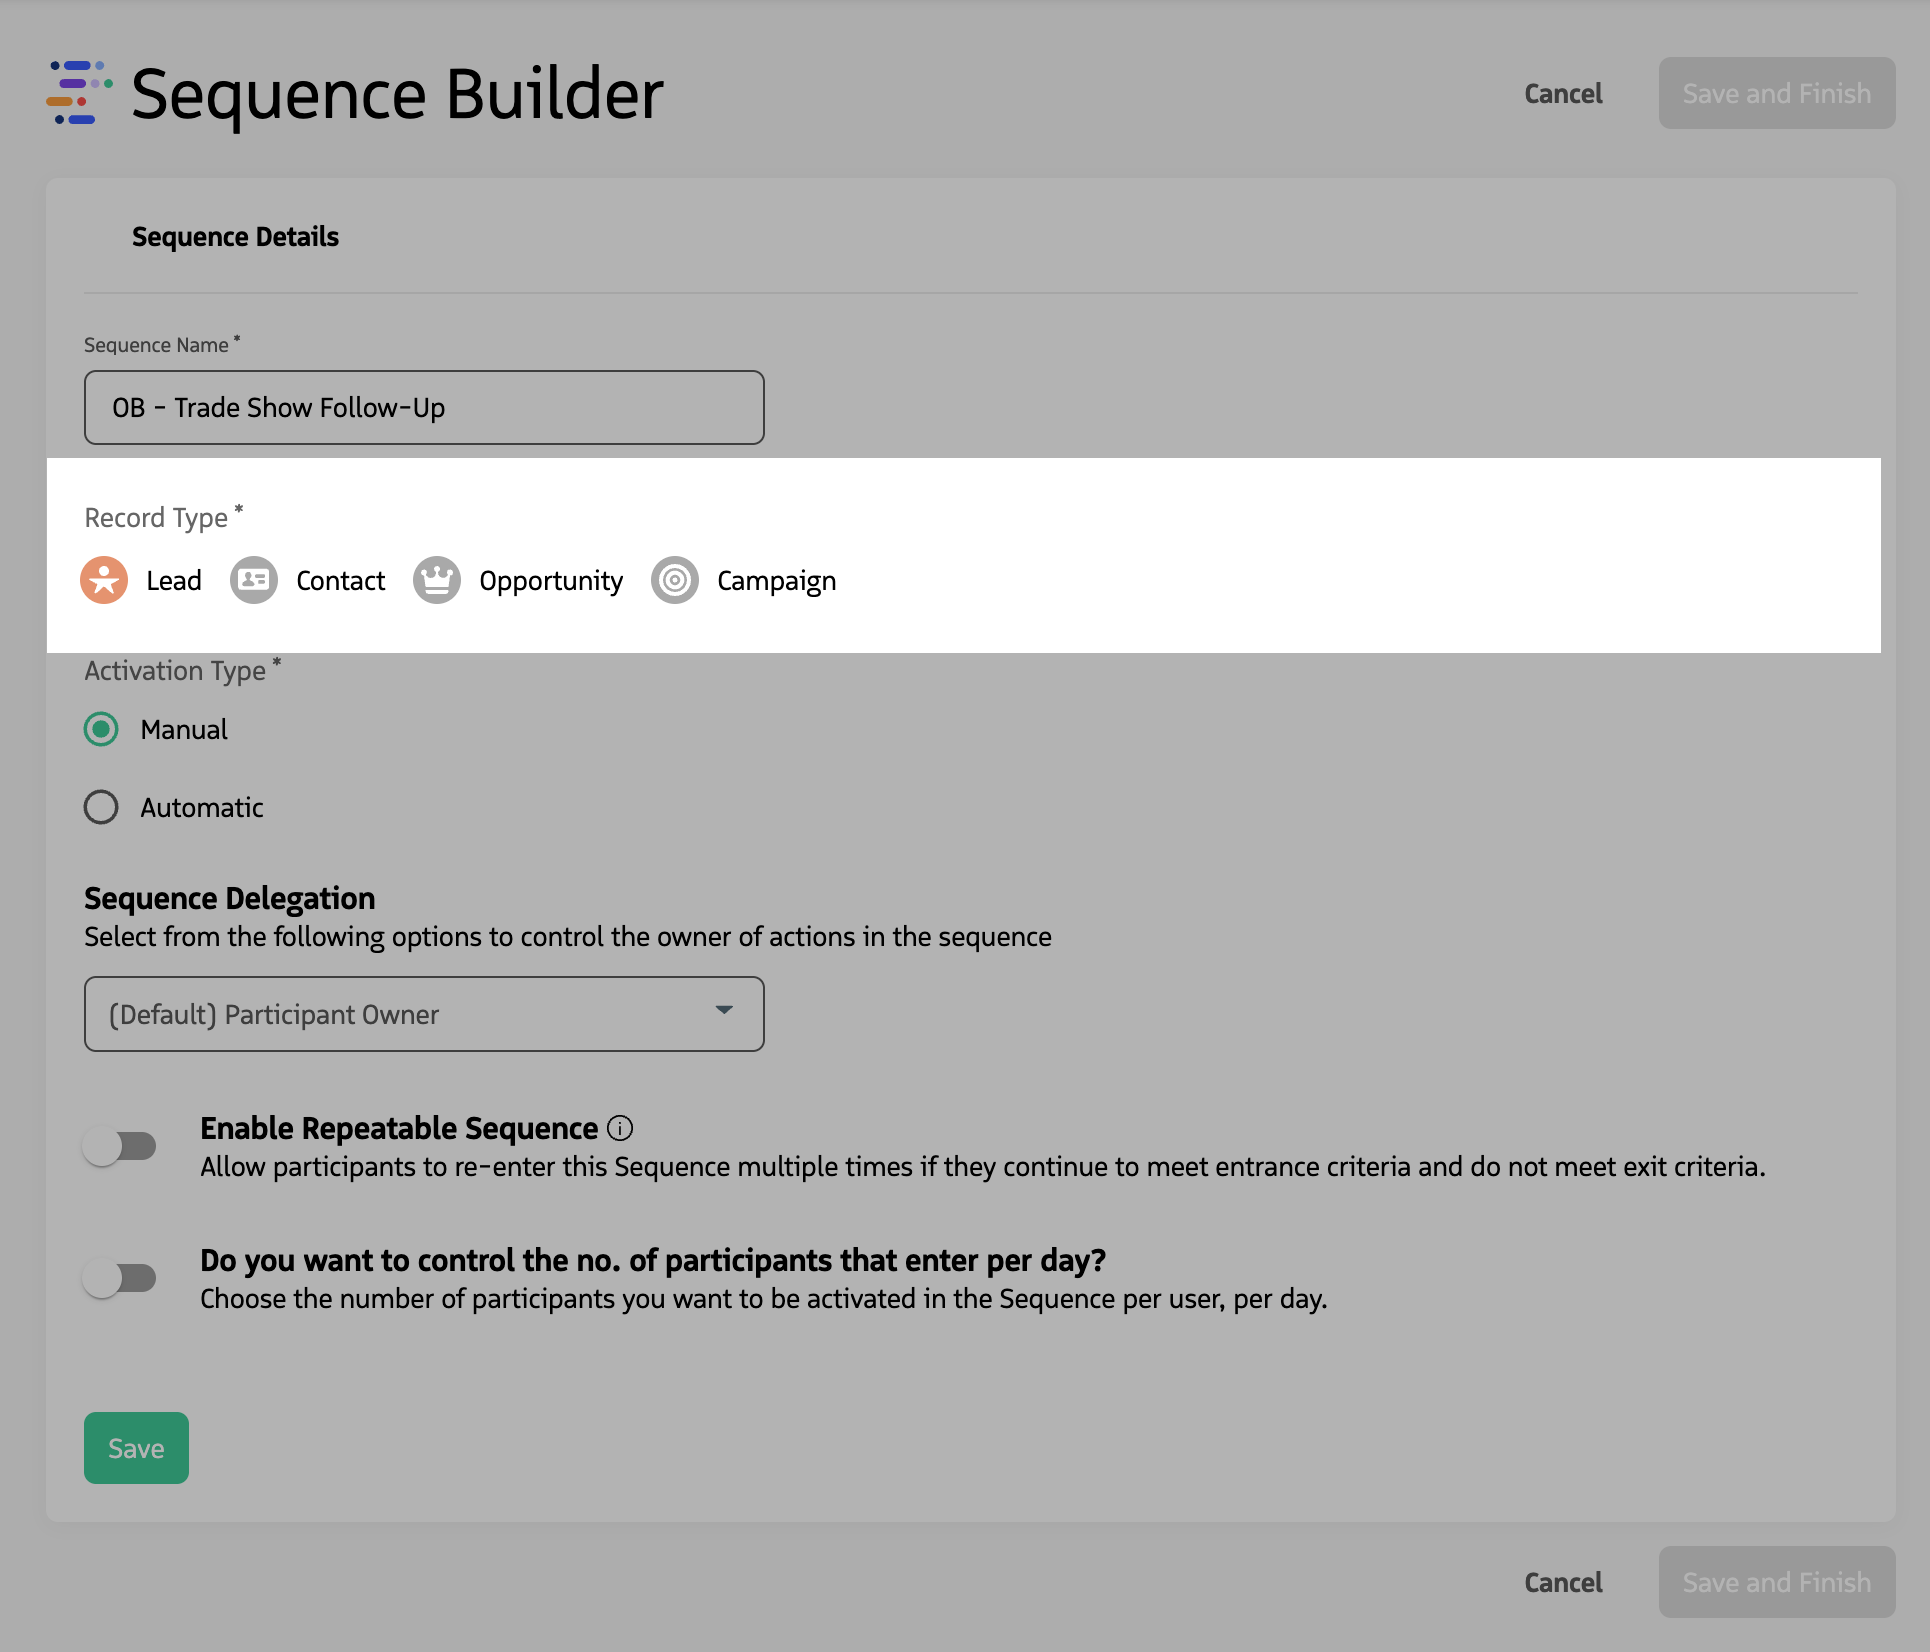
Choose activation type
Activation type controls how participants enter the sequence: Manual (enrolled only by user action, from an individual record or from a list view) or Automatic (enrolled when they meet entrance criteria). For automatic sequences you must set a priority (P1–P5); participants can be in only one sequence at a time, and priority determines which sequence wins when multiple sequences match. For more information, see Activation Type & Priority.
If this is your first time creating a sequence, start with Manual. This is also a good approach if you want to validate a sequence before automating it. You can change a sequence from Manual to Automatic later.
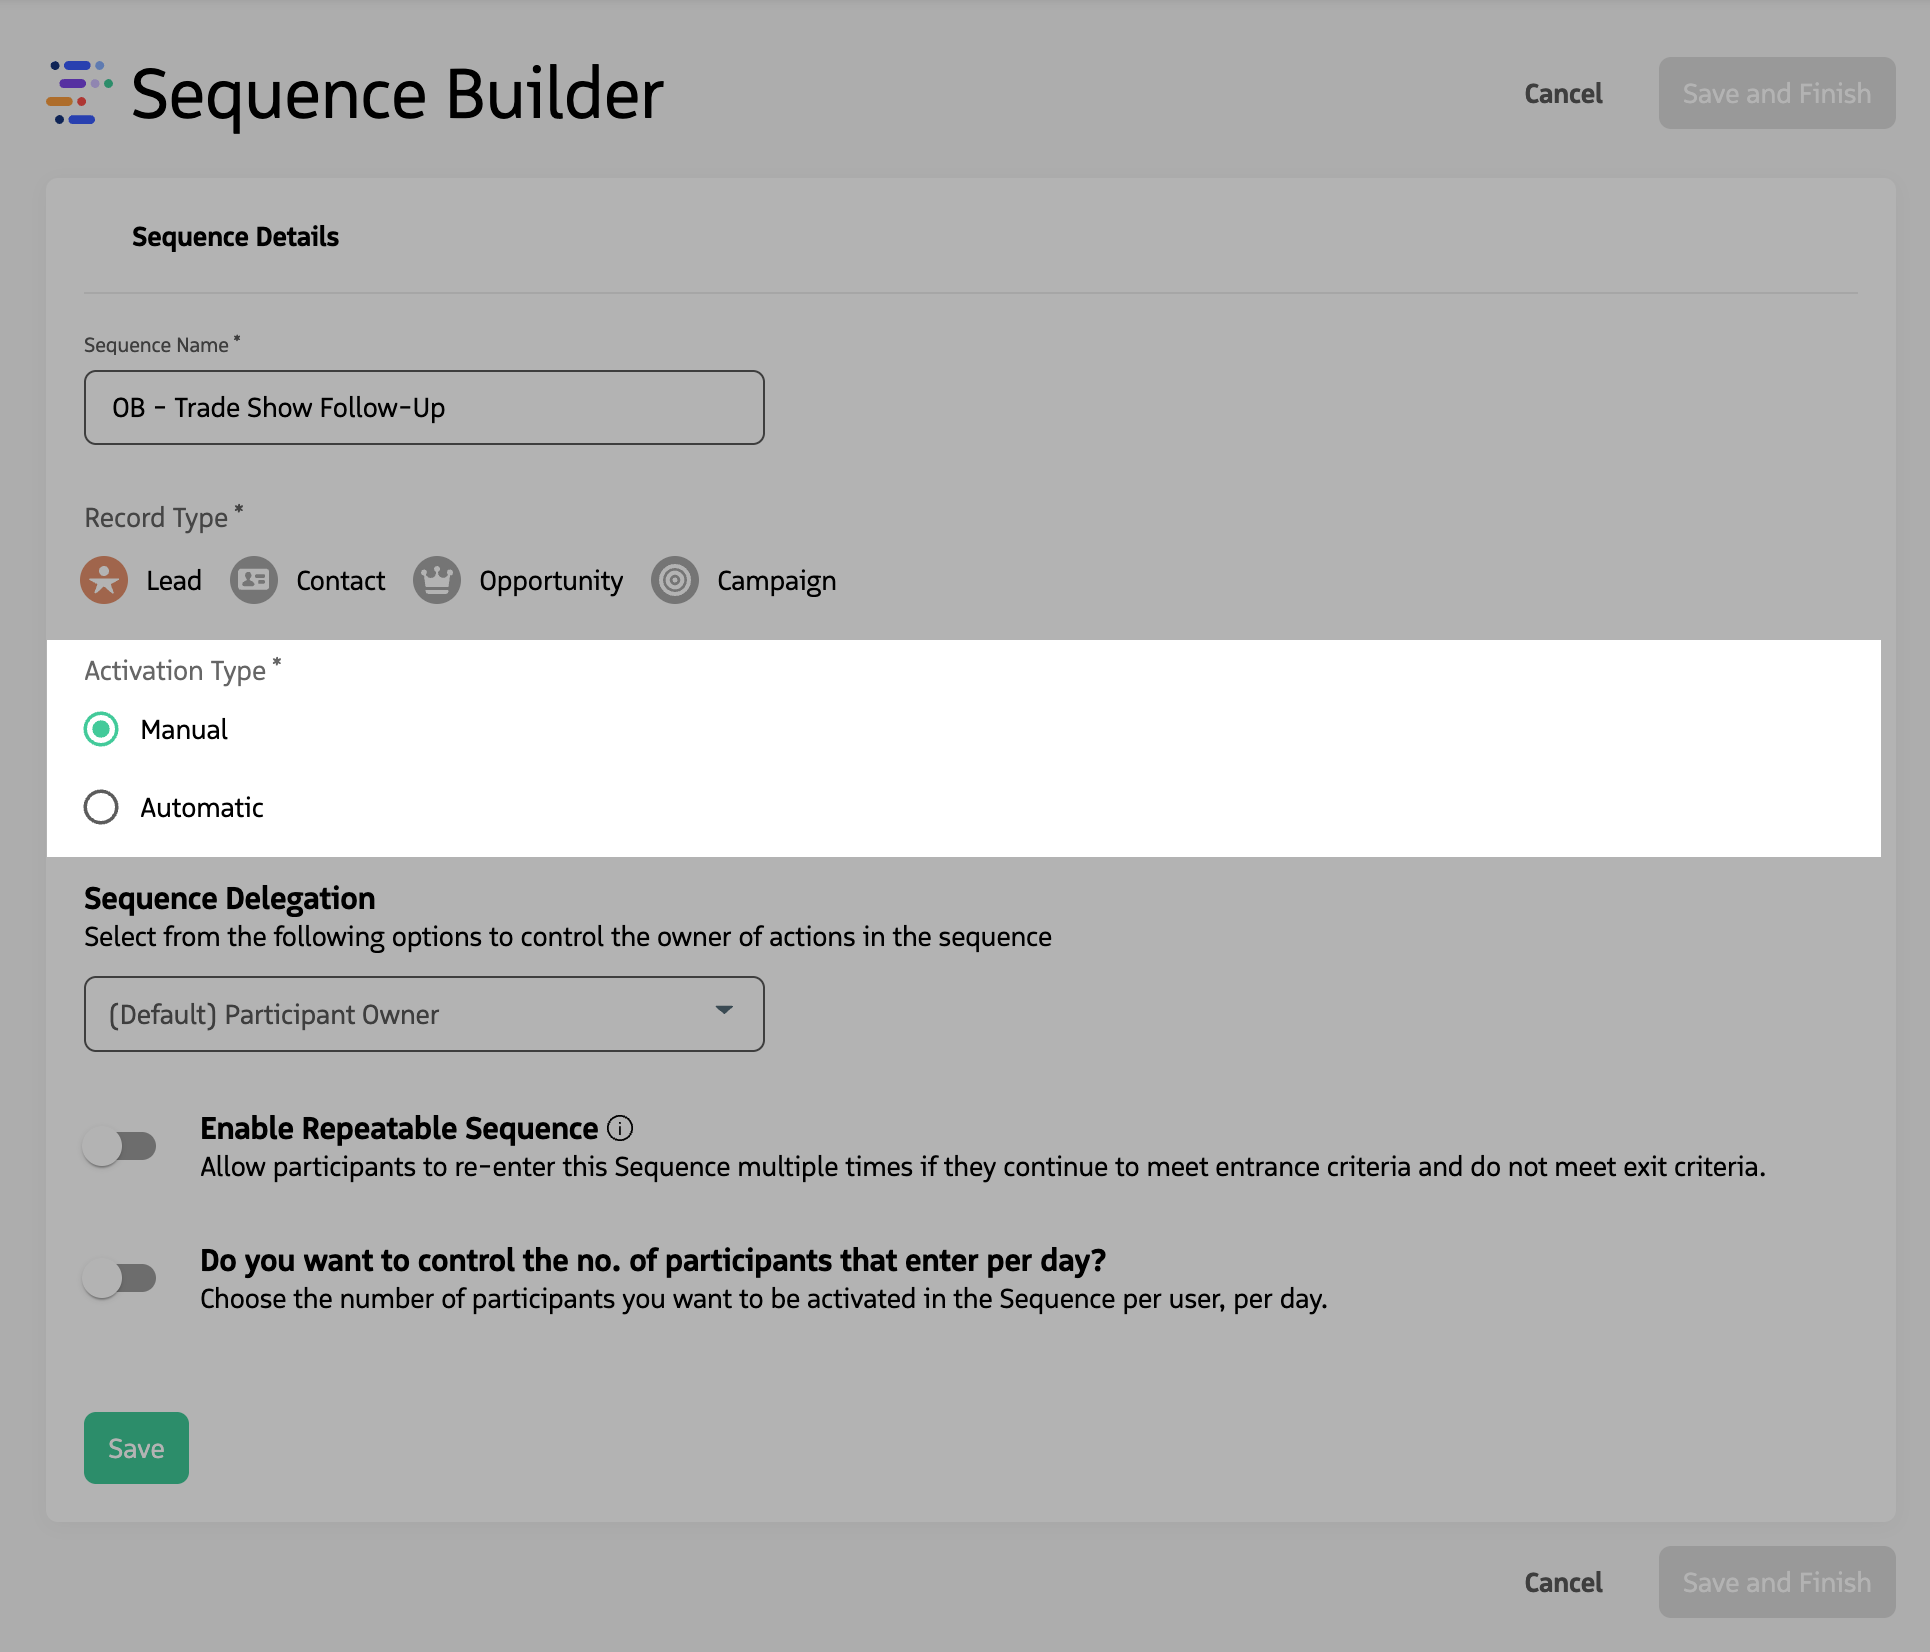
Advanced settings
You can configure delegation, repeatable (re-entry), and slow drip before saving. Each option is described below.
- Delegation — Use when the record owner is not the user who will run the sequence. Delegation assigns who owns and executes participant actions (for example, via a User lookup on the record). You can set it at the sequence level or override per action. For more information, see Sequence & Action Delegation.
- Repeatable — A repeatable sequence lets the same participant re-enter after completing all actions and exiting, as long as they still match entrance criteria and do not match exit criteria; useful for nurture or re-engagement. For more information, see Repeatable Sequences.
- Slow Drip — For sequences that match a large number of records, Slow Drip limits how many participants are activated per day so users are not overwhelmed. For more information, see Slow Drip.
Click Save to continue to the next steps.
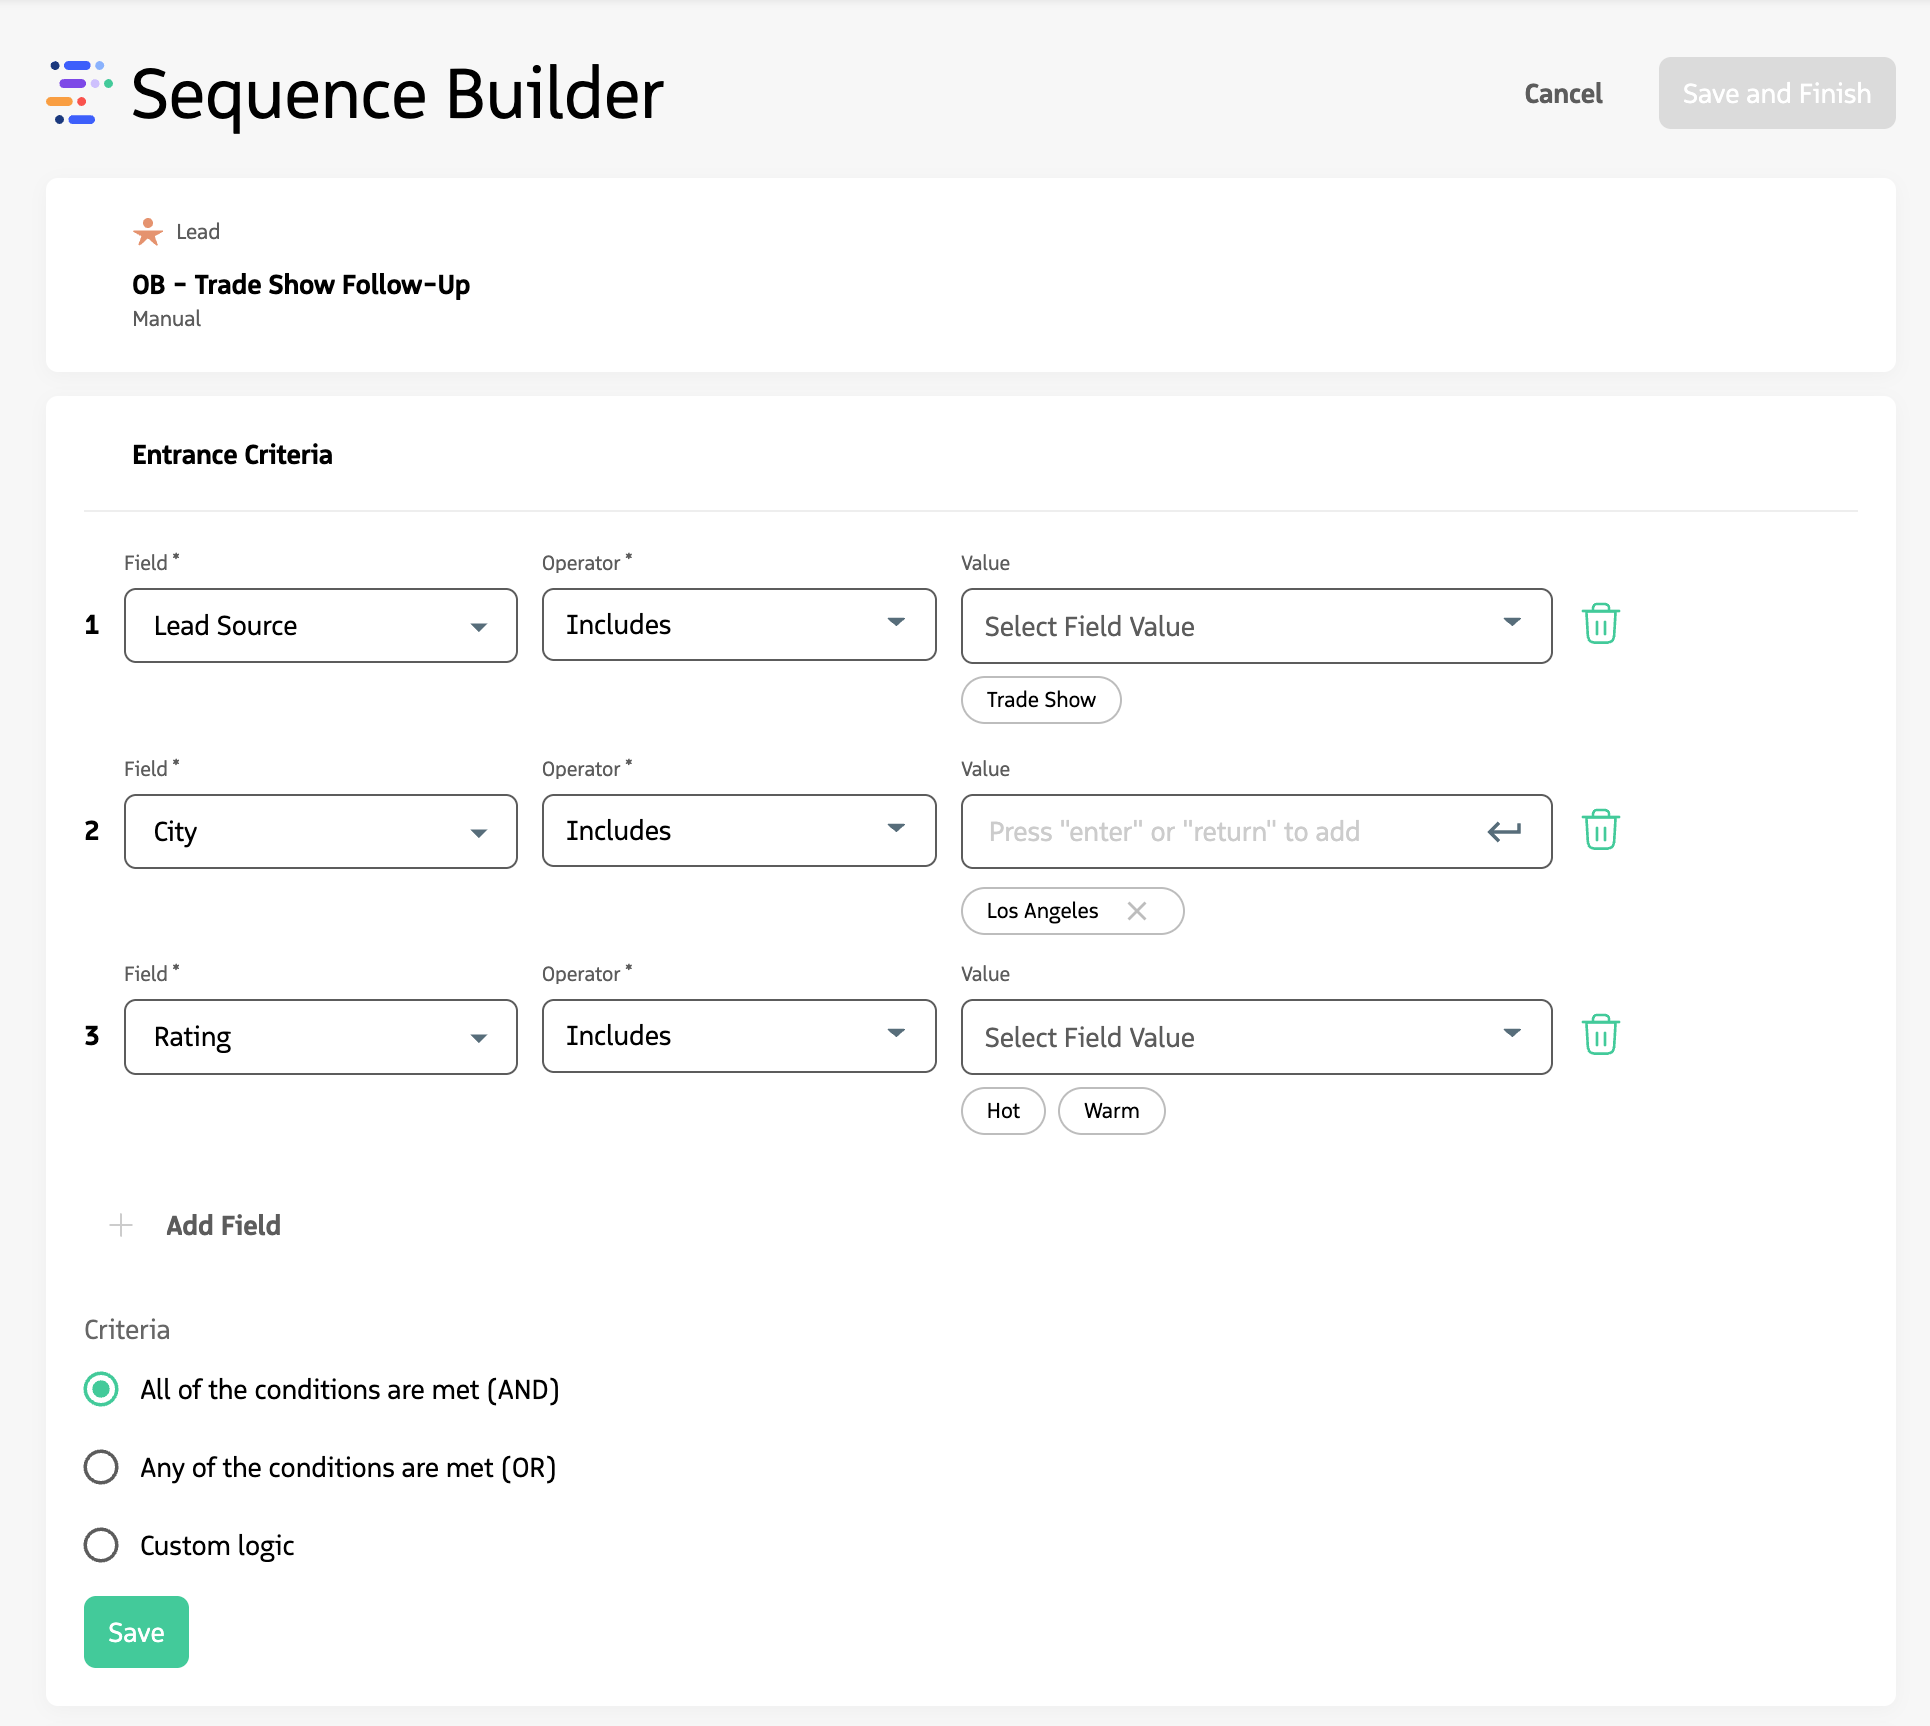
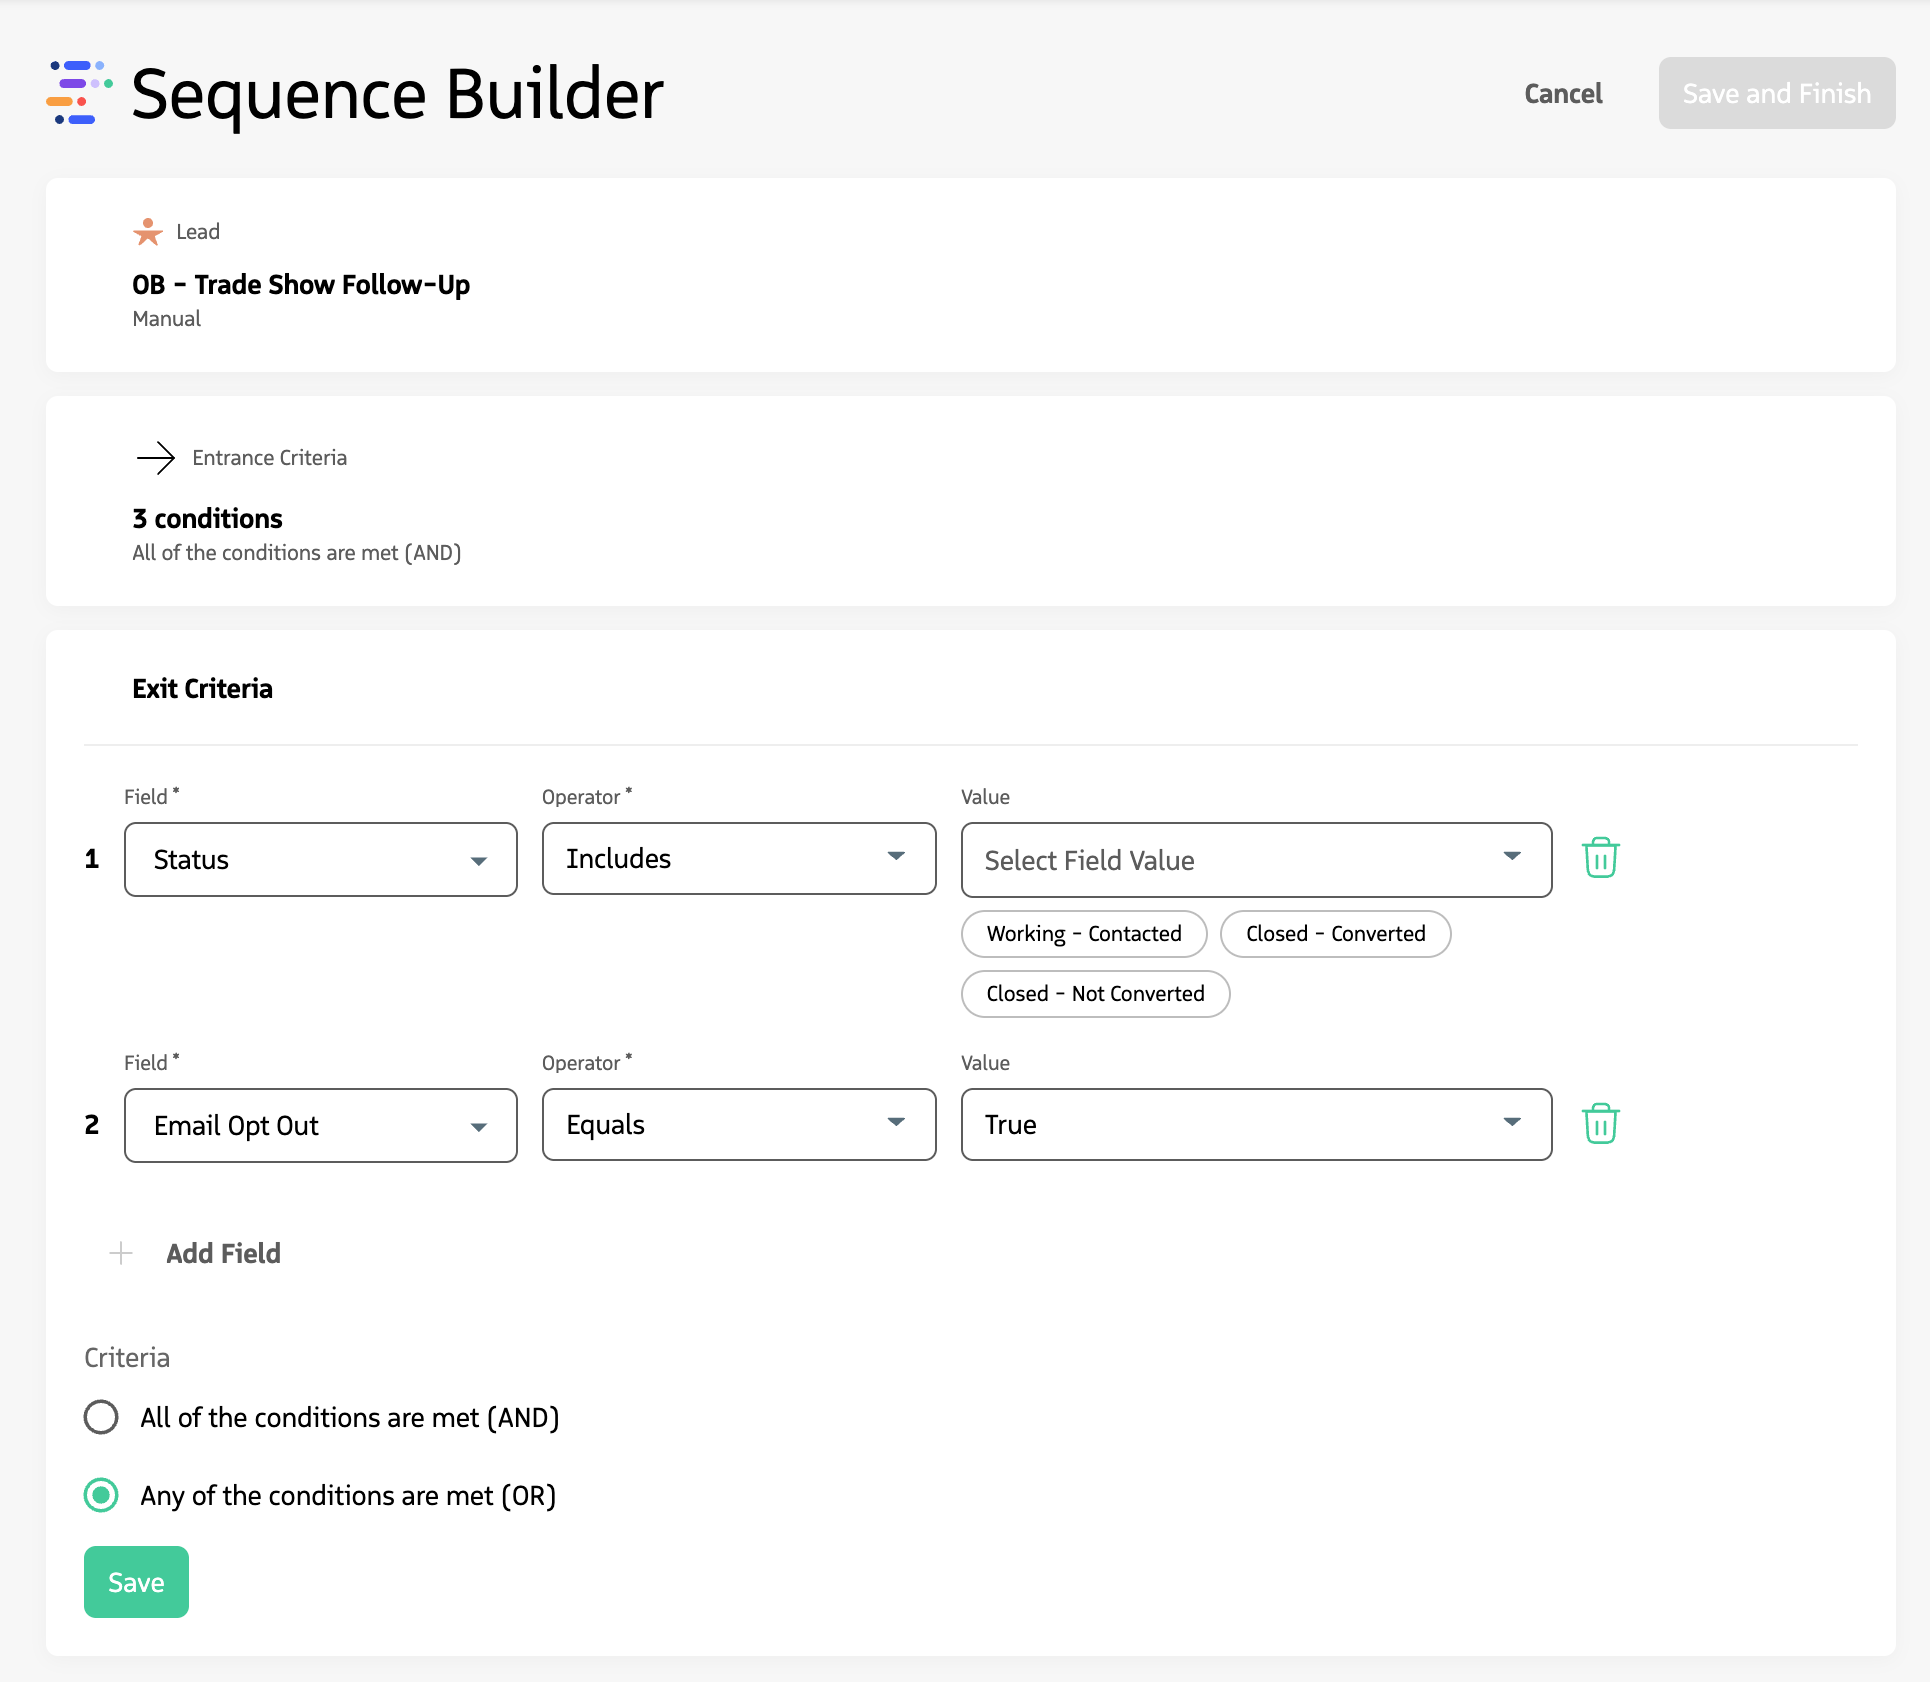
Define entrance and exit criteria
Entrance criteria determine when a record can be added to the sequence (using field, operator, and value). Exit criteria determine when a participant is automatically removed. The fields available depend on the record type. For more information, see Sequence Entry & Exit Criteria.
Configure entrance criteria so only the right records enter the sequence. Add one or more conditions (field, operator, value).
Select how conditions combine: AND (all must match), OR (any one must match), or CUSTOM — for more than three criteria, build a custom expression such as
1 AND (2 OR 3).Click
Save.
Configure exit criteria so participants are removed when appropriate (for example, when they engage or are disqualified). Check that the criteria logic (AND, OR, or CUSTOM) is correct.
Click
Save.
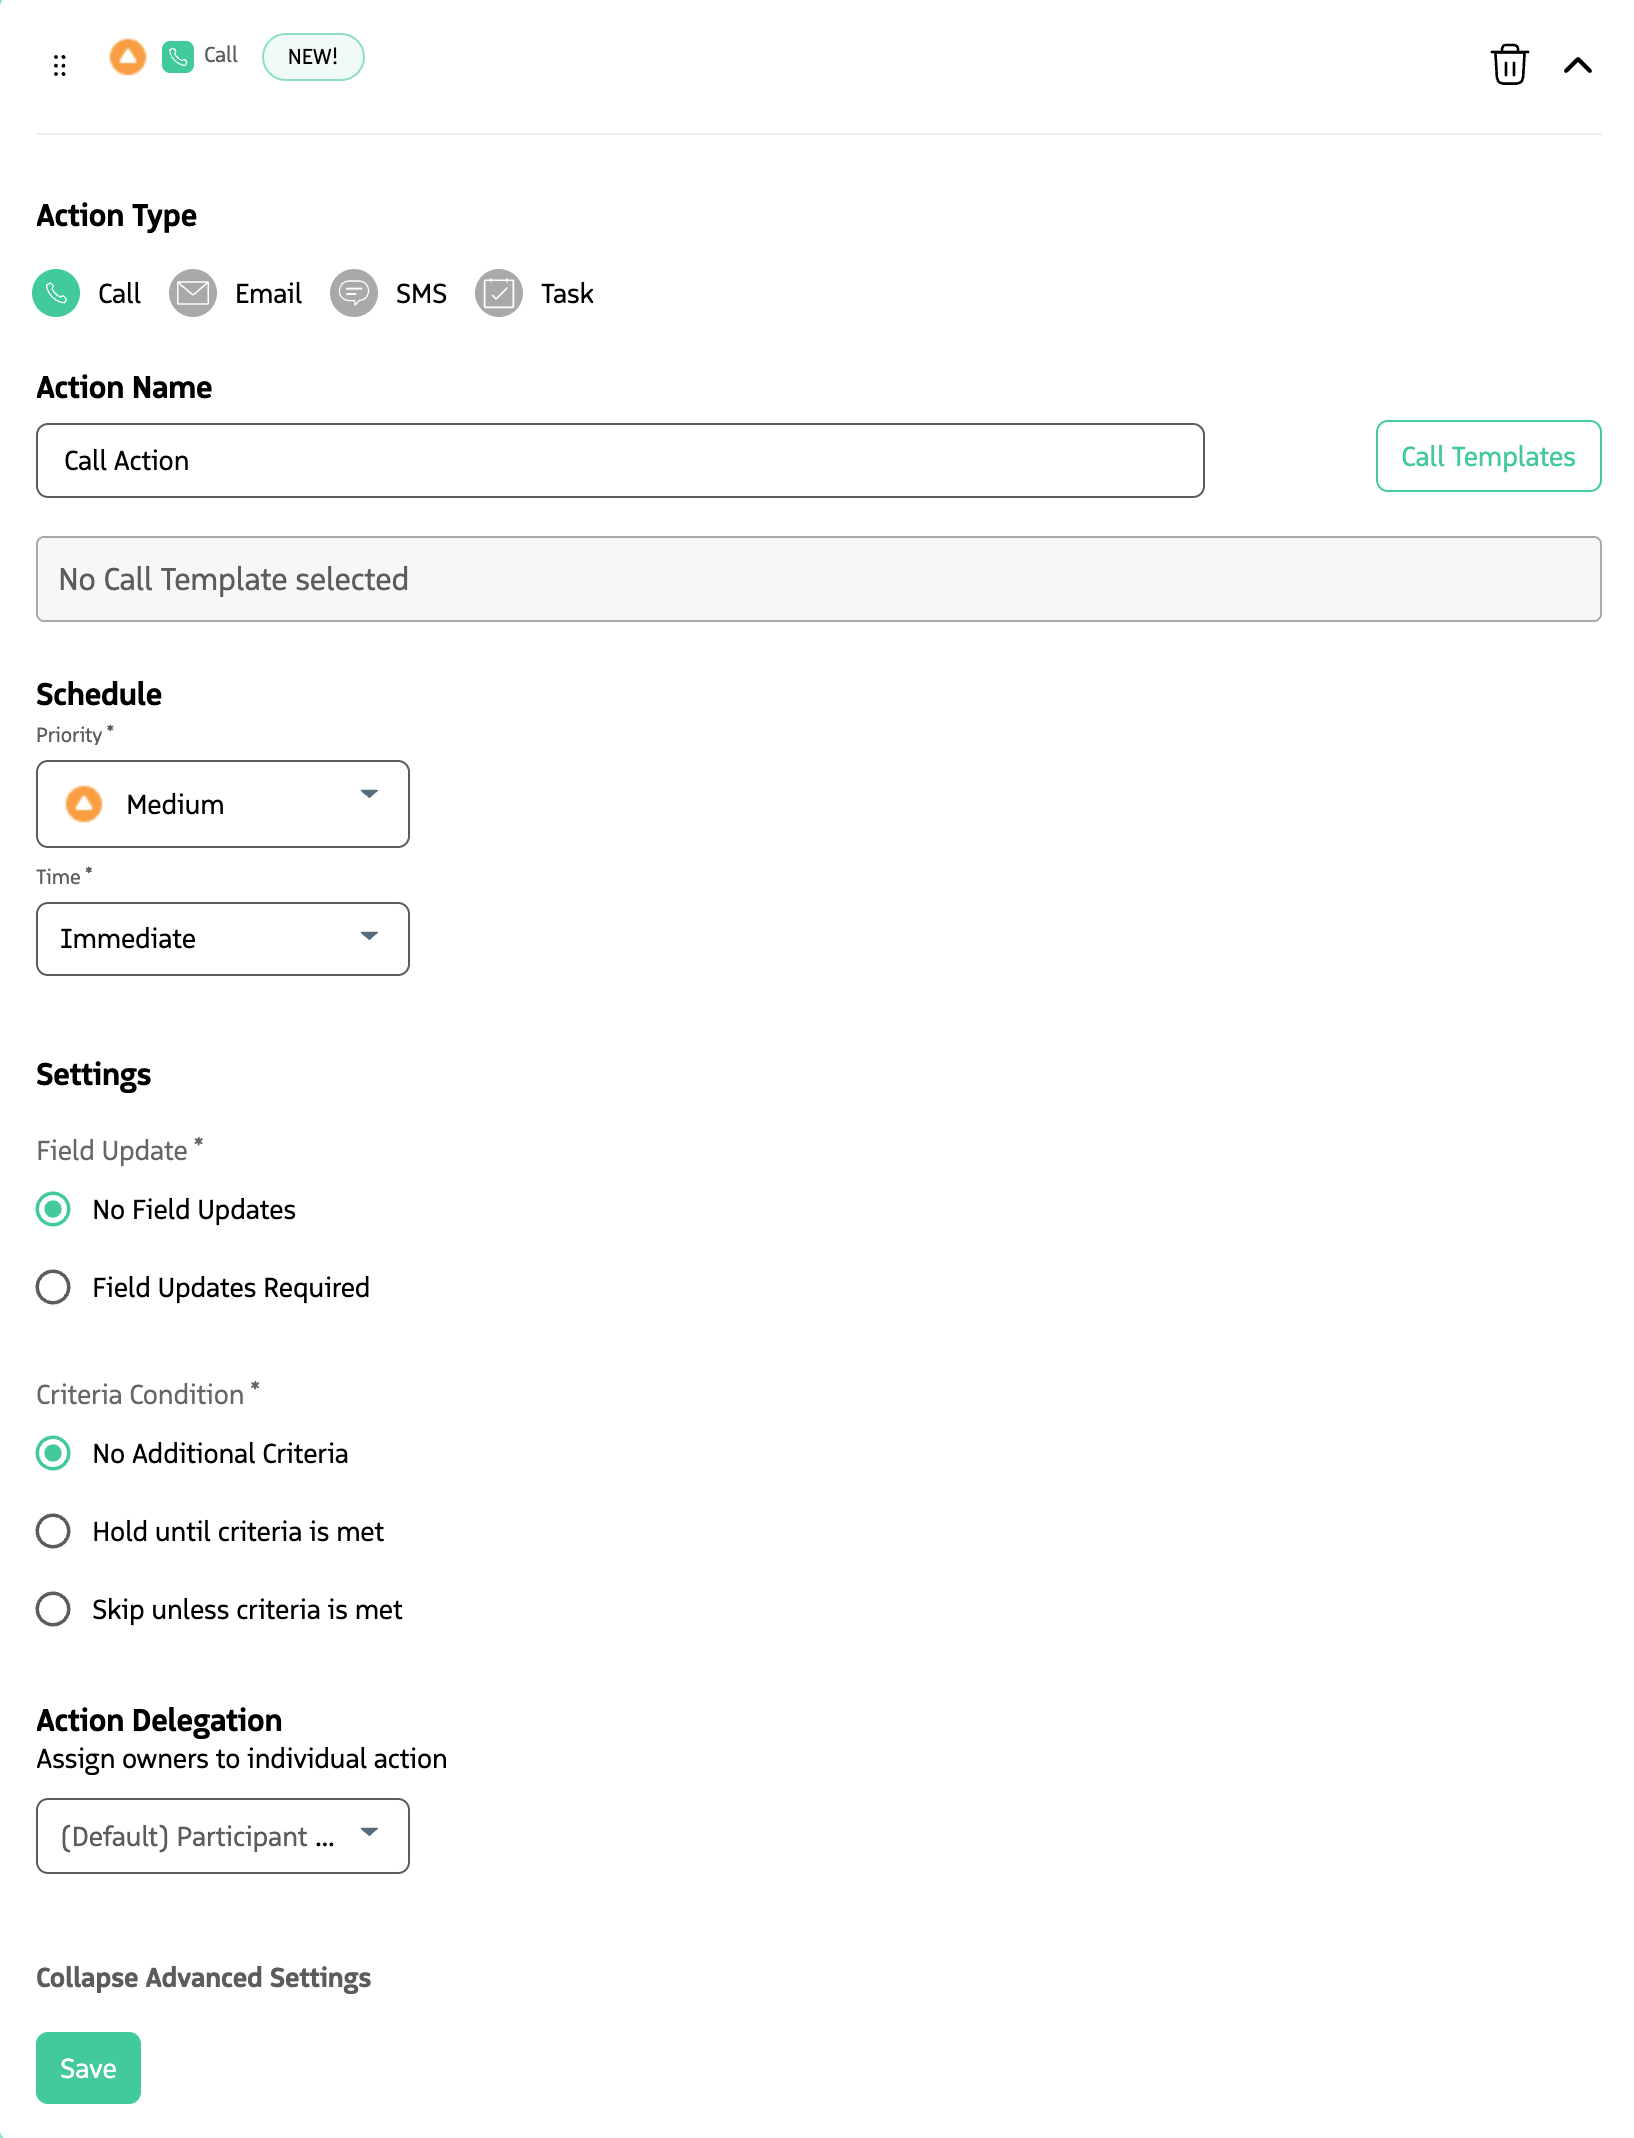
Define Actions
Actions are the steps in the sequence: Call, SMS, Email, and Task. Each action appears on the user’s Engage tab. For more information, see Actions.
- Click
+ Create Action. - Select the action type: Call, Email, SMS, or Task.
- Give the action a name. The name is displayed on the user’s
Engagetab. - Optionally, choose a template (for SMS or Email actions). For more details on templates, see Templates.
- Set Priority. Priority affects the action’s position on the user’s
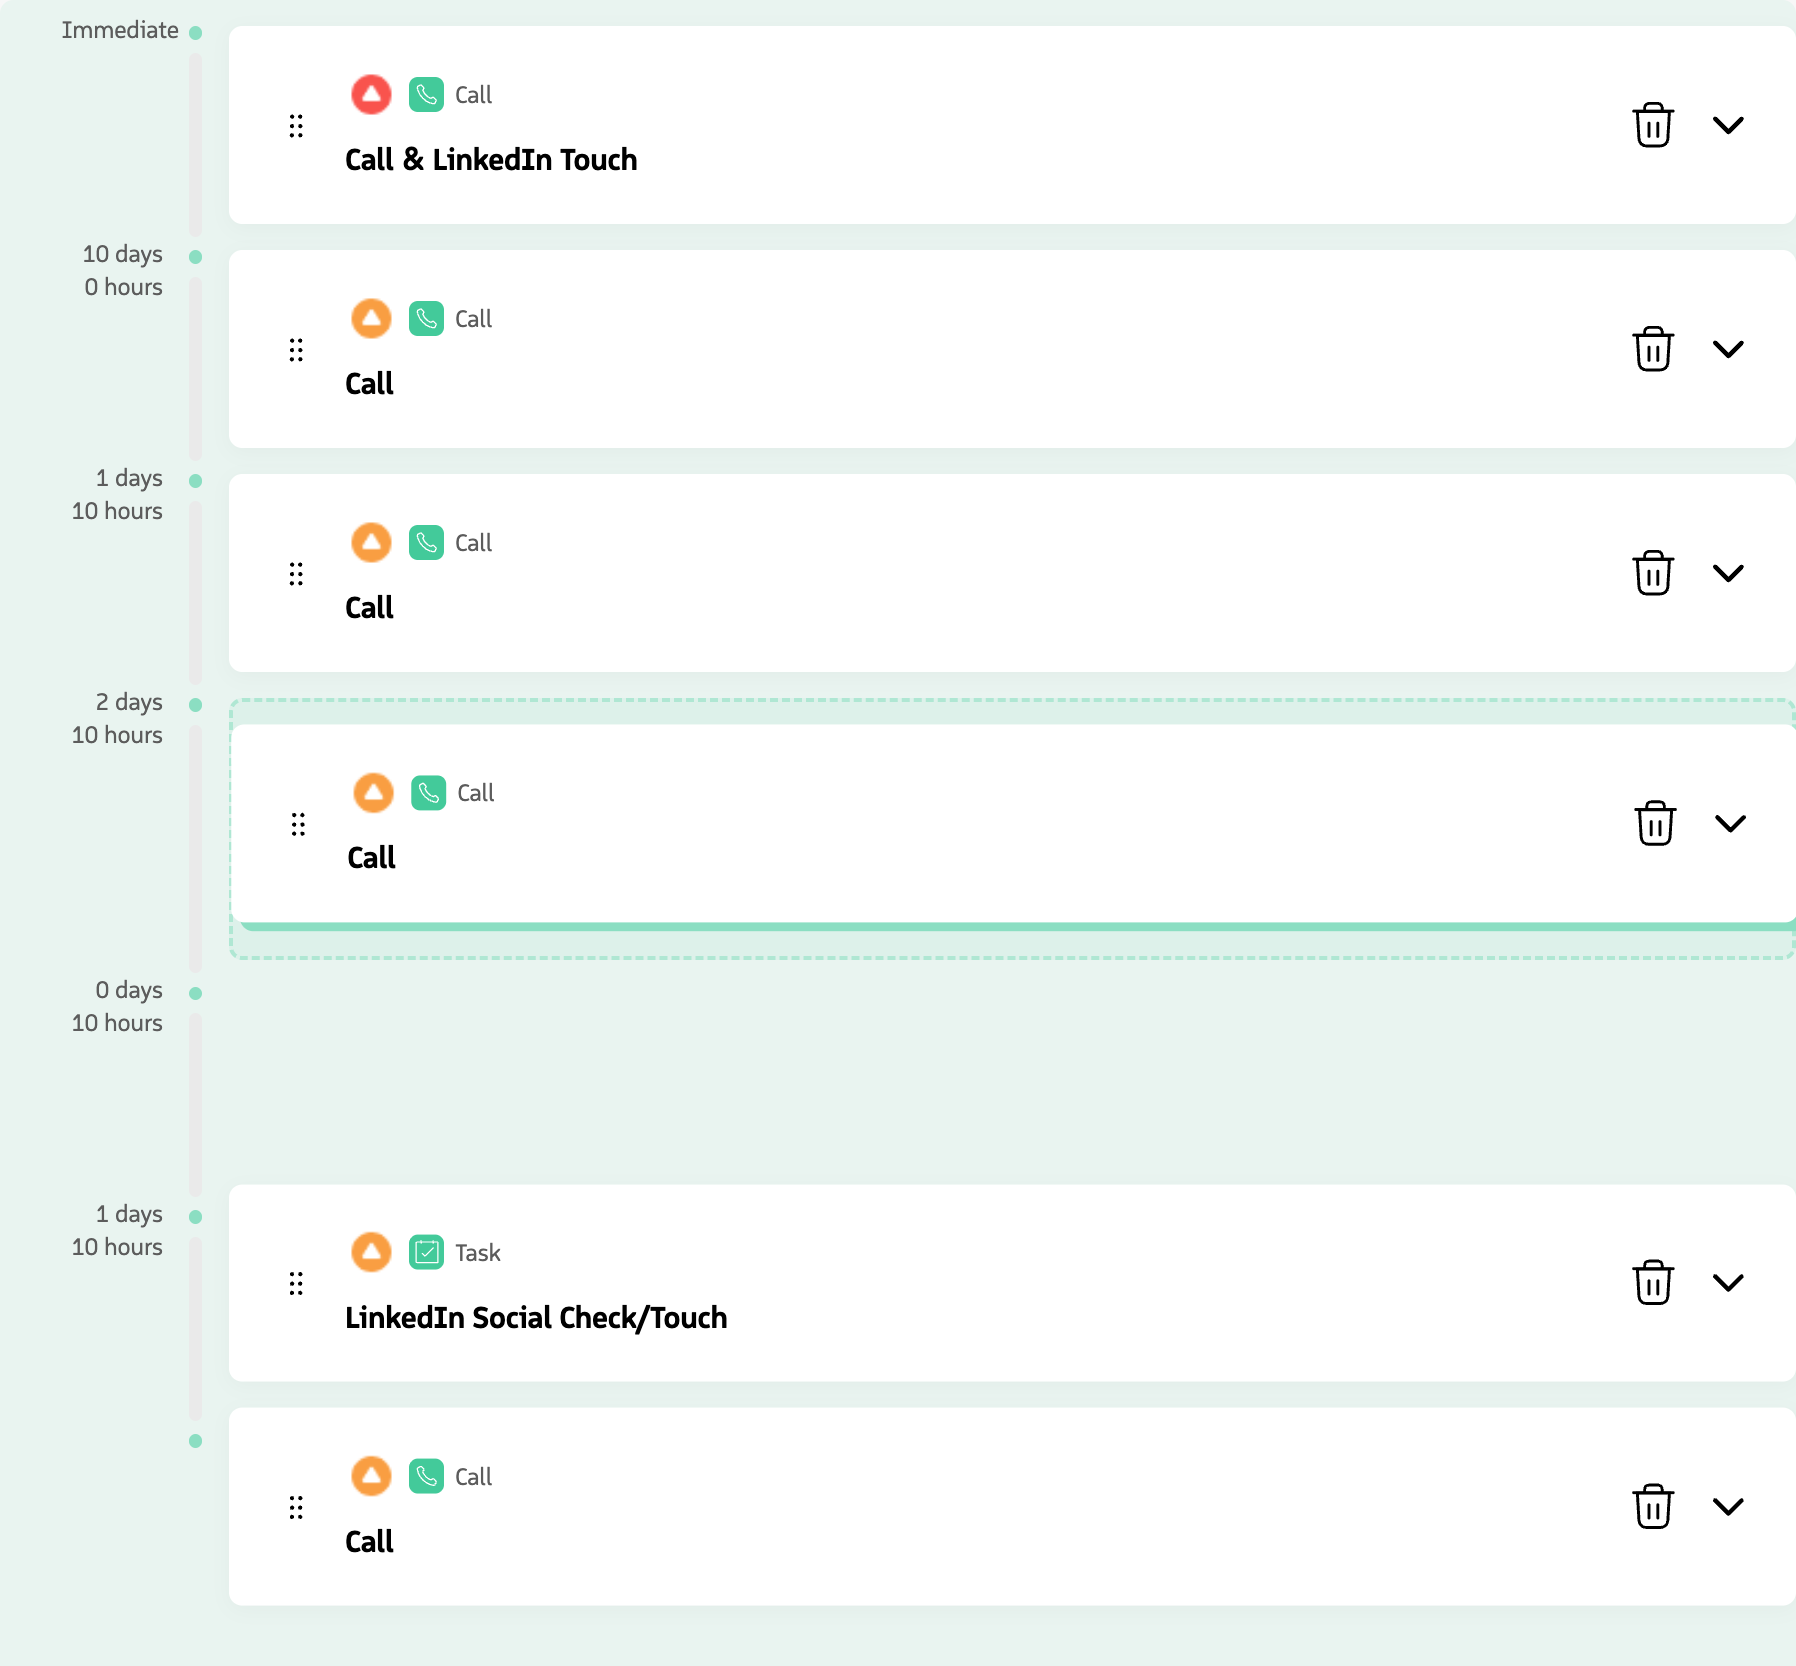
Engagetab. - Set the Timing (when the action is due relative to the previous action).
- Optionally, set advanced options such as field update, criteria condition, and action delegation.
- Click
Save. Repeat for any additional actions.
You can re-order actions by dragging them by the icon before you finish your sequence.
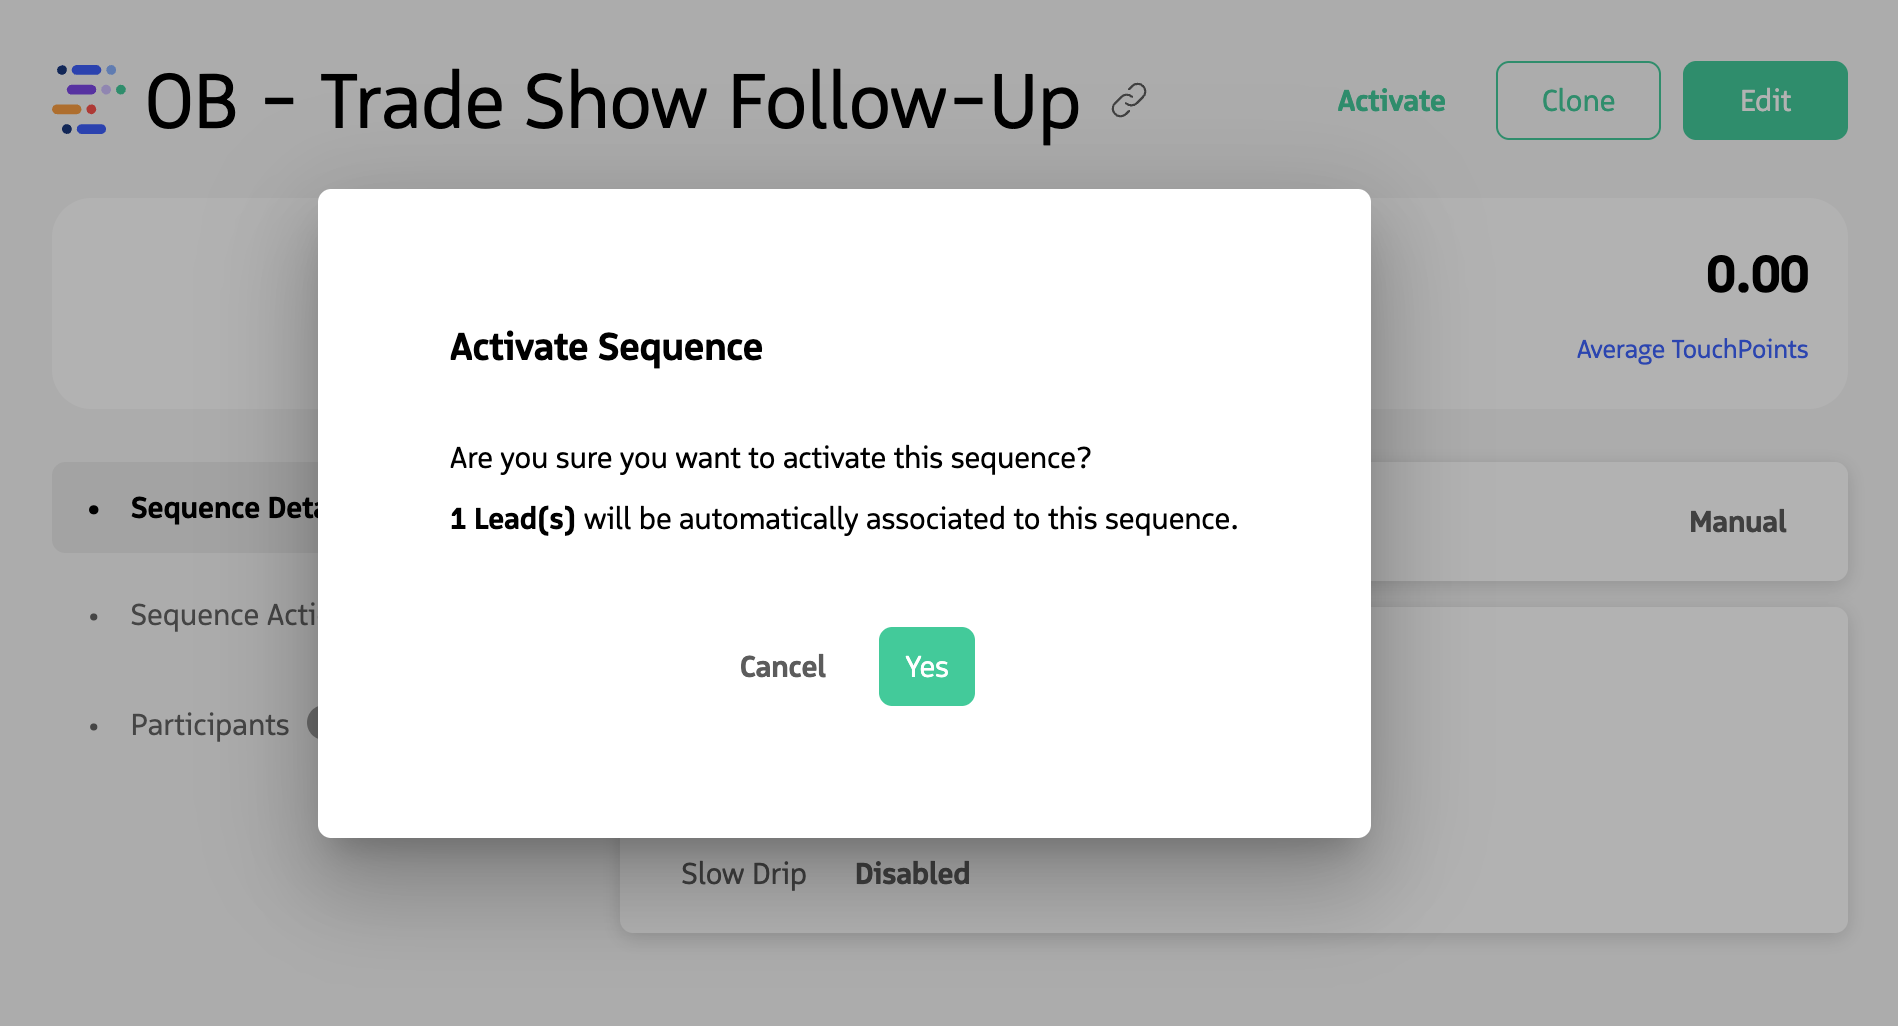
Activate Sequence
After you create a sequence, it is not active. A sequence must be Active before participants can be enrolled.
- Click
Saveto save the sequence. - Click
Activateat the top to activate the sequence.
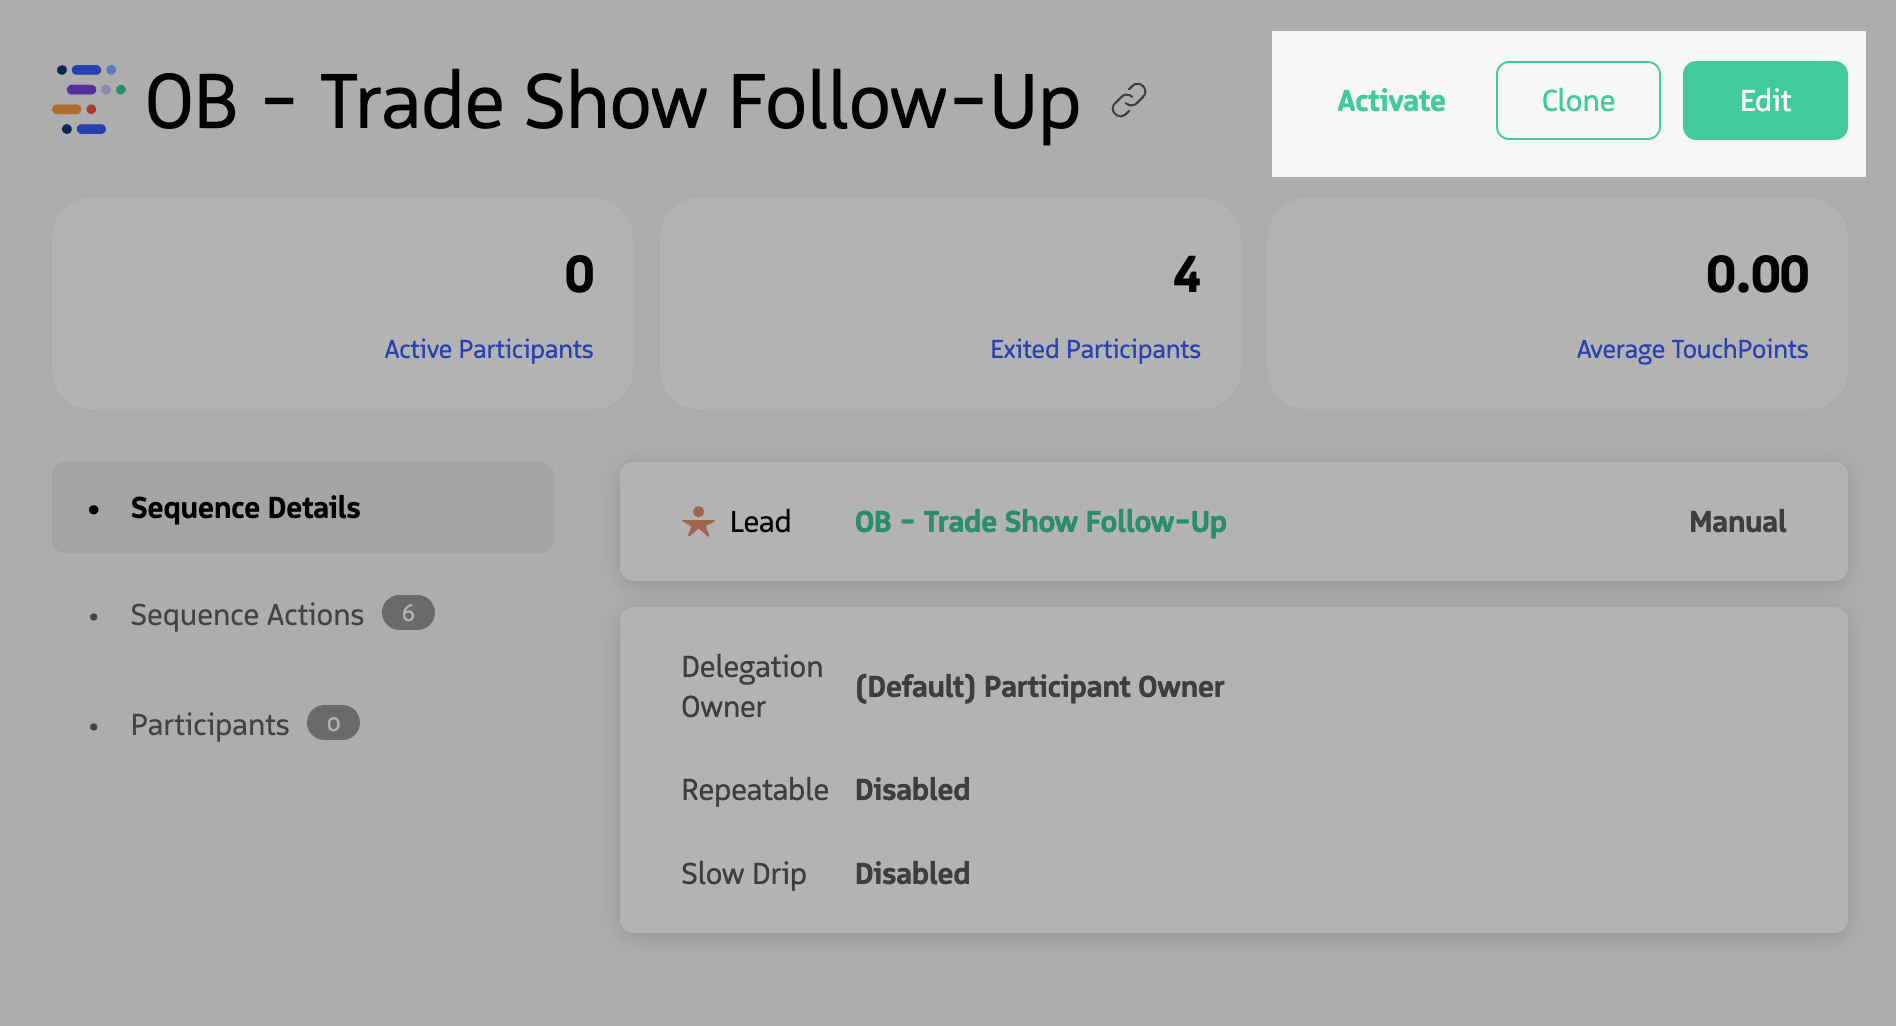
For Automatic sequences, a pop-up shows how many participants are expected to be enrolled. If your first action is an automated email, that email will be queued immediately.