Enable Sequence Attribution
Sequence Attribution helps you measure how effective your sequences are by tracking when sequence participants create opportunities, tasks, or events. This gives sales leaders clear insights into which sequences drive the most conversions and revenue.
How It Works
Sequence Attribution automatically creates records when specific outcomes happen for participants who have exited a sequence. You can track:
- Opportunities created within a time window after exiting a sequence
- Tasks with specific subjects or keywords
- Events with specific subjects or keywords
For example, if a participant exits a sequence and creates an opportunity within 14 days, Sequence Attribution creates a record linking that opportunity to the sequence. This helps you understand which sequences are most effective at driving pipeline.
Sequence Attribution uses two main components:
- Sequence Attribution Events — Custom metadata rules that define what to track (e.g., “Track opportunities created within 14 days of sequence exit”)
- Sequence Attribution Object — Custom object that stores the attribution records created when your rules are met
Enable Sequence Attribution
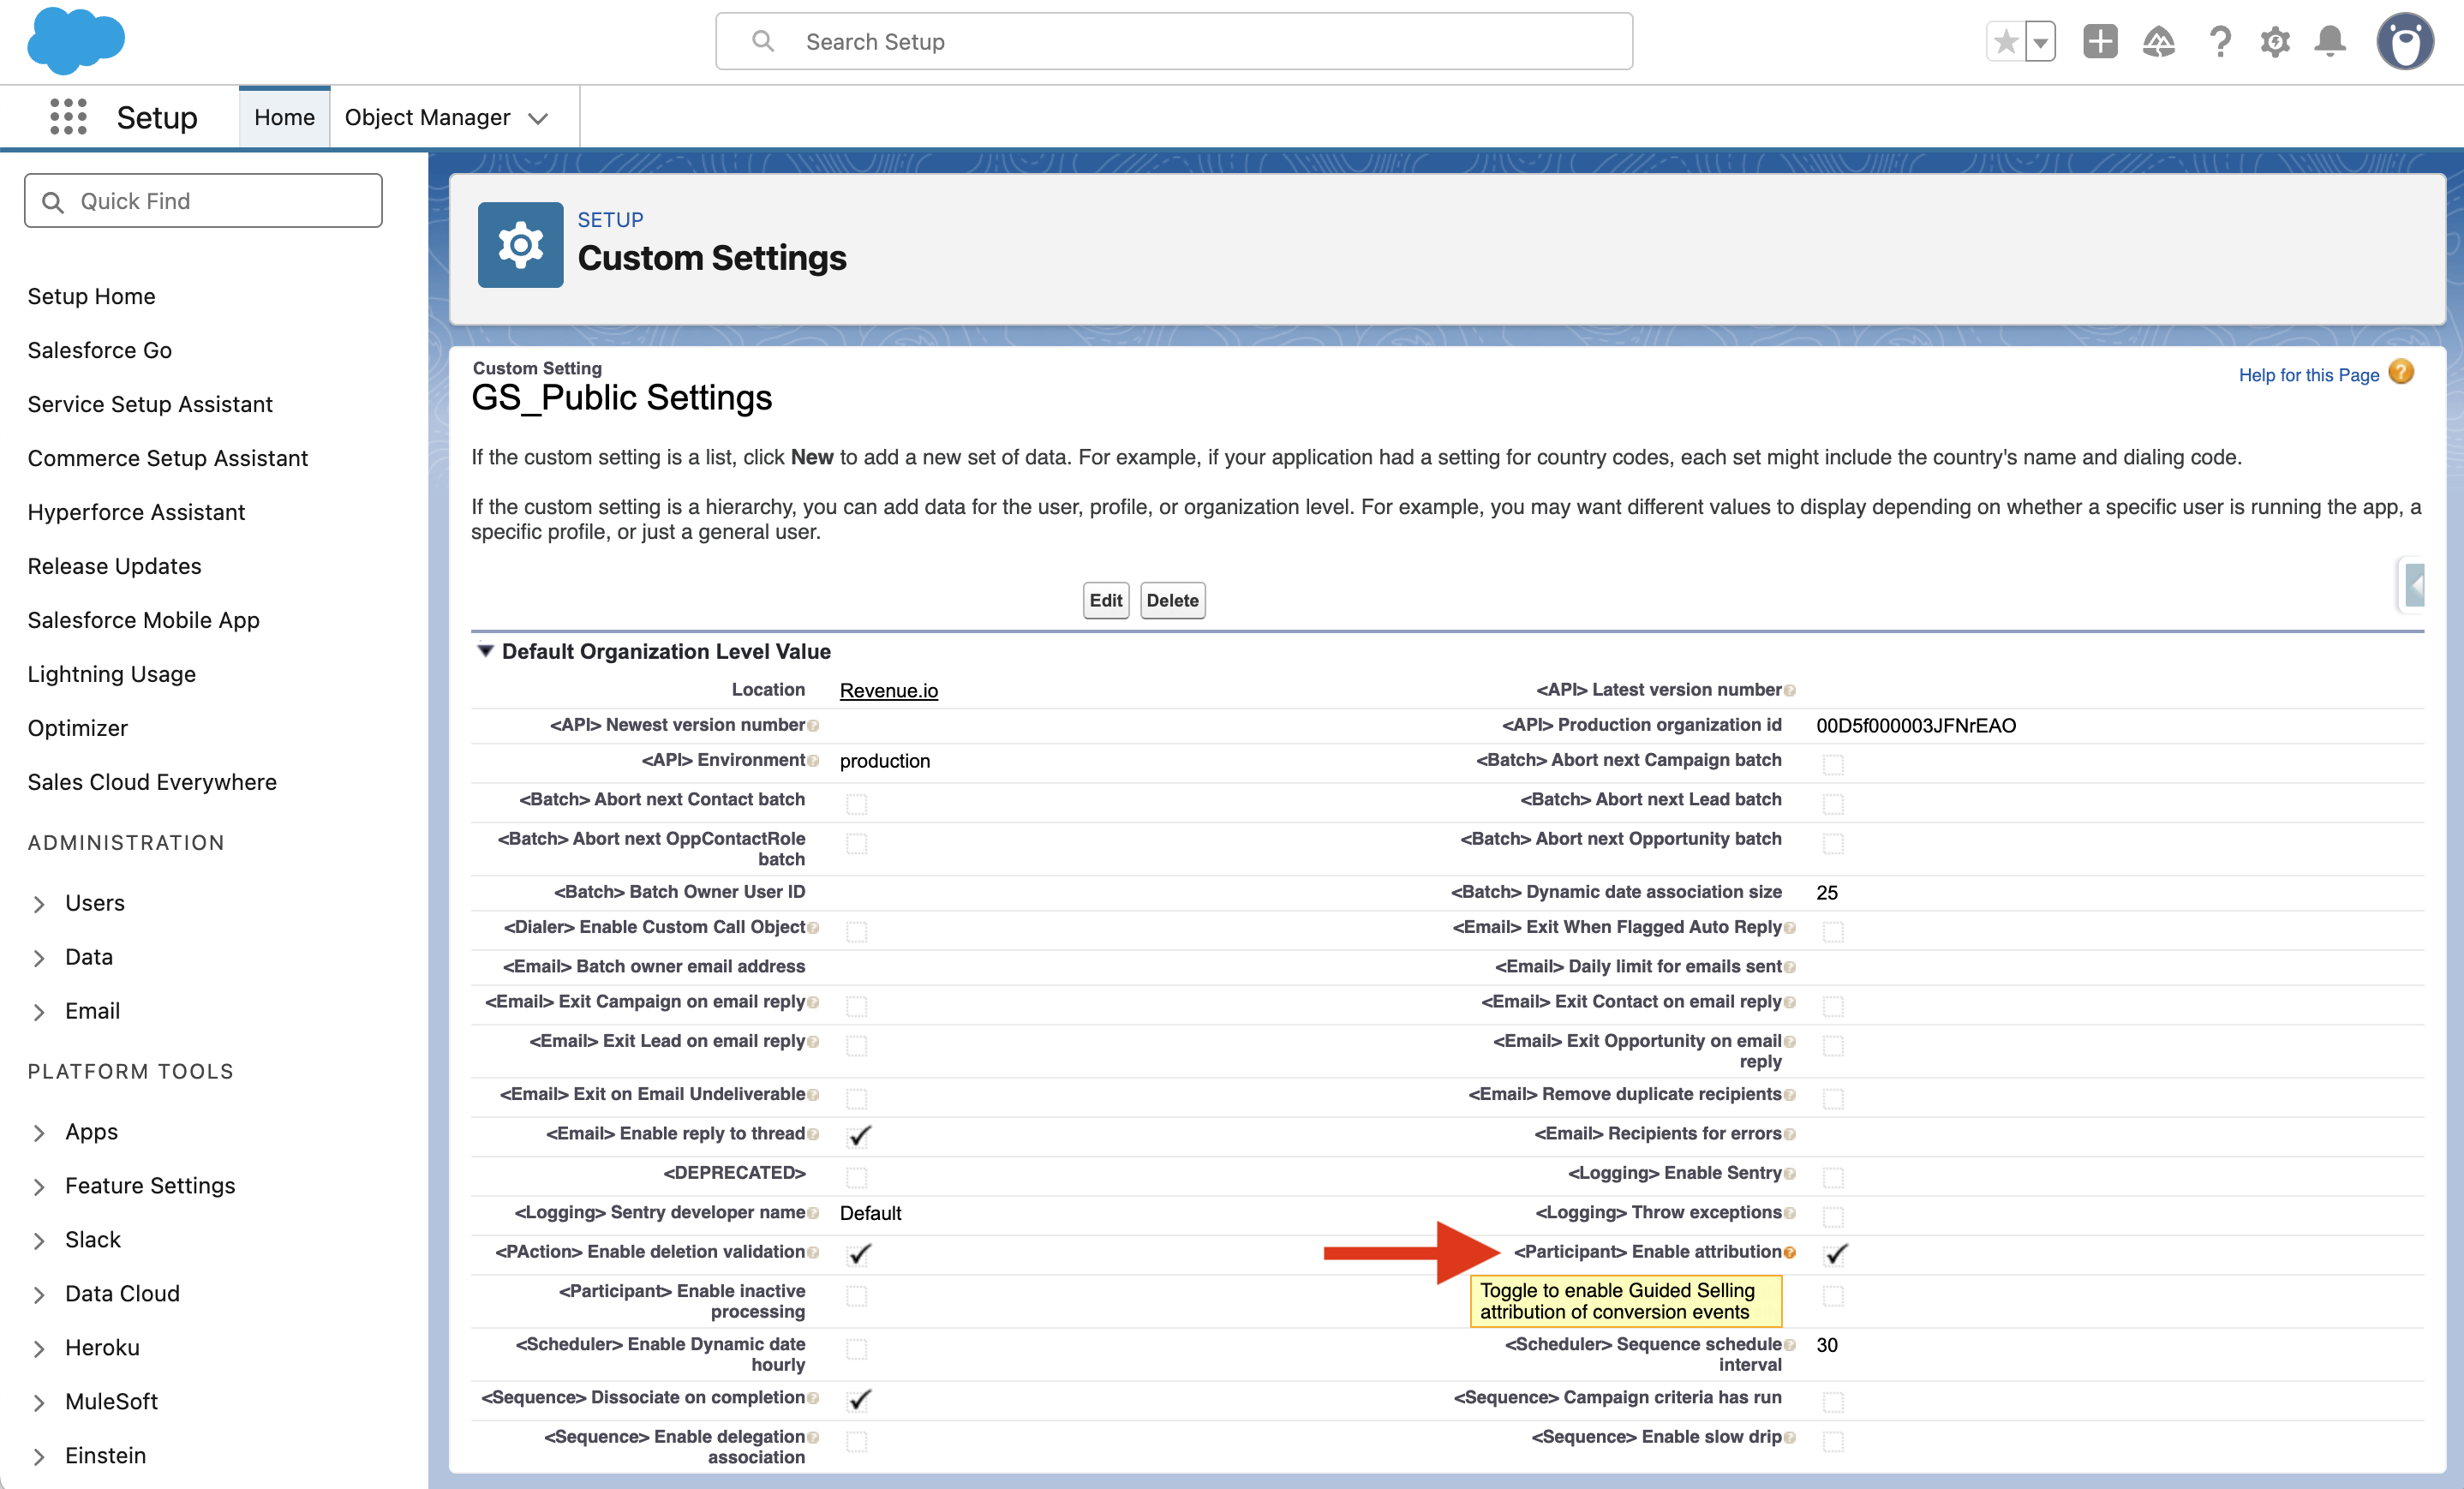
Step 1: Enable Sequence Attribution Custom Setting
- In Setup, search for
Custom Settings - Select
GS-Public Settings - Click
Manage - Click
Edit - Set the
Enable attributioncheckbox to True - Click
Save
Step 2: Configure Sequence Attribution Event Metadata Type
- In Setup, search for
Custom Metadata Types - Find and select
Sequence Attribution Event - Under
Page Layouts, clickEditnext to the Sequence Attribution Event Layout. - Drag all available fields into the layout.
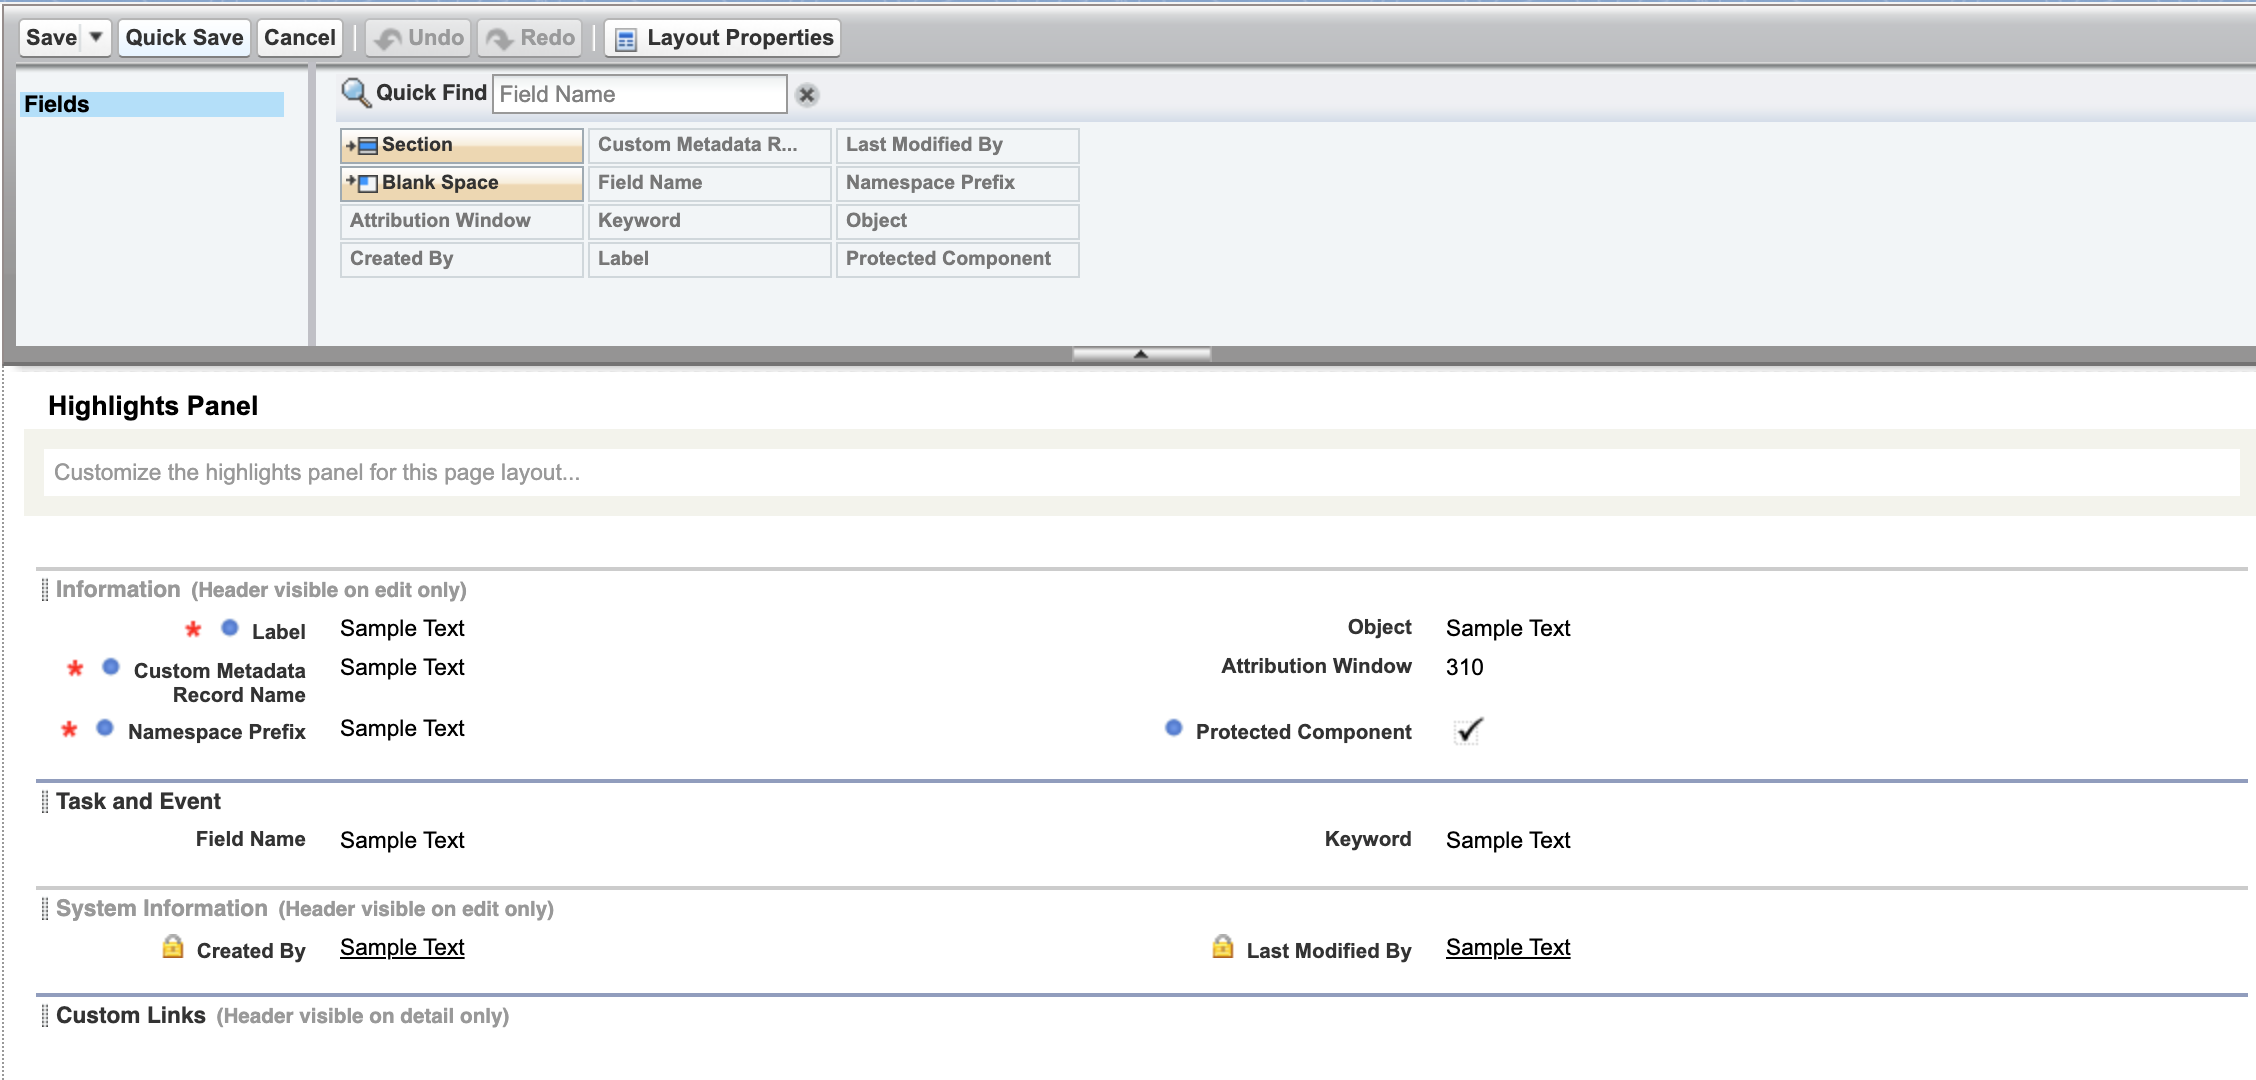
- Click
Save
Step 3: Create your attribution rules
- From the
Sequence Attribution EventCustom Metadata Type, clickManage Sequence Attribution Events

You’ll see sample attribution events (labeled with “Sample”). These are examples you can clone and use as templates.
- From the list of attribution events, click
Newor clone an existing sample - Configure the fields based on what you want to track
- Click
Save
Understanding Attribution Event Fields
When creating or editing an attribution event, you’ll configure these fields:
| Field | Description |
|---|---|
| Object | Enter “Event”, “Task”, or “Opportunity” |
| Attribution Window | For Opportunities: Days before/after sequence exit to attribute events. For Tasks/Events: Days before sequence exit to attribute events. |
| Keyword | (Tasks/Events only) Text to search for in the specified field (e.g., “Meeting” or “Contract Signed”) |
| Field Name | (Tasks/Events only) The field name where Guided Selling will search for the keyword. Must be a text/string field. |
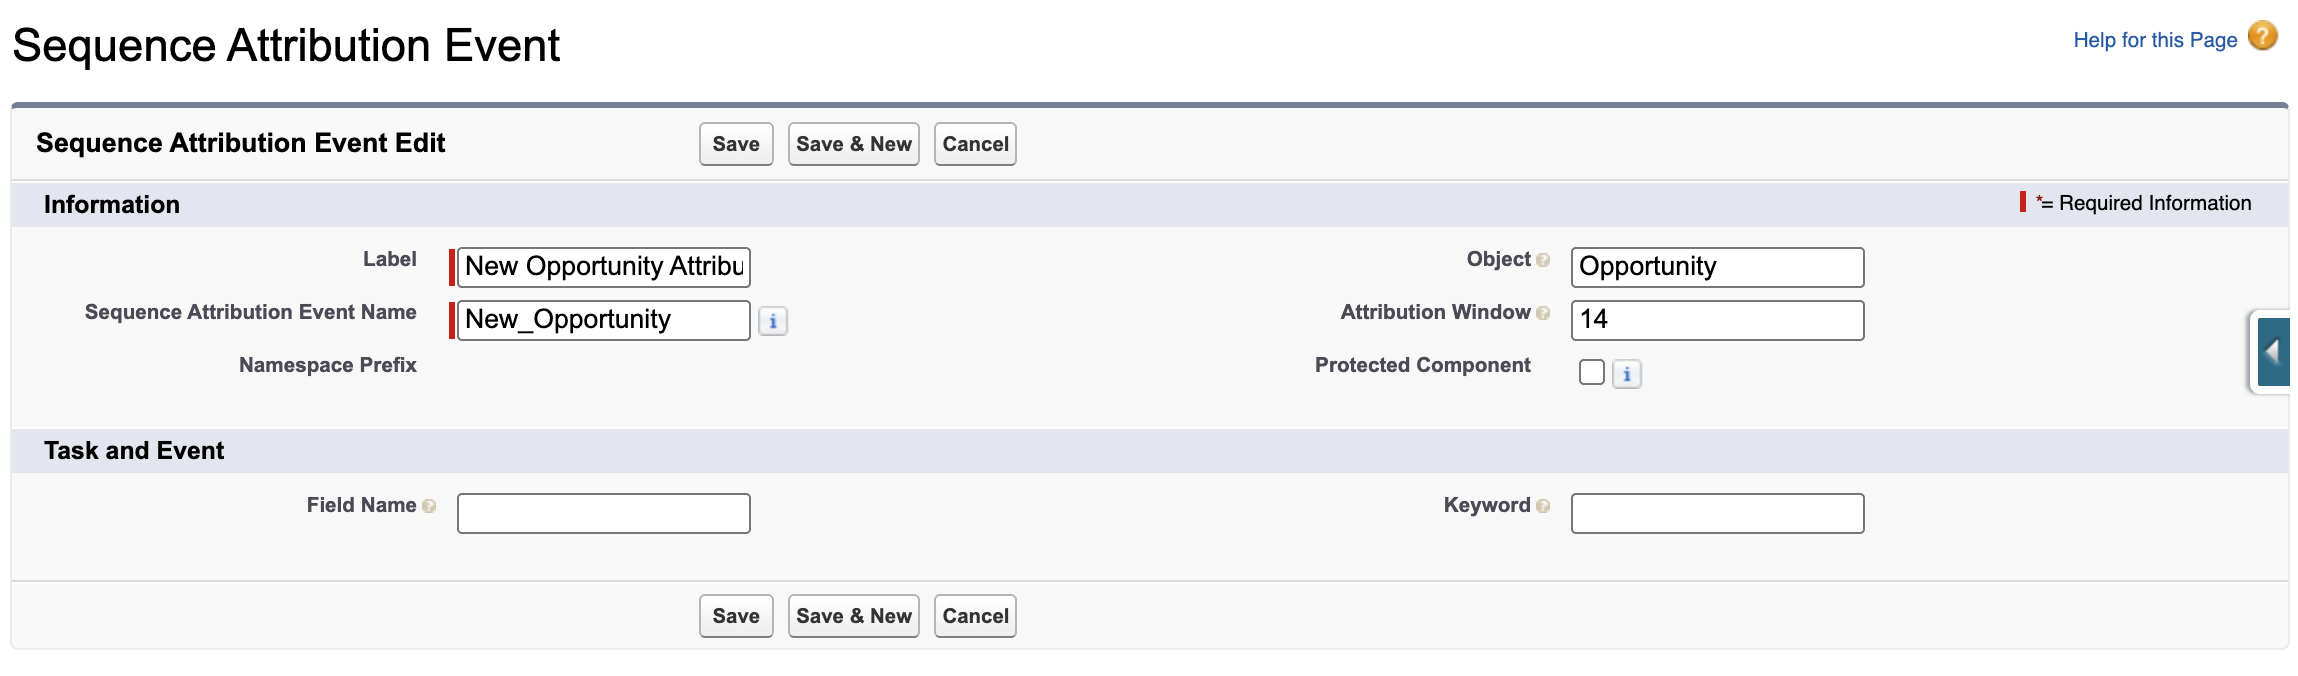
Example: Opportunity Attribution
The sample “Opportunity Creation” event attributes opportunities created within 14 days of a participant exiting a sequence.
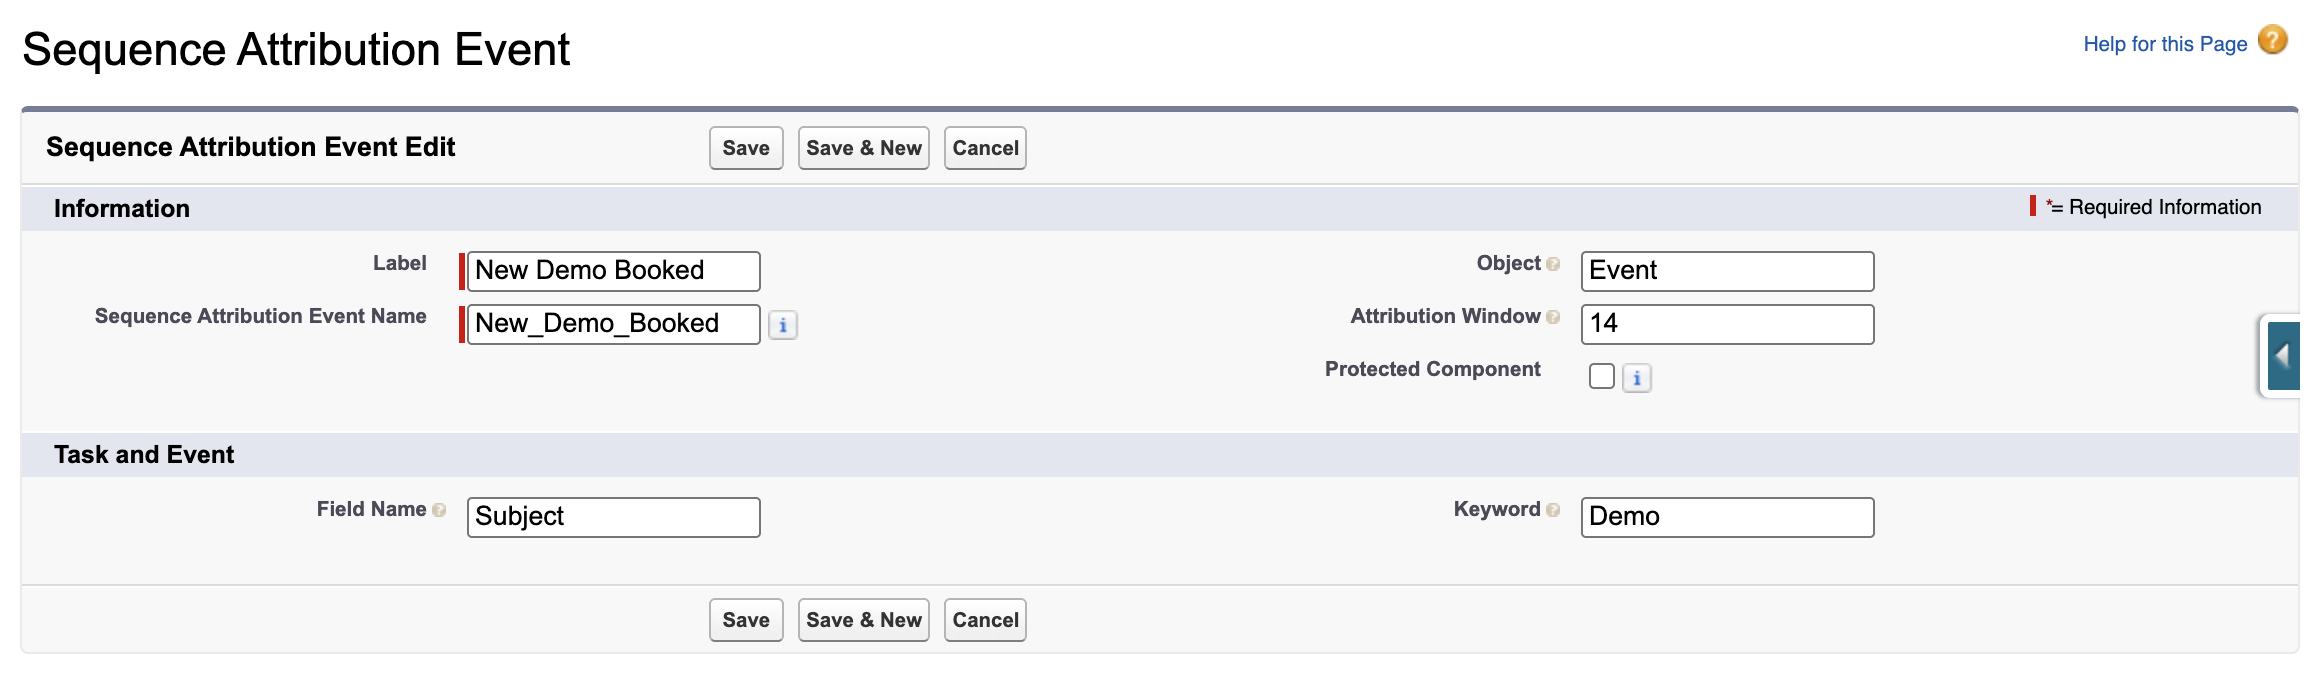
Example: Event Attribution
The sample “Event Creation” event attributes events created within 14 days of a participant exiting a sequence, where the Event Subject contains the word “Demo”.
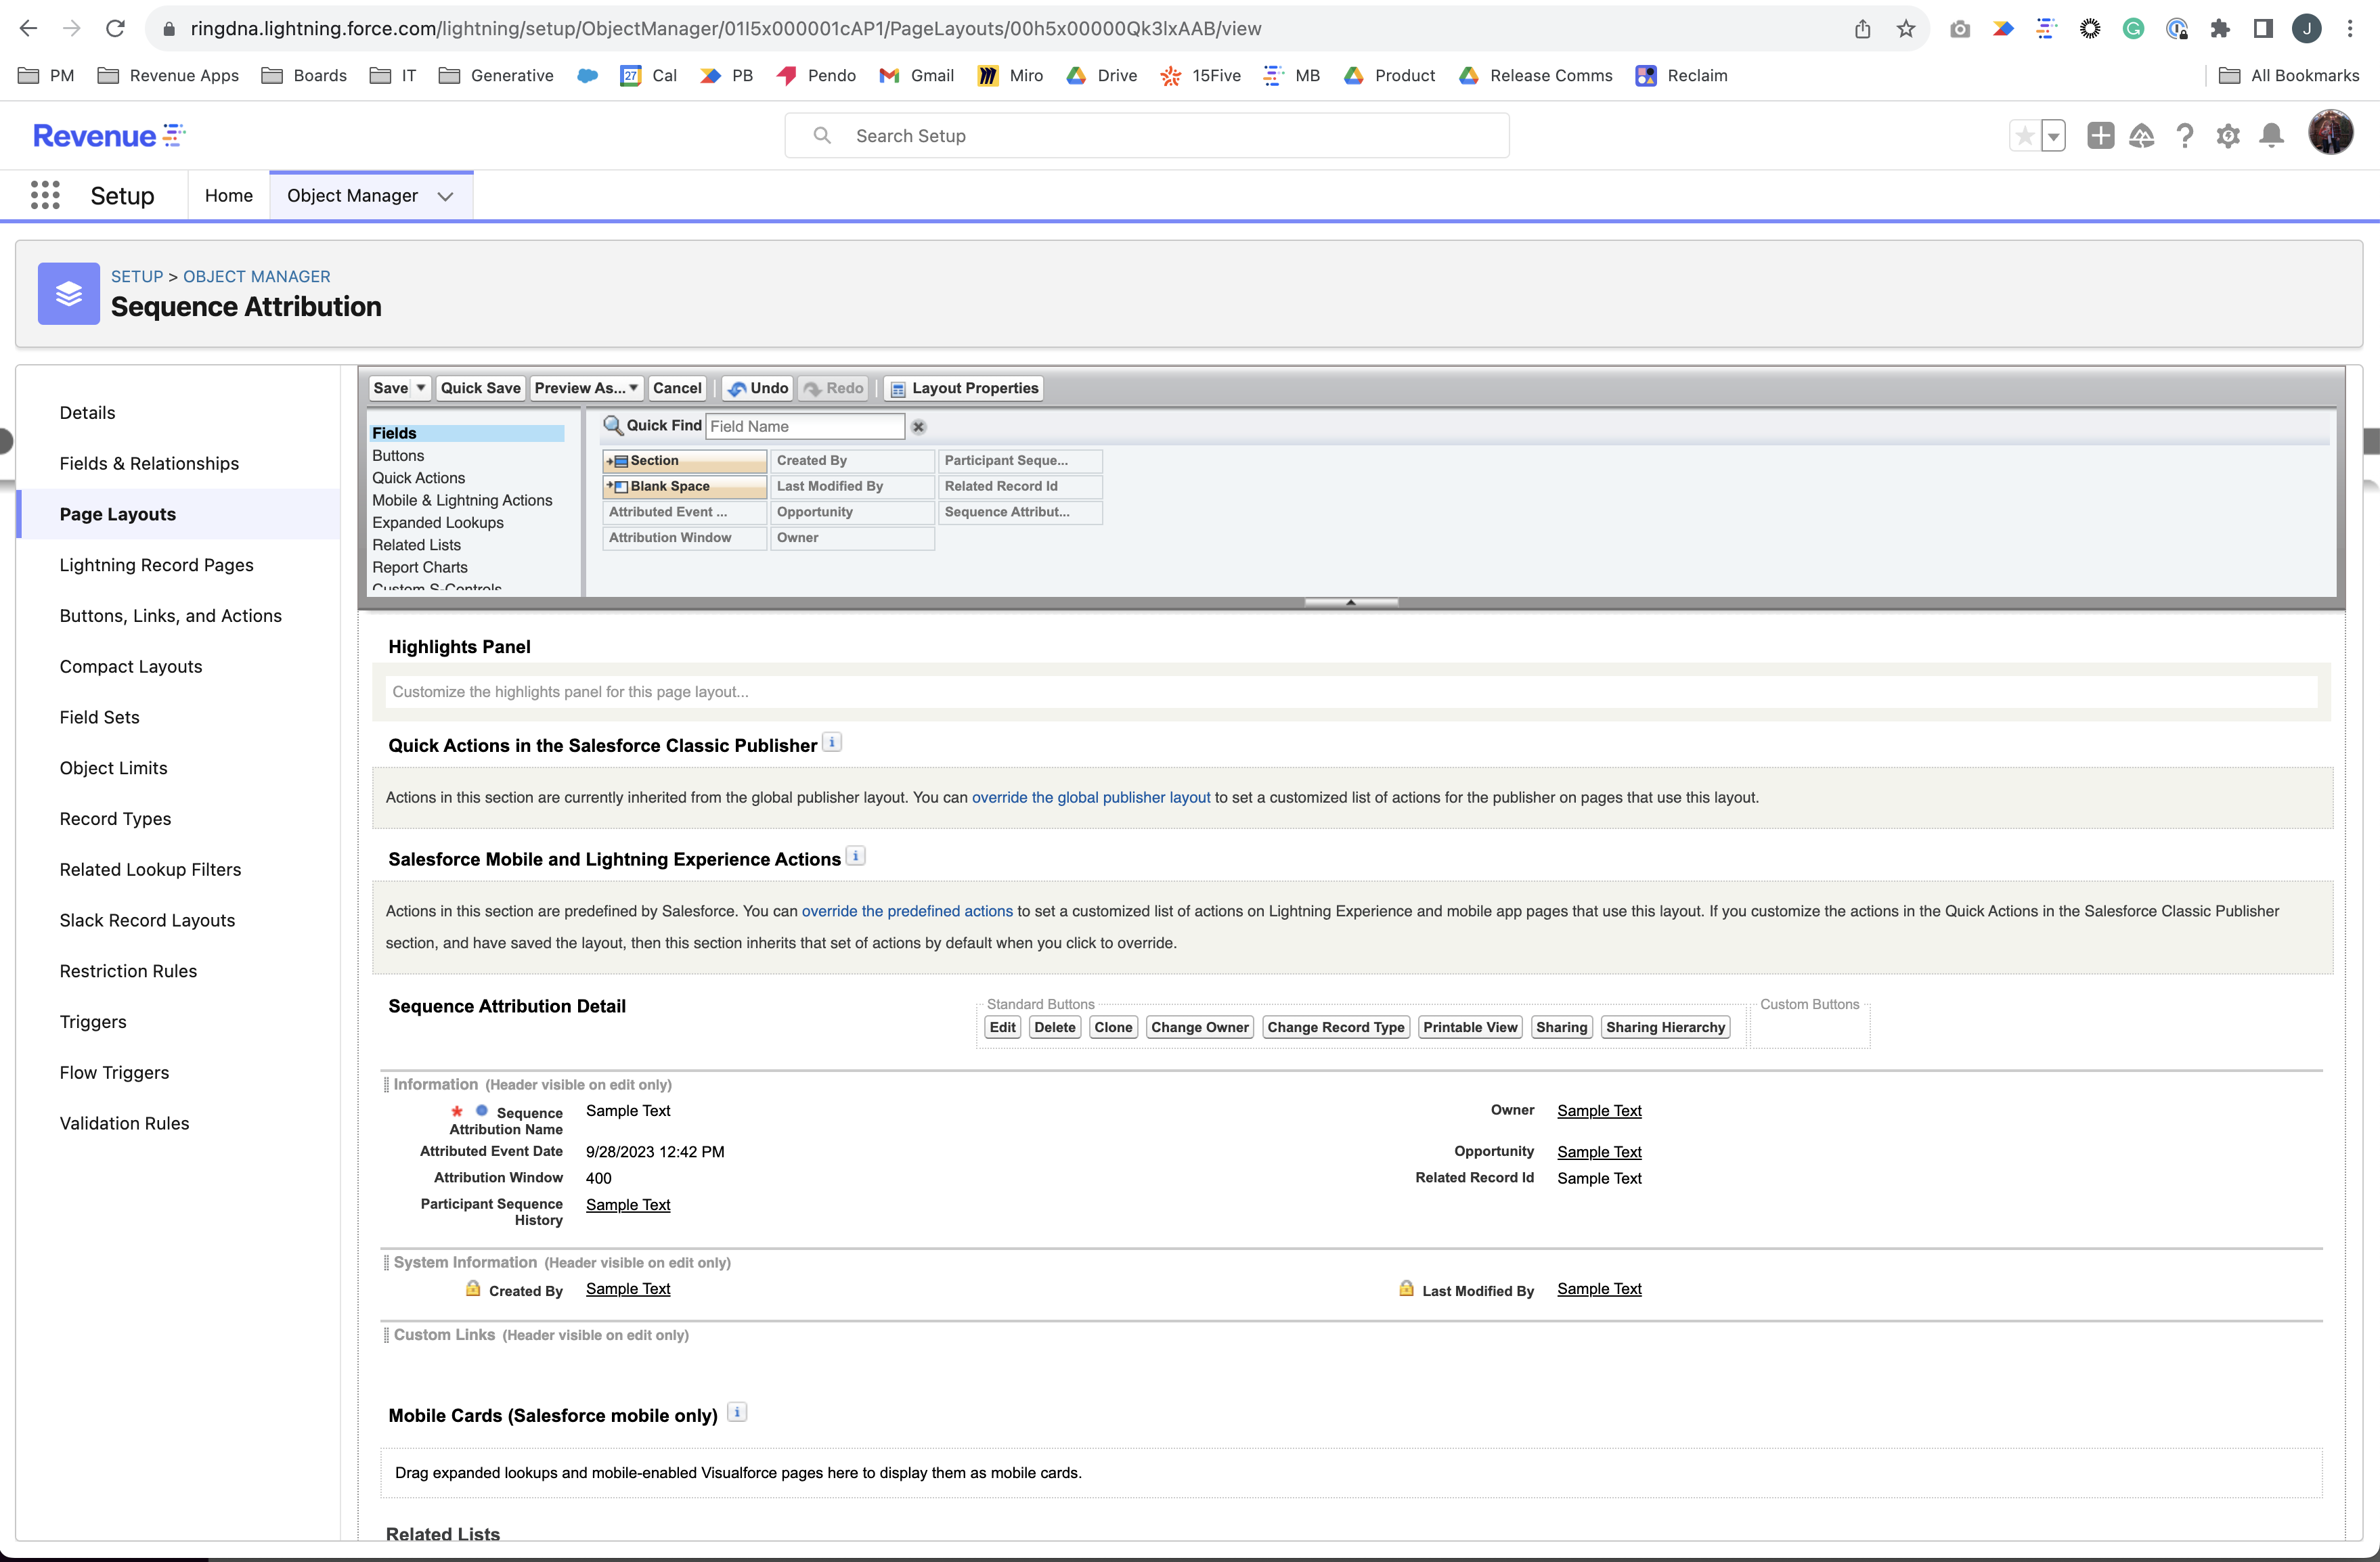
Step 4: Configure the Sequence Attribution Page Layout
- In Setup, go to
Object Manager - Find and select
Sequence Attribution
- Click
Page Layouts, then selectSequence Attribution Layout - Drag and organize the fields you want users to see on the page layout
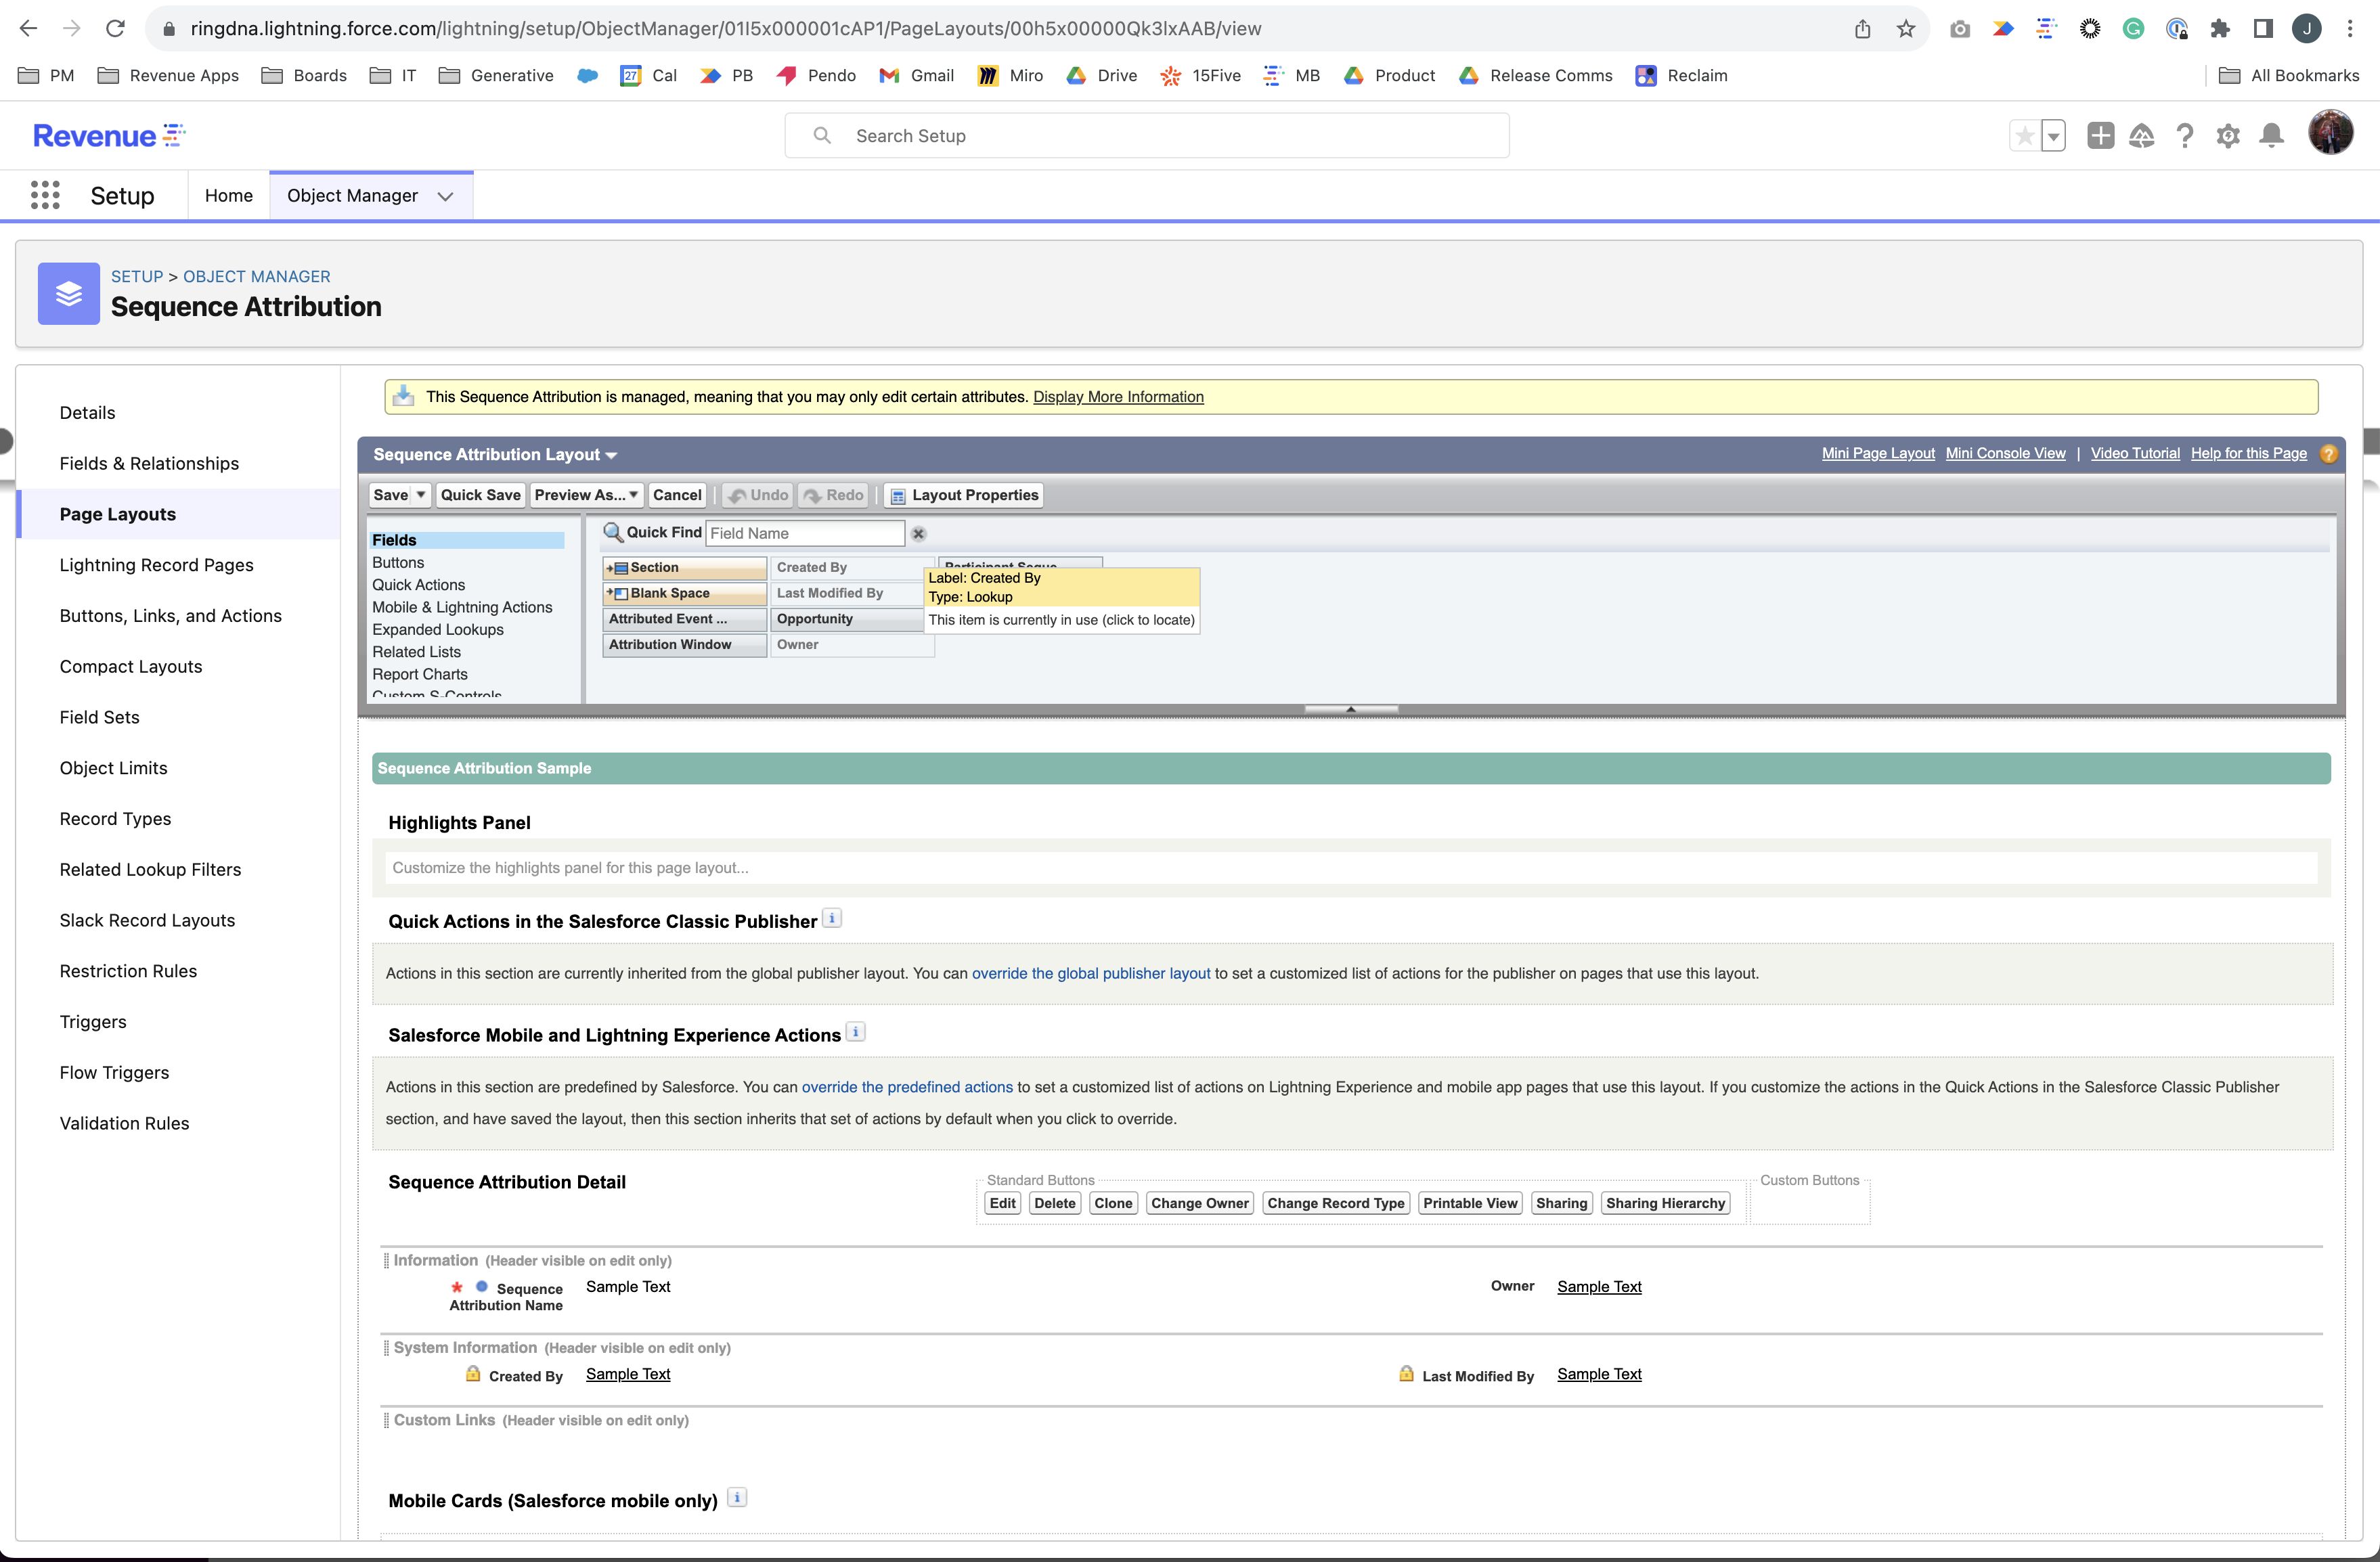
- Click
Save
Step 5: Set Field-Level Security
Control who can view and edit attribution data by setting field-level security. You can grant access either by profile or by permission set—some admins prefer using permission sets for more flexible access management.
Important: Users who will be interacting with Guided Selling need read/write access to the Sequence Attribution object and its fields.
Option 1: Grant access by profile
- In Object Manager, select
Sequence Attribution - Click
Fields & Relationships - For each field, click the field name, then click
Set Field-Level Security
- Configure read and write access for each profile that needs to interact with Guided Selling
- Repeat for all fields
Option 2: Grant access by permission set
Alternatively, you can create or modify a Permission Set to grant read/write access to the Sequence Attribution object and its fields. This approach allows you to assign access to specific users without modifying multiple profiles.
- In Setup, search for
Permission Sets - Click
New - Enter a Label and API Name for the permission set (e.g., “Guided Selling - Sequence Attribution Access”)
- Click
Save - In the permission set detail page, click
Object Settings - Find and click
Sequence Attribution - Click
Edit - Set Object Permissions:
- Check Read
- Check Create
- Check Edit
- Click
Save - To grant field-level access, click
Field Permissionsin the Sequence Attribution object settings - For each field, set Read Access and Edit Access to Enabled for users who need to interact with Guided Selling
- Click
Save - Assign the permission set to users by going to
Manage Assignmentsand clickingAdd Assignments
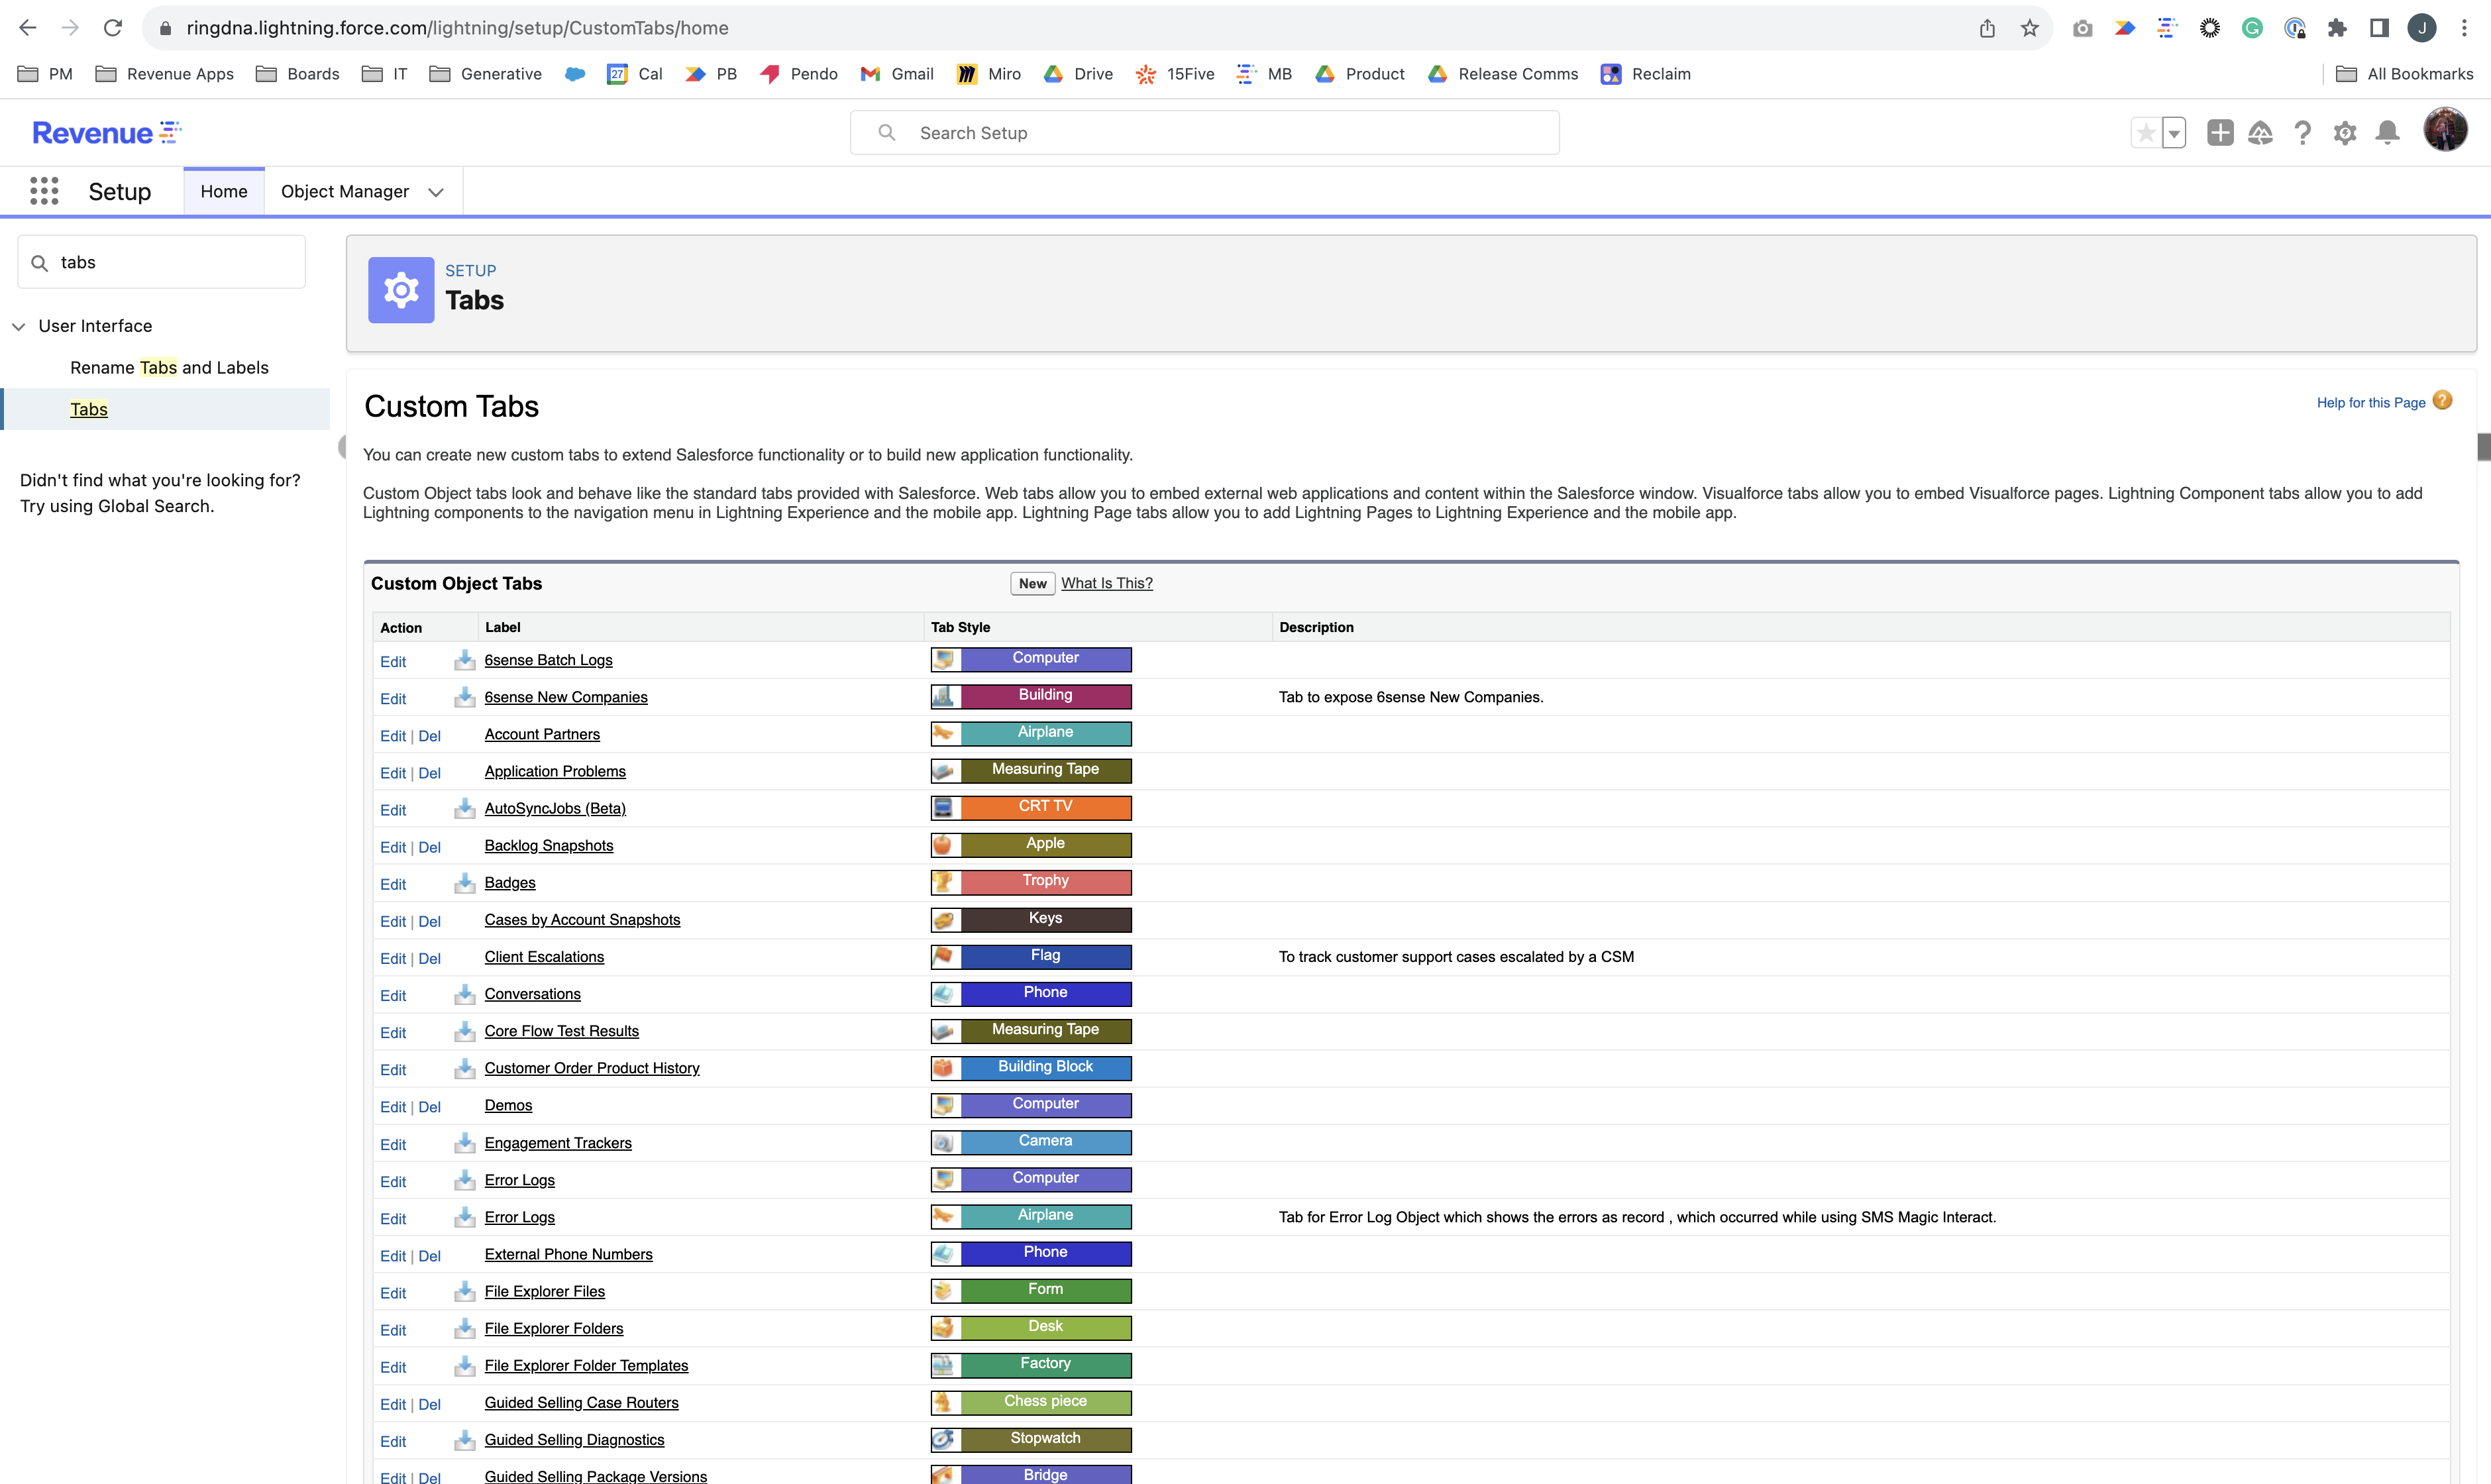
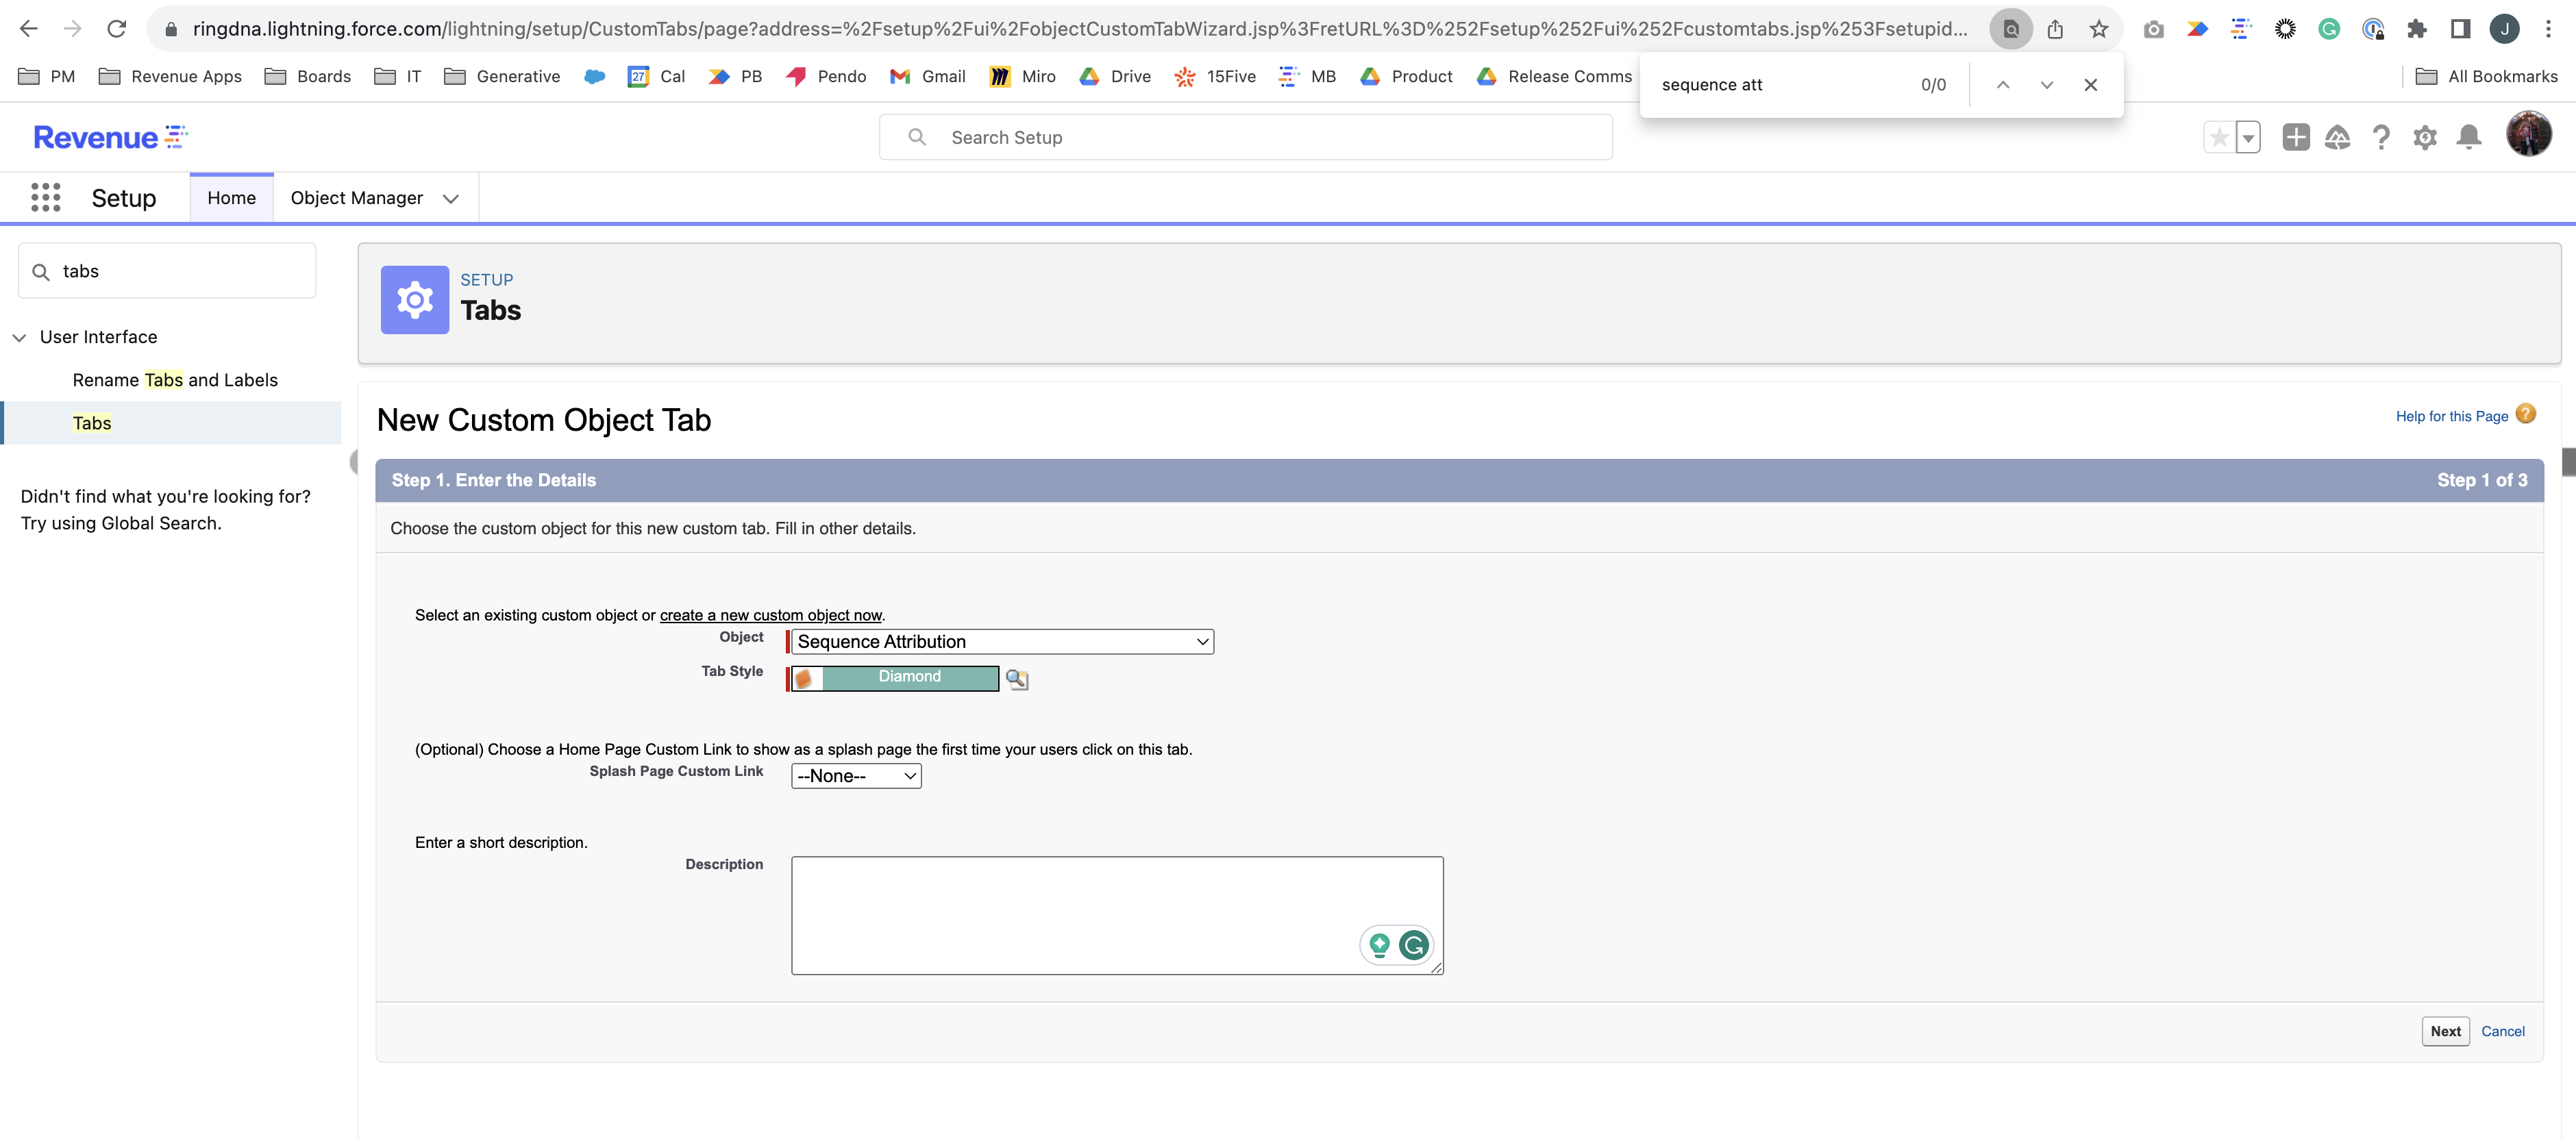
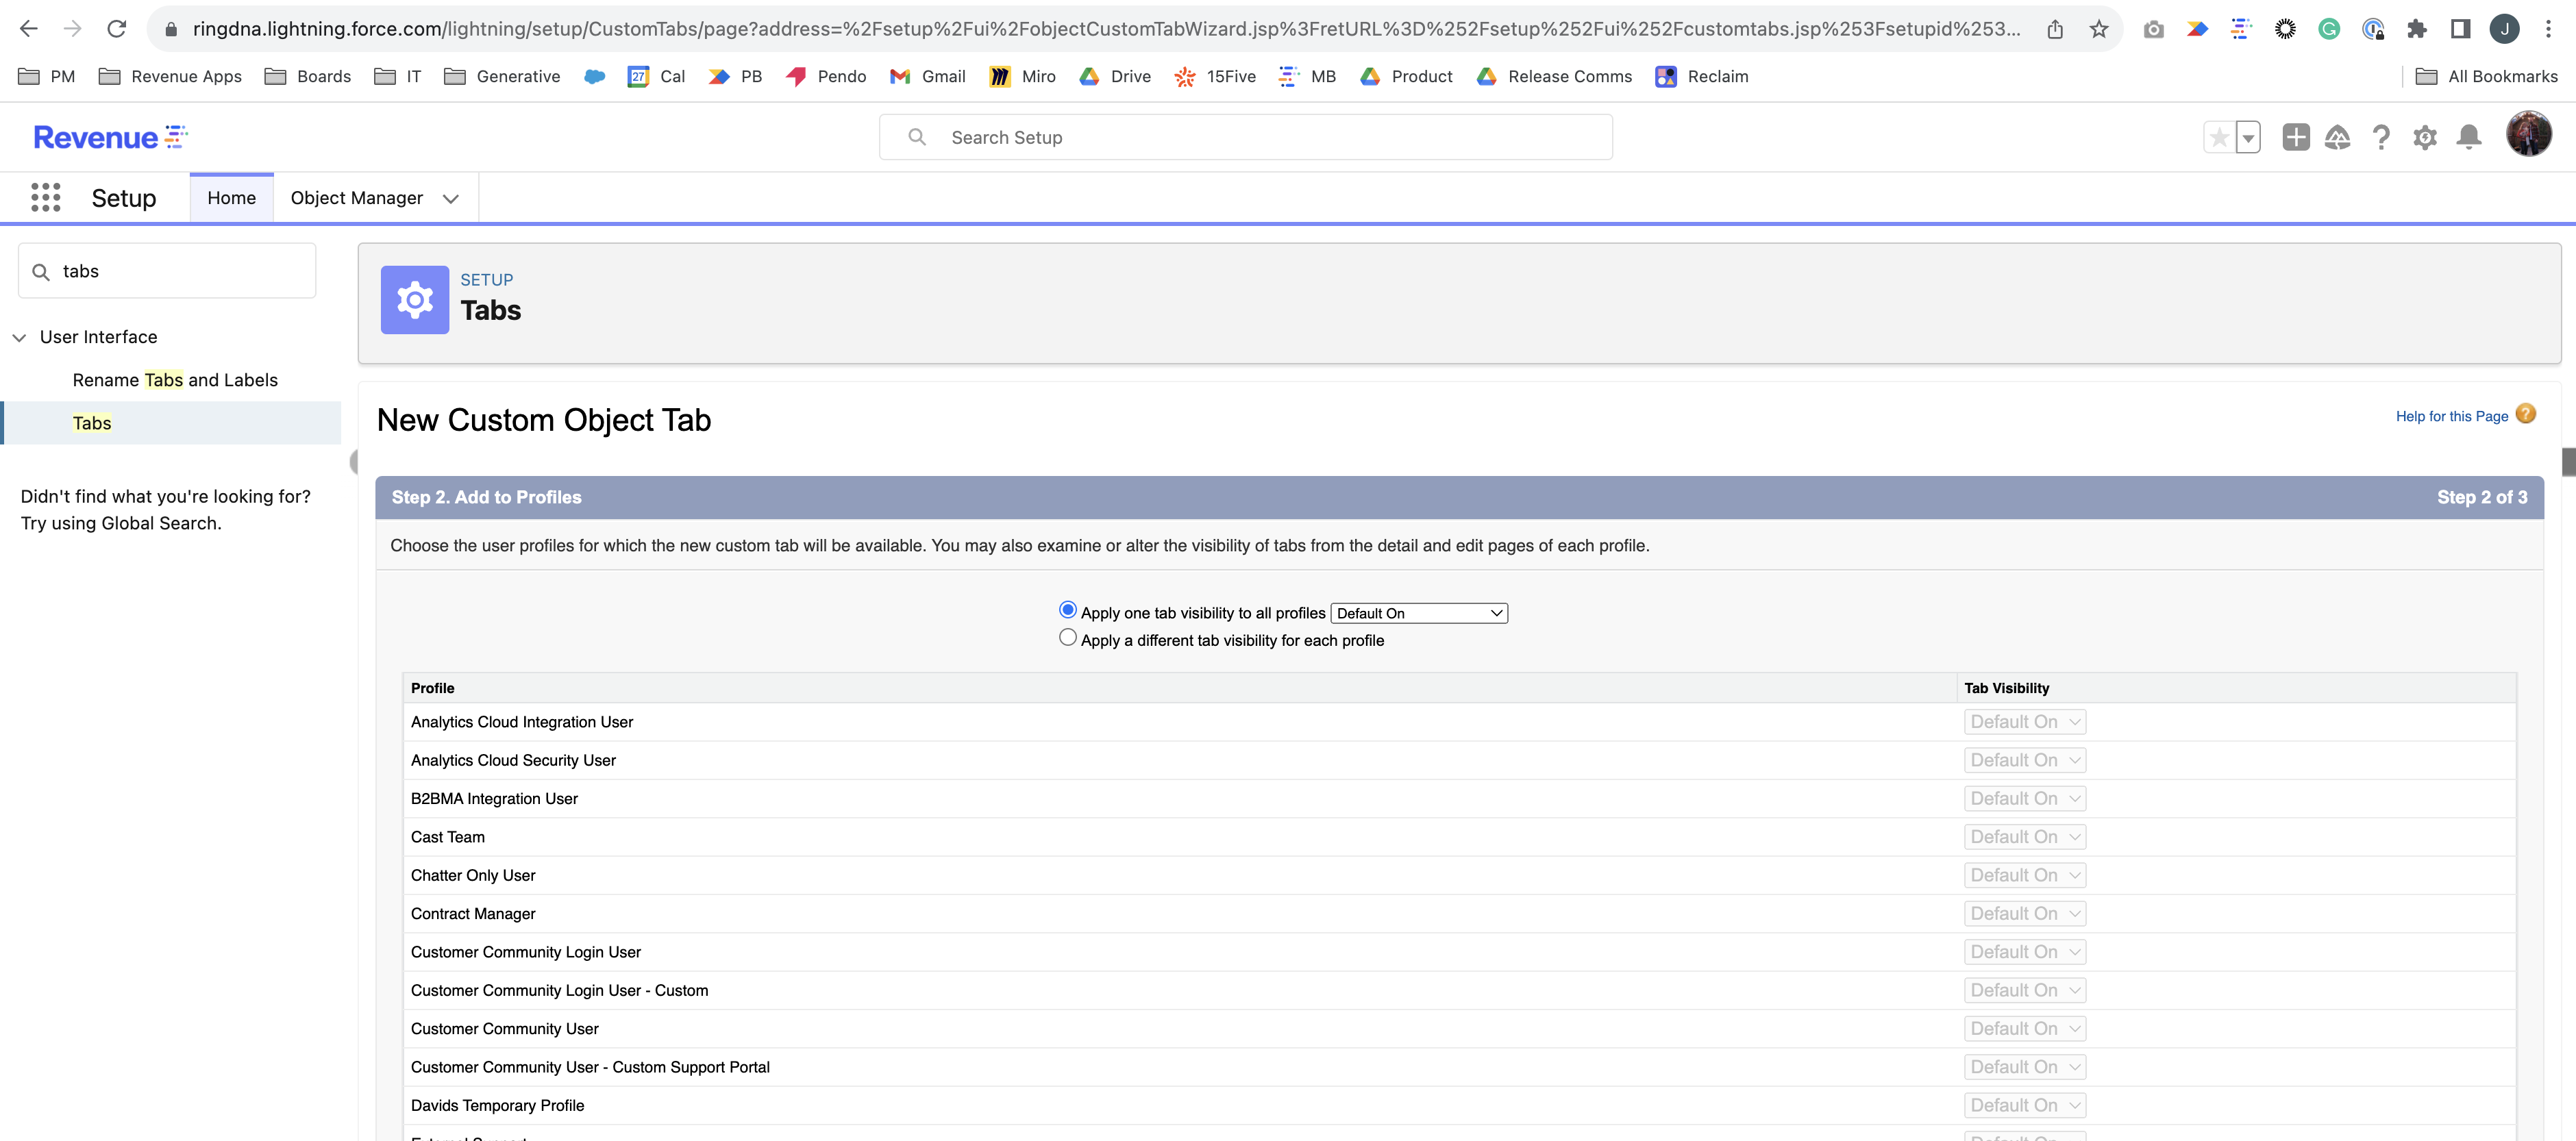
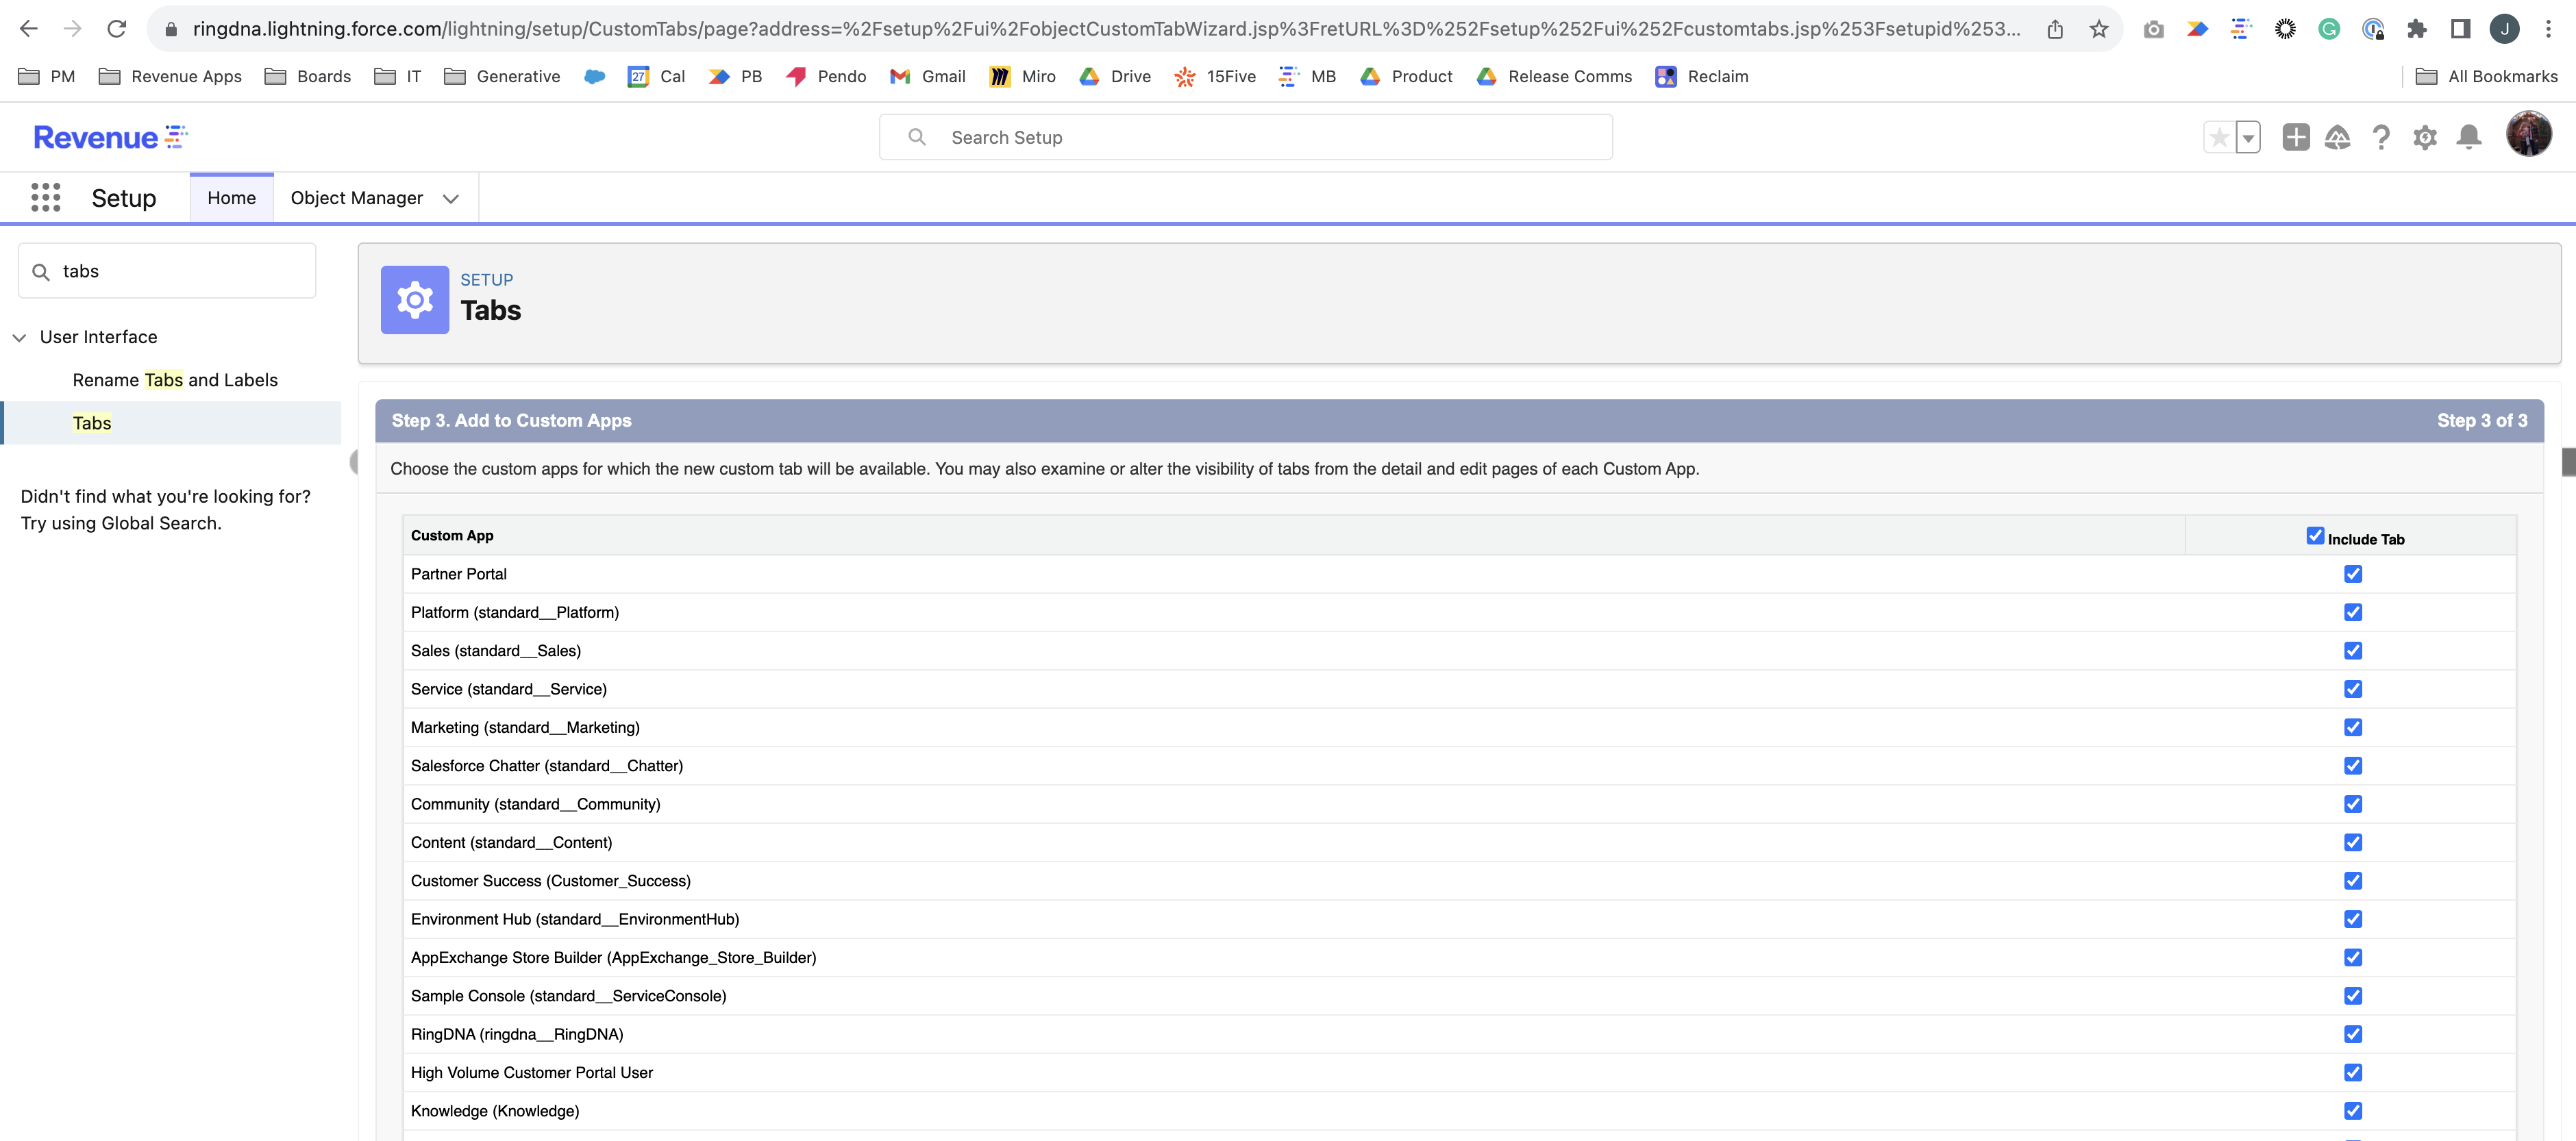
Step 6: Create a Tab for Sequence Attribution
By default, the Sequence Attribution object isn’t visible in your Salesforce applications. You can create a tab so users can see attribution records:
- In Setup, go to
Tabs - Click
New
- On the create tab form, select
Sequence Attributionas the object - Click
Next
- Configure profile visibility and tab visibility settings
- Click
Next
- Select which apps should include this tab
- Click
Save
Step 7: Create a Report Type
To build reports on attribution data, create a custom report type:
- In Setup, go to
Report Types - Click
New Custom Report Type - Configure:
- Primary Object:
Sequence Attribution - Report Type Label: Give it a descriptive name
- Report Type Name: System name (auto-generated)
- Category: Choose where it appears
- Deployment Status: Select Deployed
- Primary Object:
- Click
Next, thenSave
Add Related Object Fields
- Open your new report type and click
Edit Layout - Click
Add fields related via lookup » - Select
Opportunityto add opportunity fields - Select key fields like:
- Stage
- Won
- Closed
- Amount
- Type
- Owner Name
- Click
OK
You can also add fields from:
Sequence Attribution— Shows sequence participation detailsSequence— Shows sequence configuration details
Organize fields into sections using the Create New Section button for better report organization.
Viewing Attribution Data
Once configured, attribution records are automatically created when your rules are met.
View Attribution Records
- Open the
Sequence Attributiontab you created - Browse the list of attribution records
- Click any record to view details
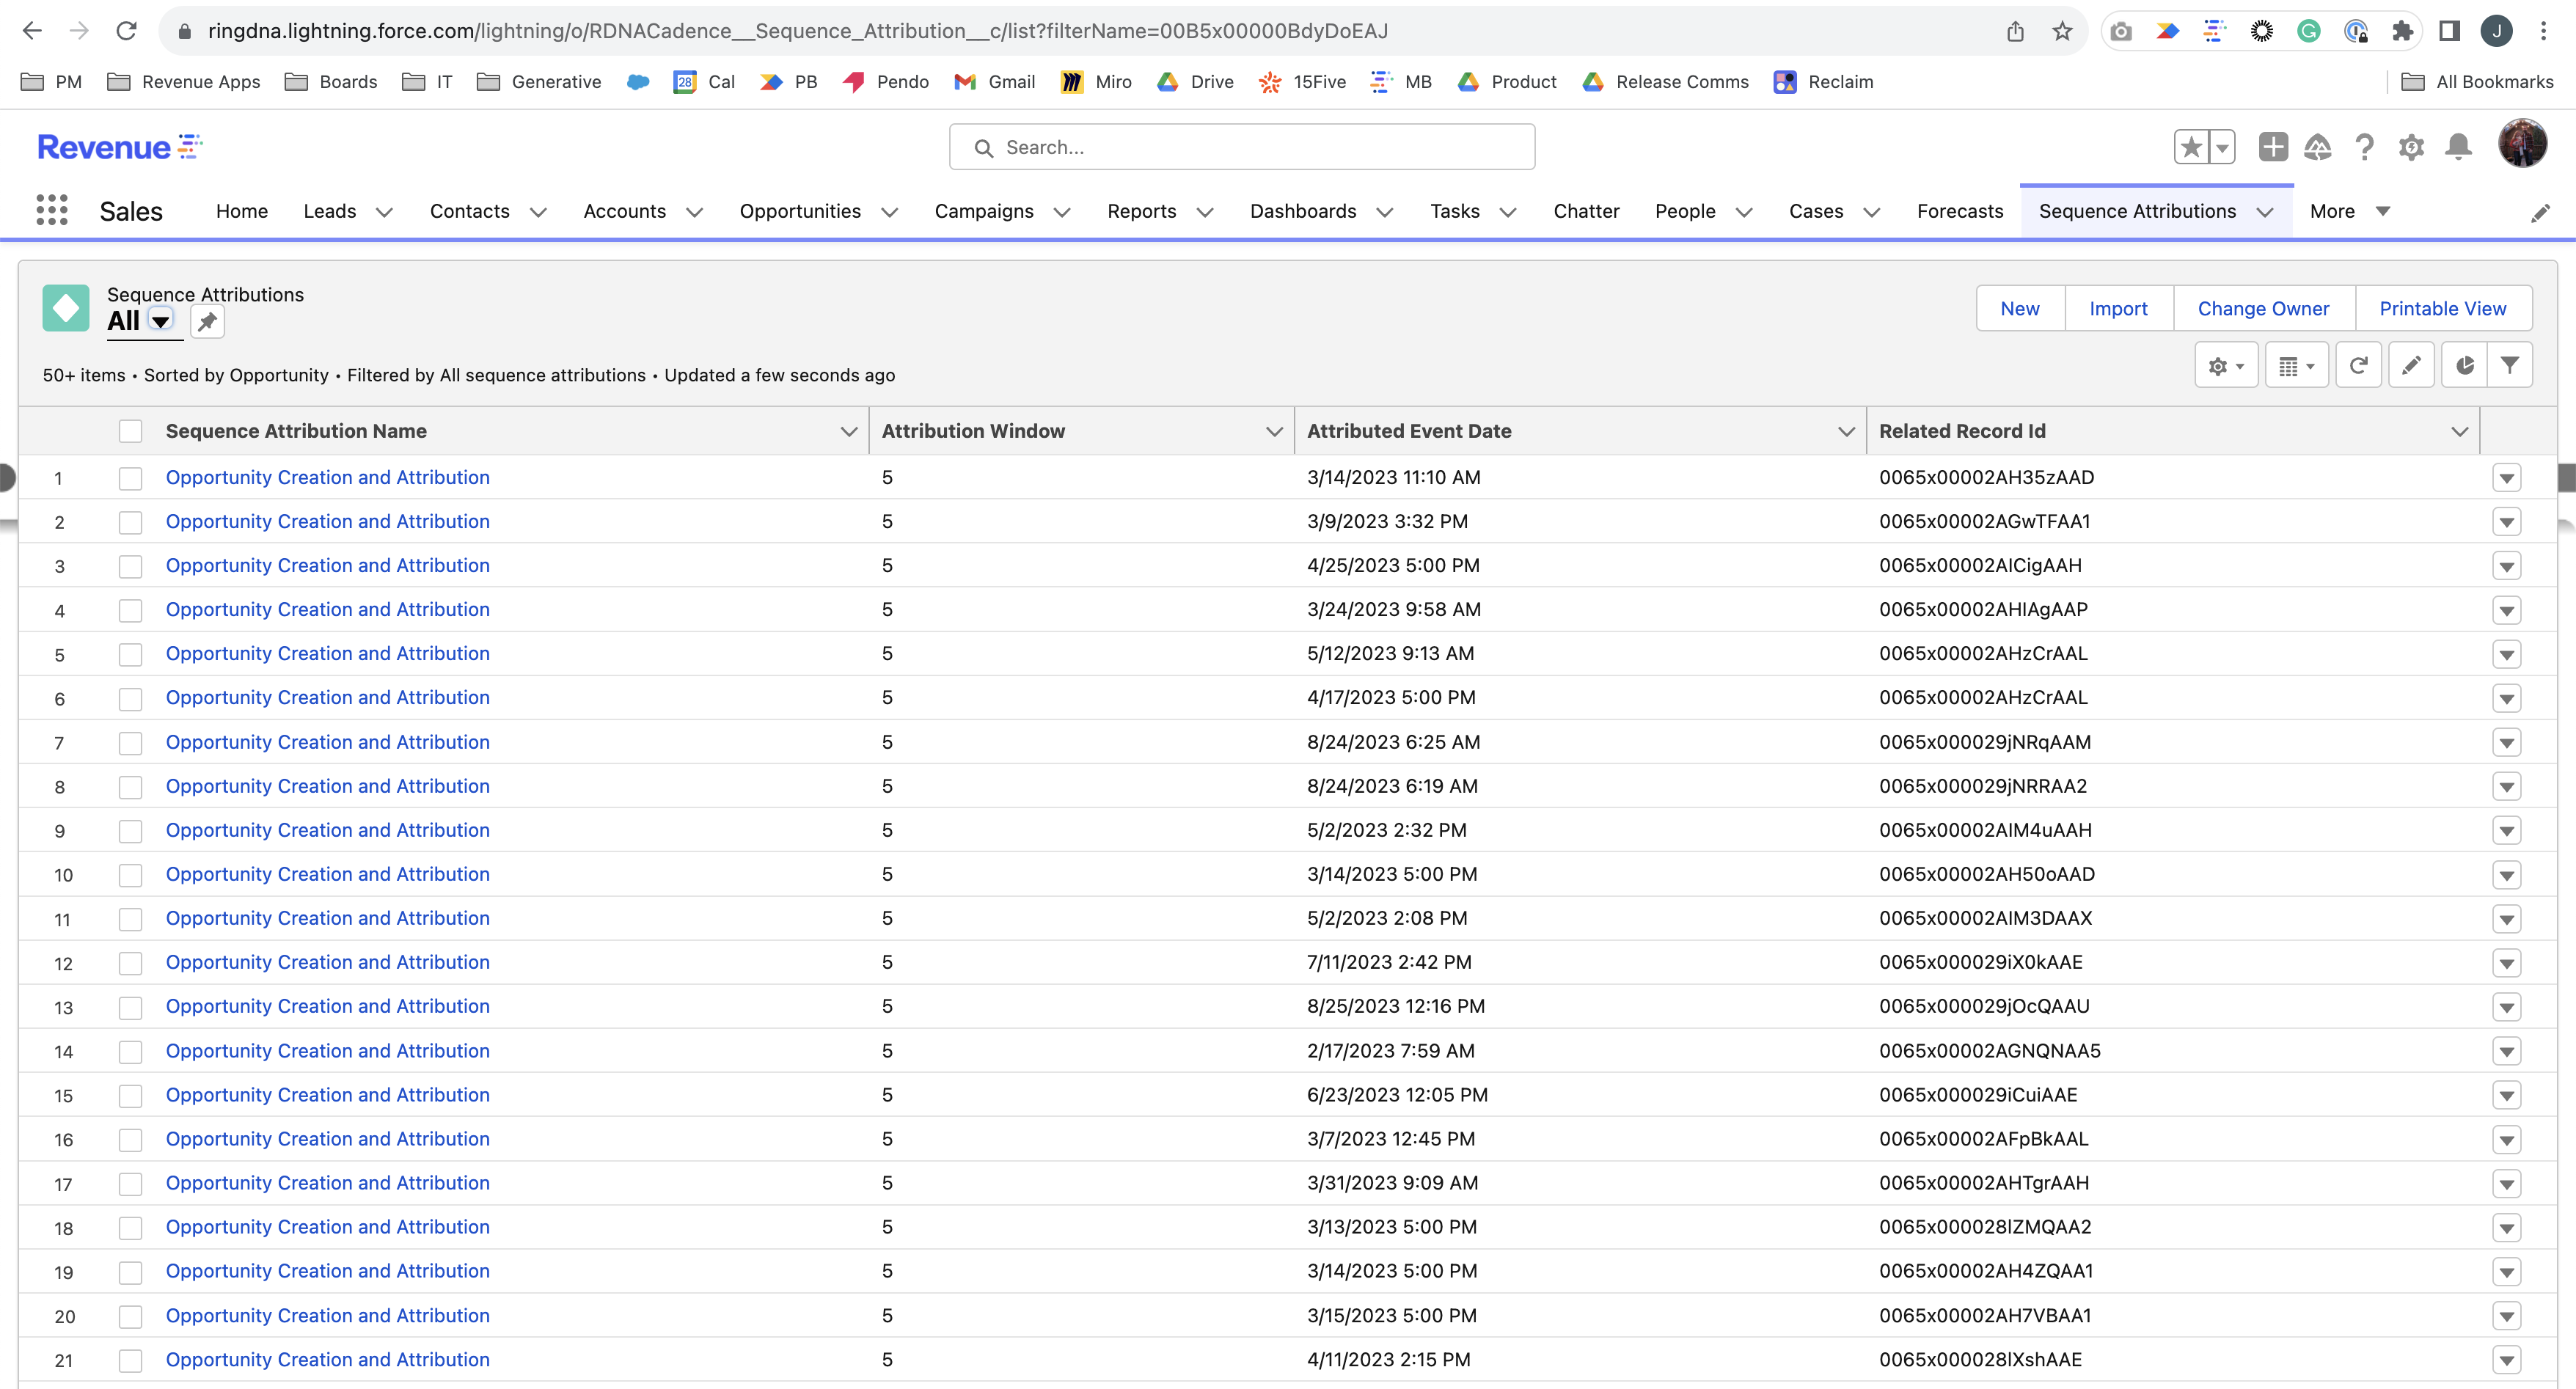
Key Fields in Attribution Records
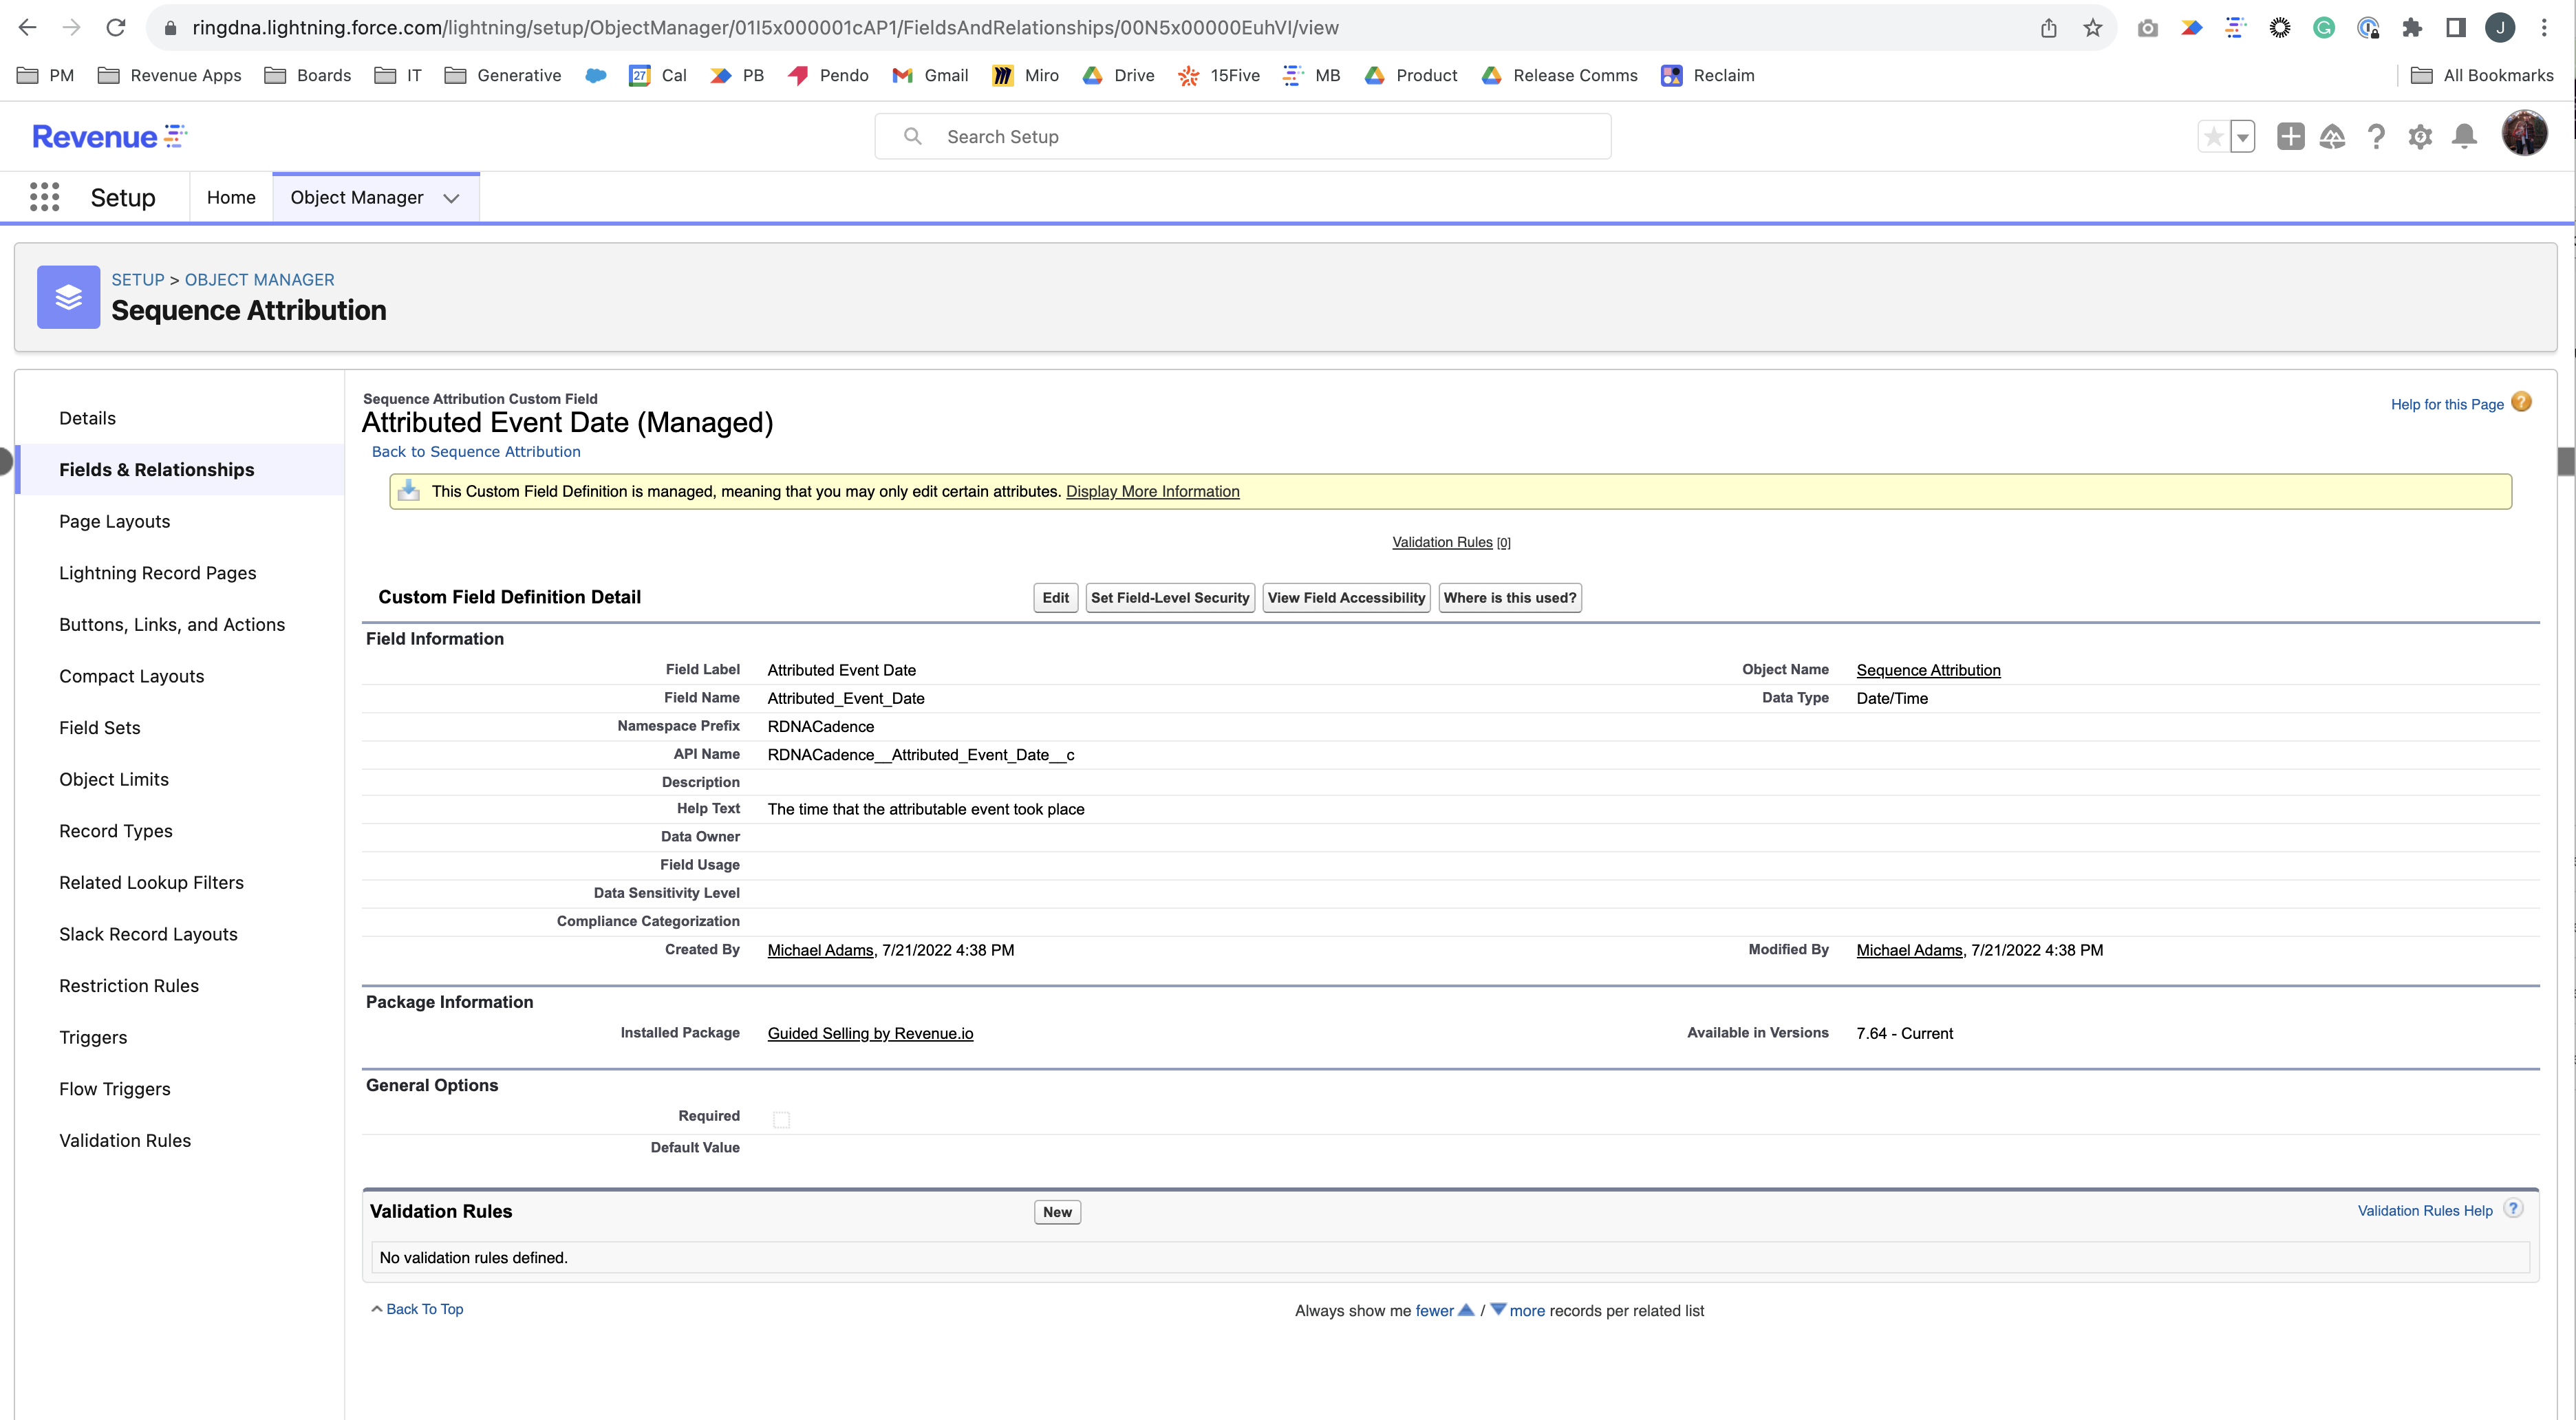
Attributed Event Date— When the attributed event occurredAttribution Window— The time window used for attributionOpportunity— The opportunity linked to this attribution (if applicable)Participant Sequence History— The participant’s sequence history recordRelated Record ID— The ID of the Task, Event, or Opportunity being attributedSequence Attribution Name— The name of the attribution rule that created this record
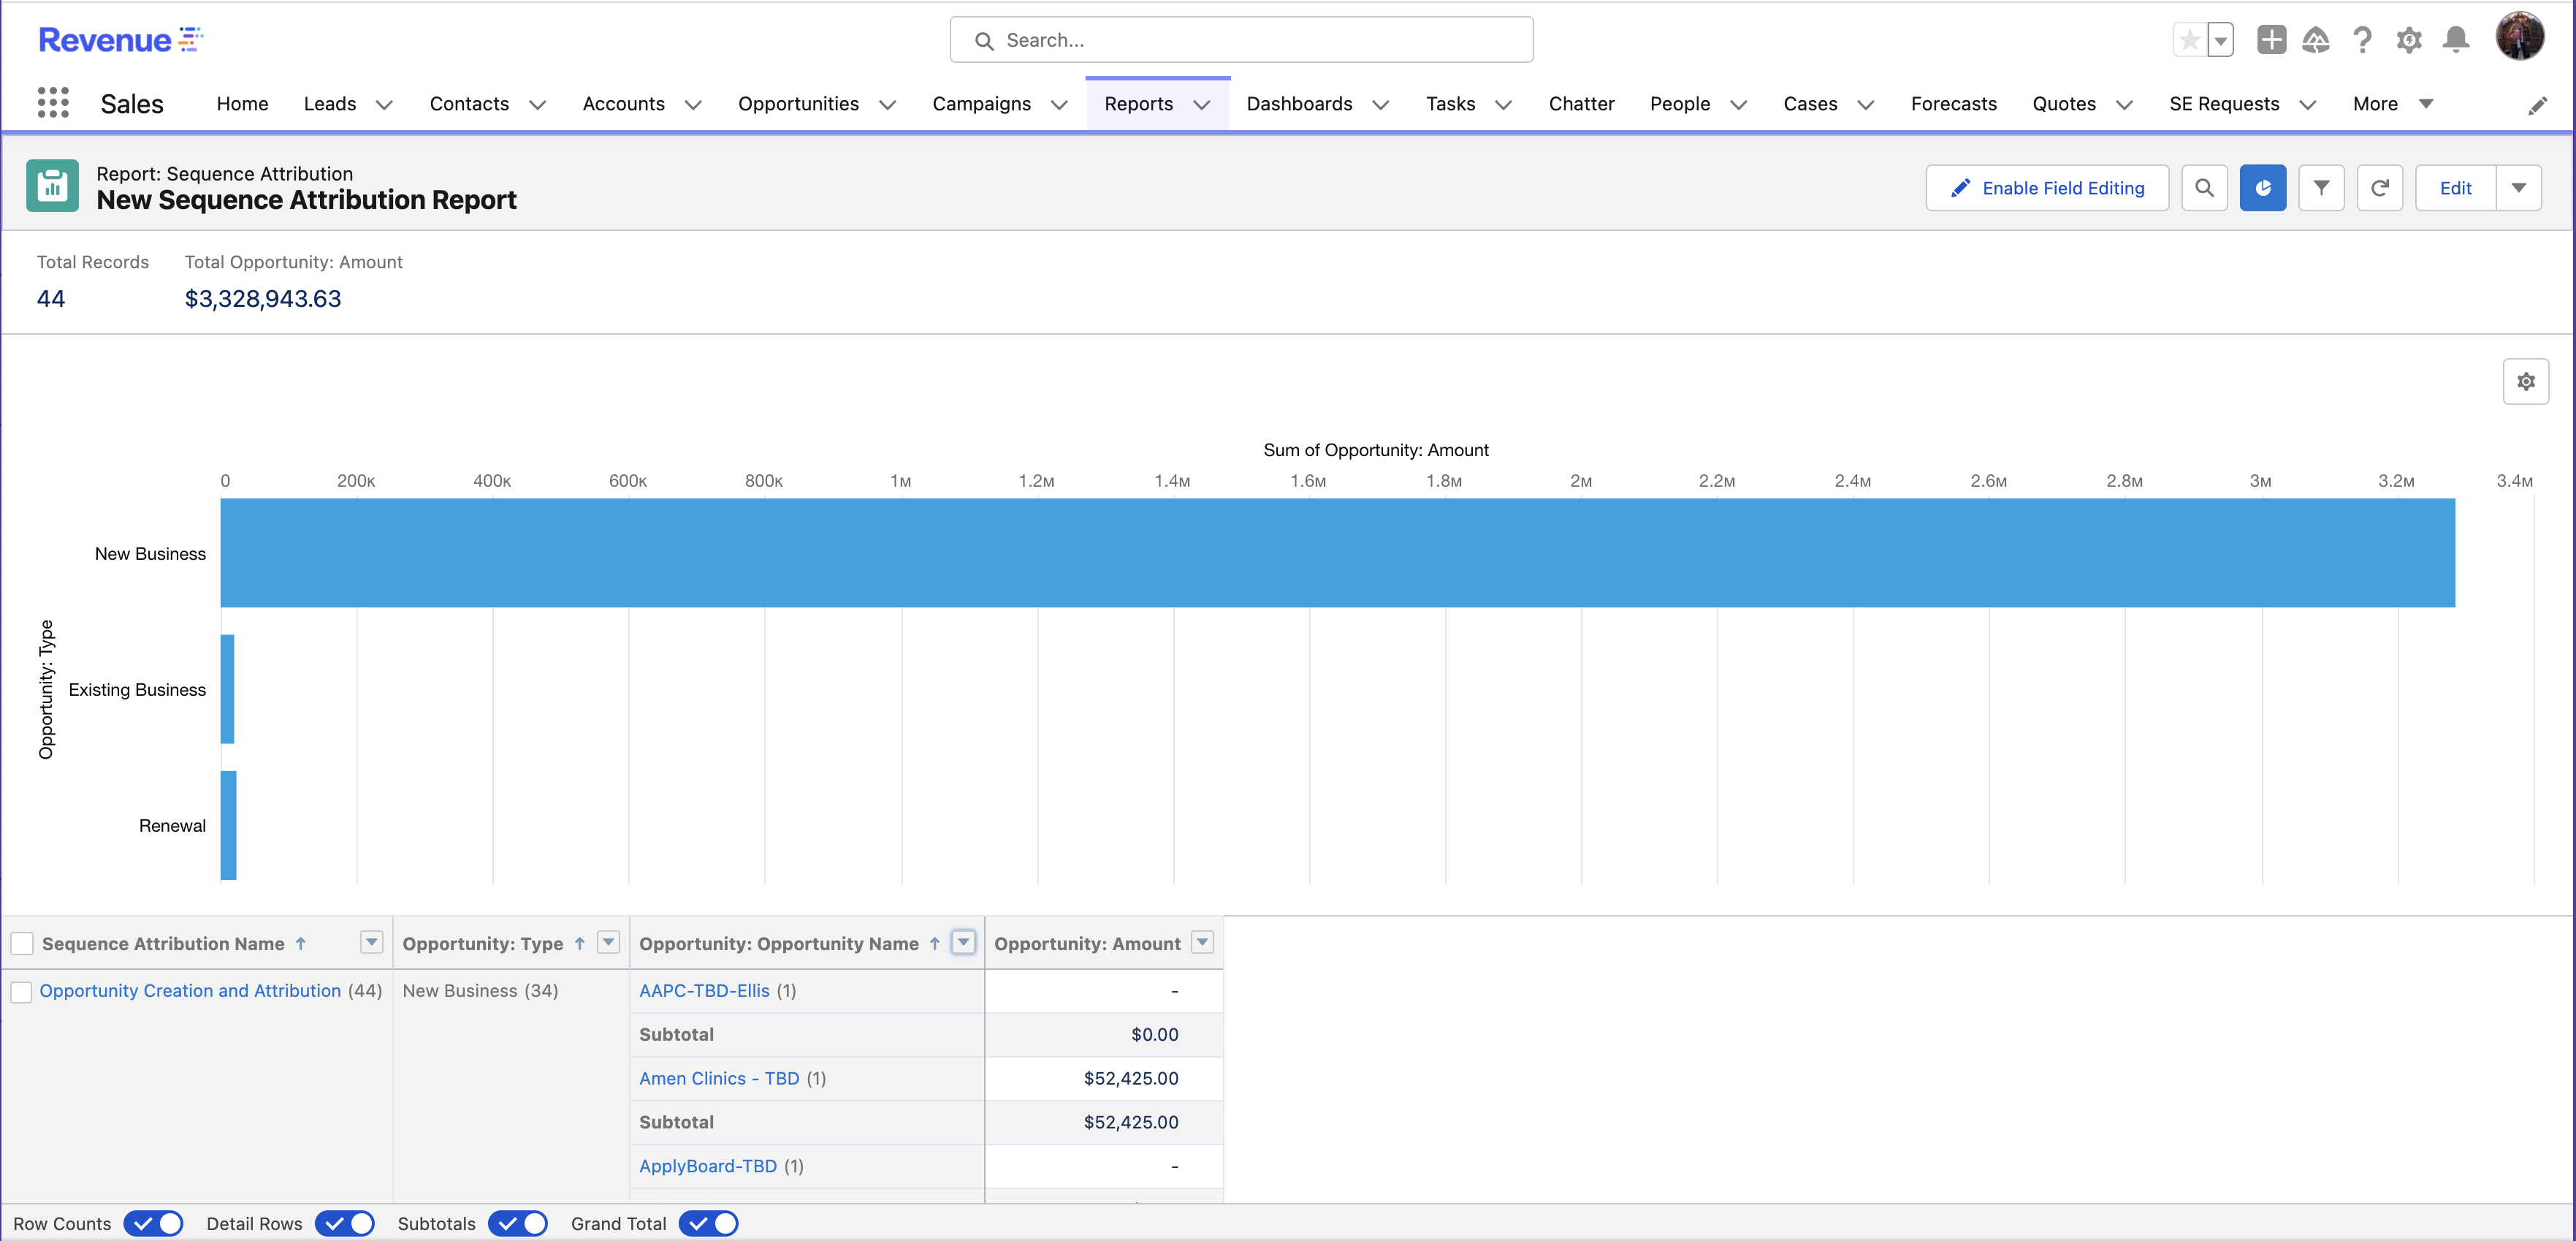
Create Attribution Reports
- Go to
Reports & Dashboards - Click
New Report - Select your
Sequence Attributionreport type - Build your report with filters, groupings, and columns
Example Report: To see closed-won opportunities by sequence:
- Group by:
Sequence Attribution Name,Opportunity Type - Columns:
Opportunity Amount - Filters: Opportunity Won = True
Backfilling Historical Data
After enabling Sequence Attribution, you can backfill attribution data for historical sequence participants. Note that opportunity attribution only works going forward, but you can backfill task/event and lead conversion attribution.
Backfill Lead Conversion Attribution
- Use Data Loader to export all Participant Sequence History records with these fields:
- ID
- CreatedDate
- Open the CSV file
- Create a new column named Sequence_Exit_Date__c
- Copy the CreatedDate values into this new column
- Use Data Loader to update the Participant Sequence History records with the new column
- In Developer Console, execute:
Database.executeBatch(
    new RDNACadence.BackfillConversionAttributionDataBatch()
);
Backfill Activity Attribution
In Developer Console, execute:
Database.executeBatch(
    new RDNACadence.BackfillActivityAttributionDataBatch()
);