Configure Page Layouts
After installing the package, you now need to configure your team’s page layouts so they can interact with Guided Selling from their Lead and Contact pages.
Access Page Layout Editor
- Navigate to
Setupin Salesforce - Go to
Object Manager - Select the Contact or Lead object
- Click
Page Layouts
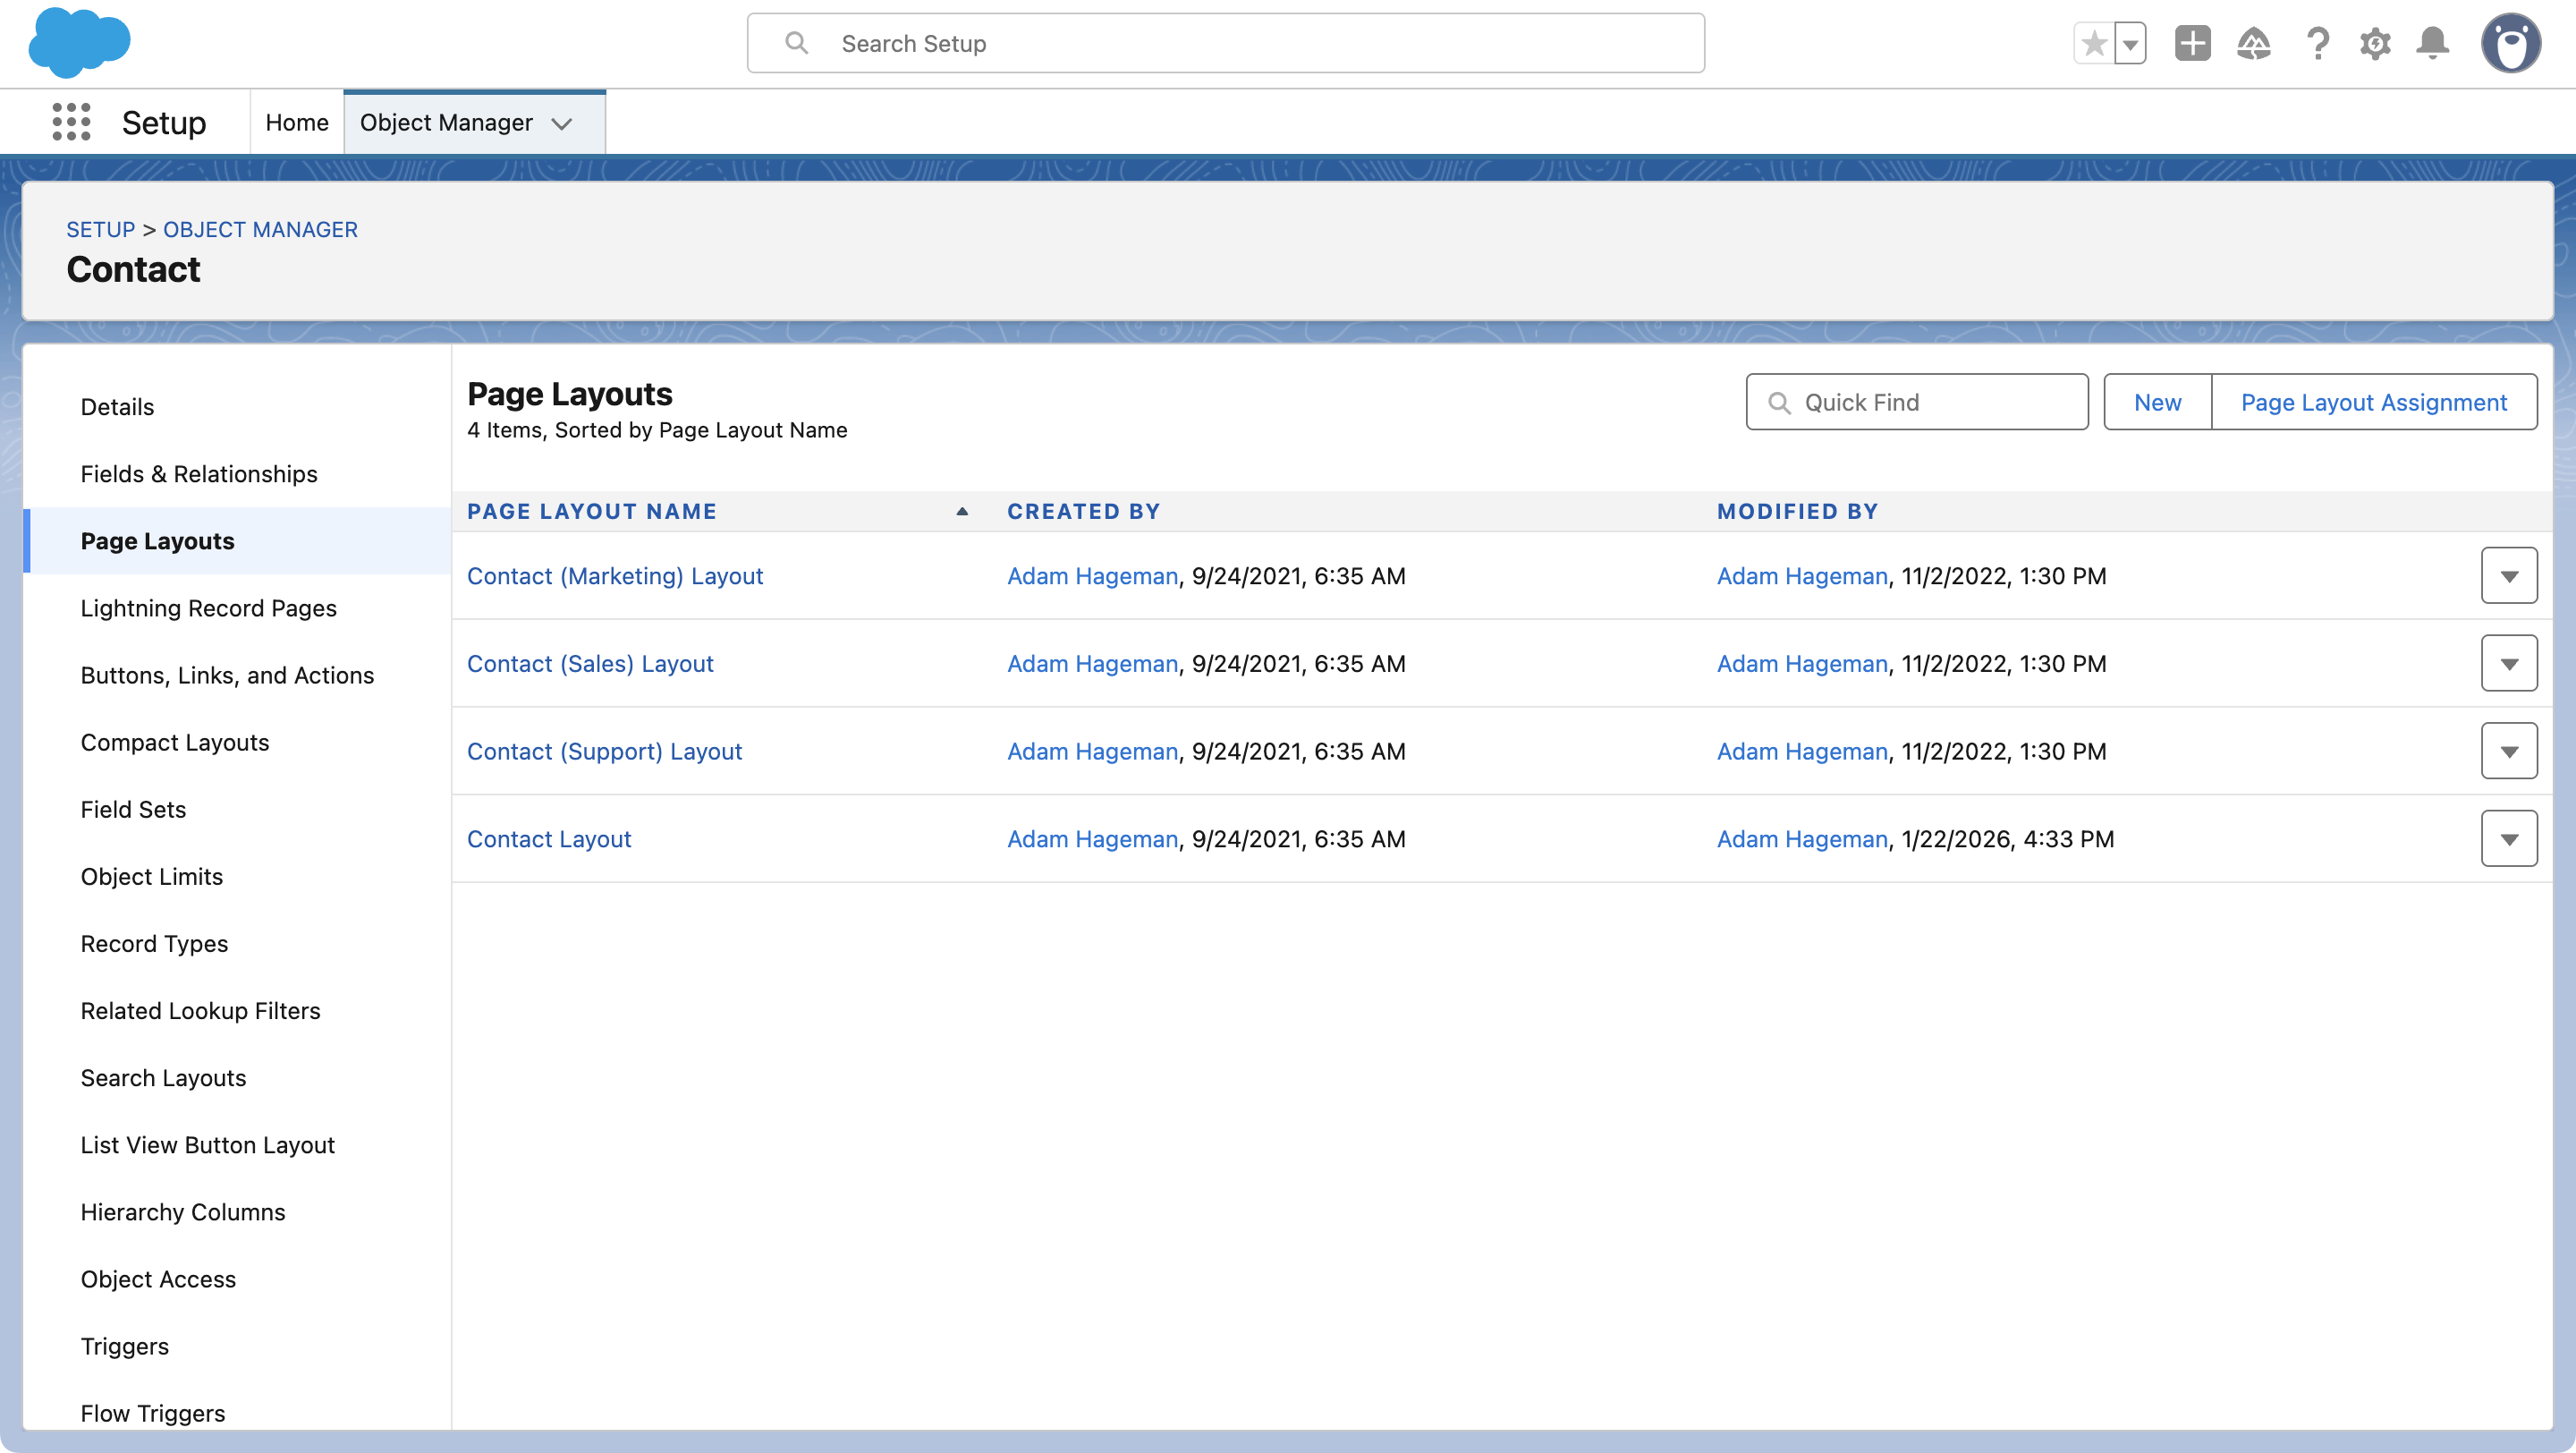
- Click the page layout you want to edit.
If you’re not sure which page layout your teams use, click the Page Layout Assignments button to view your current assignments.
Add Sequence Field and Add to Sequence Action
- In the page layout editor, find the section on the left labeled
Fields.

- Drag the
Most Recent Sequencefield into your page layout below. - Select
Mobile & Lightning Actionson the left and add theAdd to SequenceLightning Action
Add Related Lists
Related lists display sequence enrollment information and assigned actions directly on Lead and Contact records, so you can view this data without opening the Guided Selling app or Participant Overview.
- In the Layout Editor, select
Related Listson the left and drag theParticipant ActionandSequence Associationrelated list into your layout.

Participant Action
- Click the wrench icon above
Participant Actions

Add the
Sequence Name,Created Date,Expected Execution Date,Actual Execution Date, andStatusfields from the Available Fields section.Set
Sort BytoCreated Date, Descending.
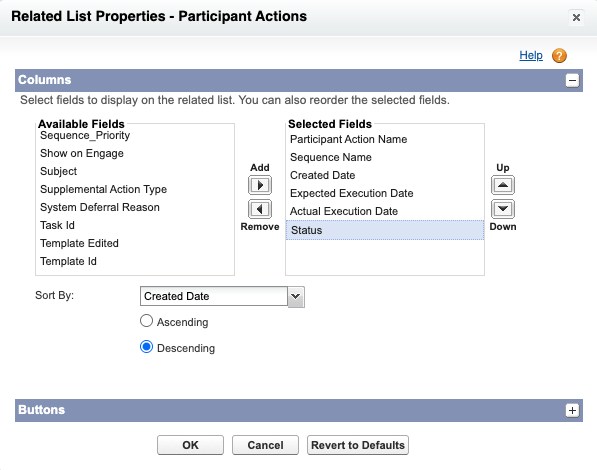
- Click
Ok
Sequence Association
- Click the wrench icon above
Sequence Association - Add the
Sequence,Sequence Entry Date,Sequence Exit Date,Sequence Exit Type,Sequence Exit Criterion Met, andLast Completed Sequence Actionfields from the Available Fields section. - Set
Sort BytoSequence Exit Date, Descending.
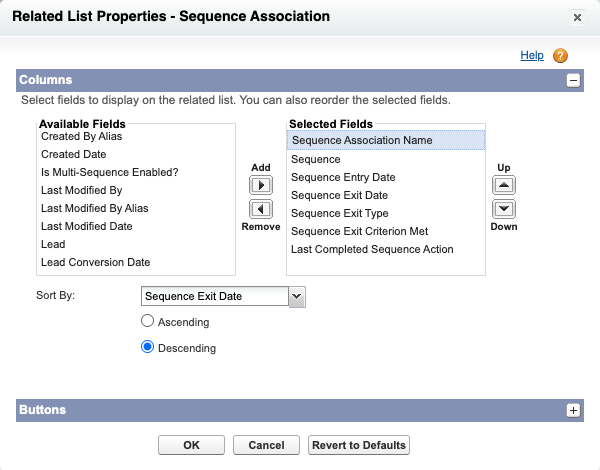
- Click
Ok
Add Participant Overview Module
The Participant Overview is a Visualforce Page that displays on Lead and Contact records. Users can enroll participants in Sequences and manage current enrollments and future actions directly from the record page.
- In the Layout Editor, select
Visualforce Pageson the left and drag aSectioninto your layout. - Set the Section Name to
Participant Overviewand Layout to1-Column, then clickOk - Drag in the
ParticipantActionsOverviewVisualforce Page. - Hover your mouse over the Visualforce page and click the wrench icon.
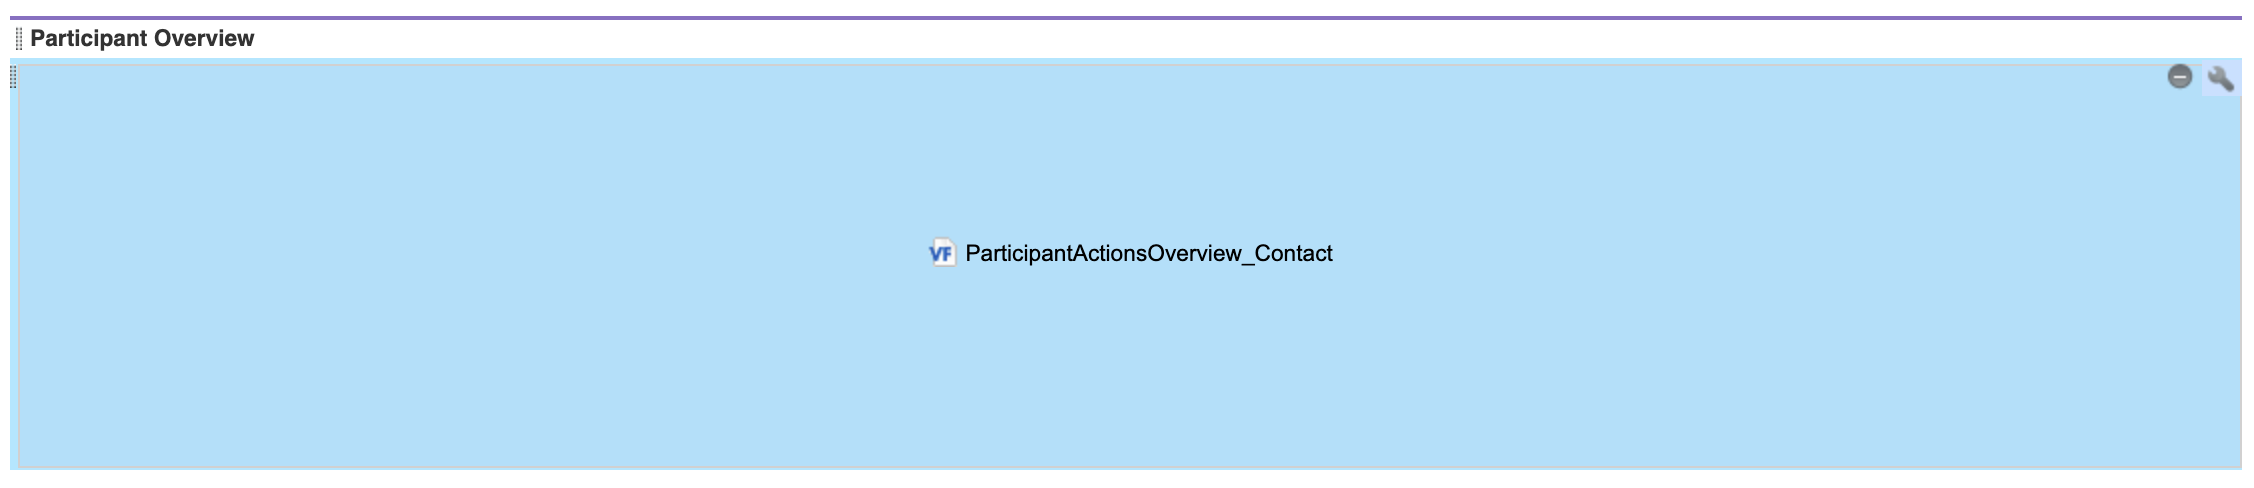
- Set the
Height (in pixels)to 500 and enable theShow Scrollbarscheckbox. - Click
Ok
Save Page Layout
After you have added all of the Guided Selling components to your page layout, click Save.
If you completed these steps only for the Contact object, repeat these steps for the Lead object and any other page layouts your team uses.
Add list view buttons
You can add Add to Sequence and Remove from Sequence to list view search layouts so users can add or remove up to 200 records at a time to manual sequences from a Lead or Contact list view. These buttons are configured under Search Layouts for Salesforce Classic. Lightning users must also add the buttons to Search Layouts for Salesforce Classic for list view bulk actions to appear.
- Navigate to
Setupin Salesforce. - Go to
Object Manager. - Select the Lead or Contact object.
- Click
Search Layouts for Salesforce Classic. - Scroll to the custom buttons section.
- Add the
Add to Sequencebutton from the available buttons to the selected buttons list. - Add the
Remove from Sequencebutton from the available buttons to the selected buttons list. - Click
Save.